Lighting plays a crucial role in enhancing the aesthetics and functionality of a space. Among the various lighting options available, strip lights have gained significant popularity for ceiling installations. They offer versatility, energy efficiency, and a modern touch to any room. For lighting contractors looking to implement strip lights effectively, a comprehensive checklist is essential. This article outlines the key considerations and steps involved in the installation of strip lights for ceilings.
Understanding Strip Lights
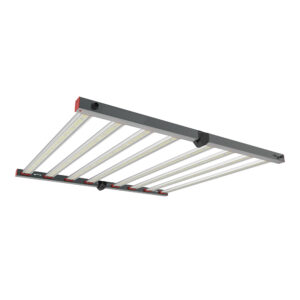
Strip lights, also known as LED tape lights, are flexible circuit boards populated with light-emitting diodes (LEDs). They can be cut to size and easily installed in various locations, making them an ideal choice for both residential and commercial applications. Their slim profile allows for discreet installation, providing a sleek and contemporary look. Additionally, many strip lights come with adhesive backing, enabling quick and hassle-free mounting on surfaces such as walls, ceilings, or under cabinets. This versatility not only simplifies the installation process but also allows for creative lighting designs that can transform any space.
Types of Strip Lights
When selecting strip lights for ceiling installations, it is vital to understand the different types available. Common options include:
- Standard LED Strip Lights: These are the most common type, available in various colors and brightness levels. They are perfect for general lighting needs and can be used in a variety of settings, from homes to offices.
- RGB Strip Lights: These strips can change colors and are often used for decorative purposes. With the ability to create dynamic lighting scenes, they are popular for parties, events, and mood lighting in entertainment areas.
- High-Output LED Strip Lights: Designed for areas requiring more illumination, these strips provide a brighter light output. They are particularly useful in commercial spaces, such as retail stores and galleries, where enhanced visibility is crucial.
Applications of Strip Lights
Strip lights can be used in numerous applications, enhancing both functionality and aesthetics. Common uses include:
- Task Lighting: Ideal for workspaces, kitchens, and reading areas. By providing focused light, they help reduce eye strain and improve productivity.
- Ambient Lighting: Used to create a warm and inviting atmosphere in living rooms and bedrooms. Soft, diffused light from strip lights can make spaces feel cozy and welcoming, perfect for relaxation.
- Accent Lighting: Perfect for highlighting architectural features, artwork, or decorative elements. By strategically placing strip lights, you can draw attention to specific areas, adding depth and interest to your decor.
Moreover, strip lights are increasingly being integrated into smart home systems, allowing users to control their lighting remotely via smartphones or voice commands. This integration enhances convenience and energy efficiency, as homeowners can easily adjust brightness levels or set schedules to ensure lights are only on when needed. Additionally, with advancements in technology, many strip lights now offer features such as color temperature adjustment, enabling users to switch between warm and cool light tones depending on the time of day or desired ambiance. This flexibility makes strip lights not just a practical lighting solution, but also a customizable element of interior design.
Planning the Installation
Proper planning is crucial for a successful strip light installation. This phase involves assessing the space, determining the lighting requirements, and selecting the appropriate materials.
Assessing the Space
Before installation, contractors should evaluate the area where the strip lights will be placed. Consider factors such as:
- Room dimensions and layout
- Existing lighting sources
- Desired ambiance and functionality
Taking accurate measurements will help in determining the length of strip lights needed and the best placement for optimal light distribution. Additionally, it is important to consider the color and texture of the surfaces in the room, as these can significantly affect how light is reflected and perceived. For instance, lighter walls can enhance brightness, while darker colors may absorb more light, necessitating a more powerful lighting solution. Furthermore, assessing the potential for obstructions, such as furniture or architectural features, will ensure that the light is evenly distributed without any unwanted shadows.
Determining Lighting Requirements
Understanding the specific lighting needs of the space is essential. This includes:
- Choosing the appropriate brightness level (measured in lumens)
- Selecting the right color temperature (measured in Kelvin) for the desired atmosphere
- Identifying any dimming requirements for adjustable lighting
Consulting with clients about their preferences can also provide valuable insights into the desired lighting effect. In addition to personal preferences, it can be beneficial to consider the function of the space. For example, a kitchen may require brighter, cooler lighting for food preparation, while a living room might benefit from warmer tones to create a cozy atmosphere. Moreover, incorporating smart lighting solutions that allow for remote control and scheduling can enhance the user experience, making it easier to adapt the lighting to different activities or moods throughout the day.
Materials Checklist
Having the right materials on hand is essential for a smooth installation process. Below is a checklist of materials commonly required for strip light installations:
Essential Tools
- Wire cutters and strippers
- Screwdrivers (flathead and Phillips)
- Measuring tape
- Level
- Heat gun (for bending strips, if necessary)
Strip Light Components
In addition to the strip lights themselves, several components are necessary for a complete installation:
- Power Supply: Ensure the power supply is compatible with the strip lights and can handle the required wattage.
- Connectors: These may be needed for connecting multiple strips or for making connections to power sources.
- Mounting Hardware: Adhesive backing is common, but additional clips or channels may be required for secure installation.
Installation Process
Once the planning and preparation are complete, the actual installation can begin. This process can vary depending on the specific application and layout, but generally follows these steps:
Preparing the Surface
Before attaching the strip lights, it is crucial to prepare the surface. Ensure that the area is clean, dry, and free of dust or debris. This will help the adhesive backing stick securely and prevent any future issues.
Cutting and Connecting the Strips
Strip lights can be cut to fit specific lengths. Most strips have designated cut points, so it is important to follow these guidelines to avoid damaging the strips. After cutting, connectors can be used to join strips or connect them to the power supply. Ensure that all connections are secure and insulated to prevent electrical issues.
Mounting the Strip Lights
Using the adhesive backing, carefully mount the strip lights along the desired location on the ceiling. For added security, consider using mounting clips or channels. Ensure that the strips are straight and evenly spaced for a professional finish.
Wiring and Power Supply
Connecting the strip lights to the power supply is a critical step in the installation process. Proper wiring ensures safety and functionality.
Electrical Considerations
Before proceeding with wiring, it is essential to turn off the power at the circuit breaker. When connecting the power supply to the strip lights, follow the manufacturer’s instructions carefully. Pay attention to the polarity of the connections to avoid any electrical mishaps.
Testing the Installation
After all connections are made, restore power and test the strip lights to ensure they function correctly. Check for any flickering or dimming issues, which may indicate a problem with the connections or power supply.
Post-Installation Tips
Once the installation is complete, there are several best practices to follow to ensure longevity and optimal performance of the strip lights.
Maintenance Guidelines
Regular maintenance can help extend the life of strip lights. Contractors should advise clients on the following:
- Cleaning the lights gently to remove dust and debris
- Checking connections periodically to ensure they remain secure
- Monitoring for any signs of wear or damage
Client Education
Educating clients about their new lighting system is essential. Provide them with information on:
- How to operate any dimmers or controllers
- Best practices for energy efficiency
- When to seek professional assistance for repairs or upgrades
Common Challenges and Solutions
While strip light installations can be straightforward, several challenges may arise during the process. Being prepared to address these issues can save time and ensure a successful project.
Adhesive Issues
If the adhesive backing does not stick properly, consider using additional mounting clips or channels for secure installation. In some cases, a heat gun can help activate the adhesive for better adhesion.
Electrical Problems
Flickering lights or inconsistent brightness can indicate electrical issues. Check all connections and ensure that the power supply is adequate for the total wattage of the installed strip lights. If problems persist, consulting with an electrician may be necessary.
Conclusion
Strip lights for ceilings offer a modern and versatile lighting solution that can enhance any space. By following this comprehensive checklist, lighting contractors can ensure a successful installation that meets both aesthetic and functional requirements. From planning and material selection to installation and maintenance, attention to detail is key to delivering high-quality results that clients will appreciate.
As the demand for innovative lighting solutions continues to grow, staying informed about the latest trends and technologies in strip lighting will empower contractors to provide exceptional service and expertise. By mastering the art of strip light installation, contractors can elevate their projects and create stunning environments that leave a lasting impression.
Illuminate Your Projects with LumenWholesale
Ready to take your ceiling strip light installations to the next level? At LumenWholesale, we provide lighting contractors with the highest quality, spec-grade strip lights at prices that can’t be beaten. Say goodbye to local distributor markups and hello to our extensive selection that meets rigorous industry standards. With free shipping on bulk orders, you can stock up on superior lighting solutions that combine quality, affordability, and convenience. Elevate your lighting projects today by visiting Wholesale Lighting at the Best Value and discover the LumenWholesale difference.