Understanding Fluorescent Lighting: Basics and Benefits
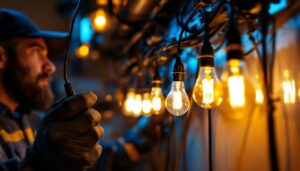
Fluorescent lighting remains a staple in commercial, industrial, and even residential environments due to its energy efficiency and longevity. For lighting contractors, mastering the installation of fluorescent fixtures is essential, not only to meet client expectations but also to ensure safety and compliance with electrical codes.
Unlike incandescent bulbs that generate light through heat, fluorescent lamps produce light by exciting mercury vapor inside the tube, which in turn emits ultraviolet light that causes the phosphor coating to fluoresce. This process results in a more energy-efficient output with less heat emission. Understanding these fundamentals is crucial before diving into installation procedures.
Moreover, fluorescent lighting offers a range of color temperatures and brightness levels, making it versatile for various applications—from office spaces requiring bright, cool light to retail environments that benefit from warmer tones. Contractors should be well-versed in these options to recommend the best lighting solutions tailored to each project.
In addition to their versatility, fluorescent lights are also known for their cost-effectiveness. They consume significantly less energy compared to incandescent bulbs, which can lead to substantial savings on electricity bills over time. This is particularly advantageous for businesses operating in large spaces or facilities that require extensive lighting. Furthermore, many fluorescent fixtures are designed to be compatible with dimming systems, allowing for even greater control over energy consumption and ambiance, which can enhance the overall atmosphere of a space.
Another noteworthy aspect of fluorescent lighting is its environmental impact. With a longer lifespan than traditional incandescent bulbs, fluorescent lamps reduce the frequency of replacements, thereby minimizing waste. Additionally, advancements in technology have led to the development of more eco-friendly fluorescent options, such as those that contain lower levels of mercury or are made from recyclable materials. This shift not only aligns with growing sustainability efforts but also provides contractors with the opportunity to promote greener practices in their projects, appealing to environmentally conscious clients.
Preparation: Tools, Materials, and Safety Considerations
Essential Tools and Materials
Before beginning any fluorescent light installation, gathering the right tools and materials is vital. Contractors typically need a voltage tester, wire strippers, screwdrivers, drill, wire nuts, electrical tape, and a ladder. Additionally, having the correct fluorescent fixture, compatible ballast, and appropriate fluorescent tubes is necessary. It’s also beneficial to have a multimeter on hand, as it can help troubleshoot any electrical issues that may arise during installation. This tool can measure voltage, current, and resistance, providing valuable insights into the electrical system’s health.
Choosing the right ballast—whether magnetic or electronic—is a significant decision. Electronic ballasts are more energy-efficient and produce less flicker and noise, which enhances the lighting quality and user experience. Contractors should verify the ballast specifications to ensure compatibility with the fluorescent tubes and the fixture. Furthermore, understanding the differences in wattage and lumens between various tube types can help in selecting the best lighting solution for specific environments, such as offices, warehouses, or retail spaces, where lighting needs can vary significantly.
Safety Protocols
Safety is paramount when working with electrical installations. Contractors must always turn off power at the circuit breaker before starting any work. Using a voltage tester to confirm the absence of current is a critical step to prevent electrical shock. Wearing insulated gloves and safety glasses further protects against accidental injury. It’s also advisable to work in a well-ventilated area, especially when dealing with fluorescent tubes, as the gases inside can be harmful if released. Keeping a first aid kit nearby can also be a prudent measure in case of minor accidents.
Additionally, fluorescent tubes contain small amounts of mercury, so handling them with care to avoid breakage is important. In case of a broken tube, following proper cleanup procedures and disposal regulations protects both the installer and the environment. Many localities have specific guidelines for disposing of fluorescent bulbs due to their hazardous materials, and contractors should familiarize themselves with these regulations to ensure compliance. Moreover, using protective coverings or shields during installation can further minimize the risk of breakage, ensuring a safer working environment for everyone involved.
Step-by-Step Installation Process
1. Turn Off Power and Remove Old Fixtures
Start by shutting off the power supply to the installation area at the main electrical panel. Confirm that the power is off using a voltage tester. If replacing an existing fluorescent fixture, carefully remove the old tubes and fixture, disconnecting wiring as necessary. Make sure to wear safety goggles and gloves during this process to protect yourself from any falling debris or sharp edges. It’s also advisable to have a flashlight handy, as the area may be poorly lit once the power is turned off.
2. Inspect and Prepare Wiring
Examine the existing wiring for any signs of damage or wear. Replace any frayed or outdated wiring to comply with current electrical codes. Ensure that the wiring gauge matches the fixture requirements. If installing in a new location, run appropriate wiring from the power source to the fixture site, securing cables with staples or conduit as required. Additionally, consider the layout of your space; planning the placement of fixtures can enhance both functionality and aesthetics, providing optimal lighting where it is needed most.
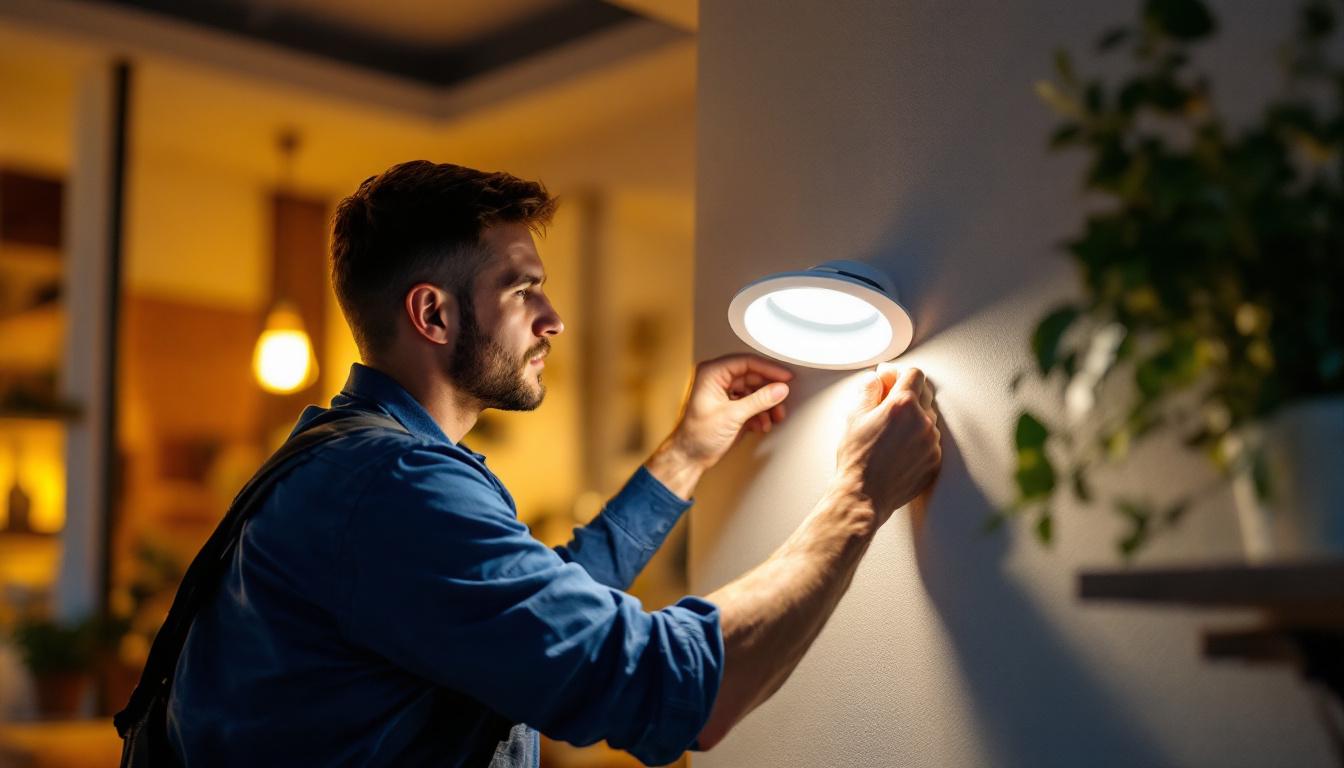
3. Mount the Fixture
Secure the fluorescent fixture to the ceiling or wall using the manufacturer’s recommended mounting hardware. It is important to ensure the fixture is level and firmly attached to prevent any movement or sagging over time. For suspended fixtures, verify that the suspension system is rated for the fixture’s weight. Take into account the height of the ceiling and the intended use of the space; for instance, fixtures in a workspace may need to be hung lower for better illumination, while fixtures in a hallway can be mounted higher for a more ambient light effect.
4. Connect Wiring
Connect the fixture wiring to the power supply wires, typically matching black to black (hot), white to white (neutral), and green or bare copper to ground. Use wire nuts to secure connections and wrap them with electrical tape for added safety. For fixtures with ballasts, follow the wiring diagram provided by the manufacturer to ensure proper ballast and lamp connections. It’s also wise to label your wires during this process, especially if you’re working with multiple fixtures, to avoid confusion later on when troubleshooting or making adjustments.
5. Install Fluorescent Tubes
Carefully insert the fluorescent tubes into the fixture sockets, aligning the pins correctly. Rotate the tubes gently until they lock into place. Avoid applying excessive force to prevent damage to the tubes or sockets. Before proceeding, check the specifications of the tubes to ensure they are compatible with your fixture. Consider using energy-efficient options, such as T5 or T8 tubes, which can provide brighter light while consuming less energy, thus saving on electricity bills in the long run.
6. Restore Power and Test
Turn the circuit breaker back on and test the fixture. The fluorescent tubes should illuminate without flickering or buzzing. If issues arise, double-check wiring connections and ballast compatibility. Flickering or failure to light may indicate a faulty ballast or incorrect tube type. Additionally, observe the light output for uniformity; if certain areas appear dimmer, it may be necessary to adjust the fixture’s positioning or check for any obstructions that could be affecting the light distribution.
Common Challenges and Troubleshooting Tips
Addressing Flickering and Buzzing
Flickering is a frequent complaint with fluorescent lighting and can stem from several causes. Loose wiring connections, incompatible ballasts, or aging tubes often contribute to this issue. Ensuring tight, secure connections and replacing old tubes or upgrading to electronic ballasts can significantly reduce flicker.
Buzzing noises typically originate from magnetic ballasts. Switching to electronic ballasts not only eliminates this noise but also improves energy efficiency and lamp life.
Dealing with Dim or Non-Illuminating Fixtures
If the fixture fails to light or appears dim, verify that the tubes are properly seated and that the ballast is functioning correctly. Using a multimeter to test ballast output can help identify faulty components. In some cases, replacing the ballast or tubes resolves the problem.
Ensuring Compliance with Electrical Codes
Lighting contractors must adhere to local and national electrical codes, such as the National Electrical Code (NEC), which governs wiring methods, grounding, and fixture mounting. Non-compliance can lead to safety hazards and legal liabilities. Staying updated on code changes and obtaining necessary permits ensures installations meet all regulatory requirements.
Energy Efficiency and Modern Alternatives
While fluorescent lighting is efficient compared to older incandescent technology, the rise of LED lighting presents new opportunities for contractors and clients seeking even greater energy savings and longevity. LEDs consume less power, have longer lifespans, and contain no mercury, making them environmentally friendly.
However, fluorescent fixtures remain cost-effective for many applications, particularly in large-scale installations where retrofitting to LED may not be immediately feasible. Lighting contractors should be prepared to advise clients on the pros and cons of fluorescent versus LED options, including upfront costs, maintenance, and energy usage.
In some cases, retrofitting existing fluorescent fixtures with LED tubes is a practical compromise, offering improved efficiency without full fixture replacement. Understanding these hybrid solutions expands the contractor’s service offerings and meets diverse client needs.
Maintenance Best Practices for Fluorescent Lighting
Proper maintenance extends the life of fluorescent lighting systems and ensures consistent performance. Regular cleaning of fixtures and tubes removes dust and debris that can reduce light output. Inspecting and replacing ballasts and tubes before failure prevents unexpected outages.
Lighting contractors should educate clients on maintenance schedules and provide service agreements when appropriate. This proactive approach enhances client satisfaction and builds long-term business relationships.
Conclusion: Mastering Fluorescent Light Installation for Professional Success
Installing fluorescent lighting requires a blend of technical knowledge, attention to detail, and adherence to safety standards. By understanding the fundamentals of fluorescent technology, preparing adequately, following systematic installation steps, and addressing common challenges, lighting contractors can deliver high-quality, reliable lighting solutions.
Staying informed about emerging lighting technologies and energy efficiency trends further positions contractors as trusted experts in the field. Whether working on new construction or retrofitting existing spaces, mastering fluorescent light installation is a valuable skill that contributes to professional success and client satisfaction.
Get Your Premium Lighting Supplies at LumenWholesale
Ready to elevate your lighting installations with products that blend quality, affordability, and convenience? Look no further than LumenWholesale for all your fluorescent lighting needs. Our spec-grade lighting products are designed to meet the highest industry standards, ensuring your projects shine with reliability and performance. Say goodbye to inflated markups and hello to unbeatable wholesale prices, complete with the ease of bulk buying and free shipping. Take the next step in professional success and client satisfaction with LumenWholesale, where you can find Wholesale Lighting at the Best Value. Start shopping now and experience the LumenWholesale difference!