Fluorescent tube lights are a popular choice for both residential and commercial lighting due to their energy efficiency and longevity. However, the installation process can be tricky if not approached with the right knowledge. Lighting contractors often overlook specific details that can lead to inefficiencies or even safety hazards. This article aims to provide a comprehensive guide on how to properly install a fluorescent tube light bulb, highlighting the aspects that are frequently neglected.
Understanding the Components of Fluorescent Lighting
The Basics of Fluorescent Tubes
Fluorescent tube lights consist of a glass tube filled with a gas, typically argon, and a small amount of mercury. When electricity passes through the gas, it produces ultraviolet light, which then excites a phosphor coating on the inside of the tube, creating visible light. Understanding this basic principle is crucial for proper installation and maintenance.
Each fluorescent tube has specific requirements in terms of wattage and length, which must be matched with the appropriate fixture. Failing to do so can result in flickering lights or even damage to the fixture. Contractors should always verify the specifications before proceeding with installation. Additionally, the lifespan of fluorescent tubes can be affected by factors such as the frequency of switching on and off, as well as the ambient temperature. For instance, frequent on-off cycles can shorten the life of the tube, while extreme temperatures can impact its efficiency and color rendering. Therefore, it’s essential to consider the environment where the lights will be used to ensure optimal performance.
Types of Fluorescent Fixtures
There are various types of fixtures designed for fluorescent tubes, including surface-mounted, recessed, and pendant fixtures. Each type has its own installation requirements and considerations. For instance, surface-mounted fixtures typically require more space for installation compared to recessed fixtures, which are designed to fit snugly within ceilings. Recessed fixtures are particularly popular in modern design due to their sleek appearance and ability to blend seamlessly into the architecture of a room.
Additionally, some fixtures come with electronic ballasts, while others use magnetic ballasts. Electronic ballasts are generally more efficient and quieter, but they can be more sensitive to voltage fluctuations. Understanding the differences between these fixtures will help contractors choose the best option for their specific application. Furthermore, advancements in technology have led to the development of energy-efficient fluorescent options, such as T5 and T8 tubes, which provide higher lumen output and better energy savings compared to traditional T12 tubes. This evolution not only contributes to lower energy bills but also aligns with sustainability goals, making fluorescent lighting a viable choice for environmentally conscious consumers.
Preparation for Installation
Safety First
Before beginning any installation, safety should be the top priority. Always ensure that the power supply is turned off at the circuit breaker. Using a voltage tester to confirm that the fixture is not live is a good practice that should never be overlooked. This step not only protects the installer but also ensures that the electrical system remains intact throughout the process.
Contractors should also wear appropriate personal protective equipment (PPE), including safety glasses and gloves. Fluorescent tubes contain small amounts of mercury, which can be hazardous if the tube breaks. Proper handling and disposal methods should be followed to mitigate any risks associated with mercury exposure. In addition to gloves and goggles, it may be wise to have a first aid kit nearby, just in case of minor accidents. Familiarizing oneself with the location of emergency exits and fire extinguishers can also be beneficial in case of unforeseen incidents.
Gathering the Necessary Tools and Materials
Having the right tools and materials on hand can streamline the installation process. Essential tools include a screwdriver, wire cutters, and a ladder, depending on the height of the fixture. Additionally, contractors should have replacement bulbs and ballasts ready, as these components may need to be replaced during installation. It’s also helpful to have a multimeter on hand to check voltage and continuity, ensuring that all electrical connections are secure and functioning properly before sealing everything up.
It is also advisable to have a clean workspace. Clutter can lead to accidents and may cause delays during the installation process. Taking a few moments to organize tools and materials can make a significant difference in efficiency. Furthermore, labeling wires and components during disassembly can save time and prevent confusion when reassembling the fixture. By preparing adequately and ensuring that everything is in its place, contractors can focus on the task at hand, leading to a smoother and more successful installation experience.
Step-by-Step Installation Process
Removing the Old Bulb
When replacing an old fluorescent tube, the first step is to remove it safely. Start by gently twisting the tube to disengage it from the fixture. If the tube is stuck, a slight wiggle can help. However, be cautious not to apply excessive force, as this could lead to breakage.
Once the tube is free, it is essential to dispose of it properly. Many localities have specific regulations regarding the disposal of fluorescent bulbs due to the mercury content. Contractors should be familiar with these regulations to ensure compliance and safety.
Installing the New Bulb
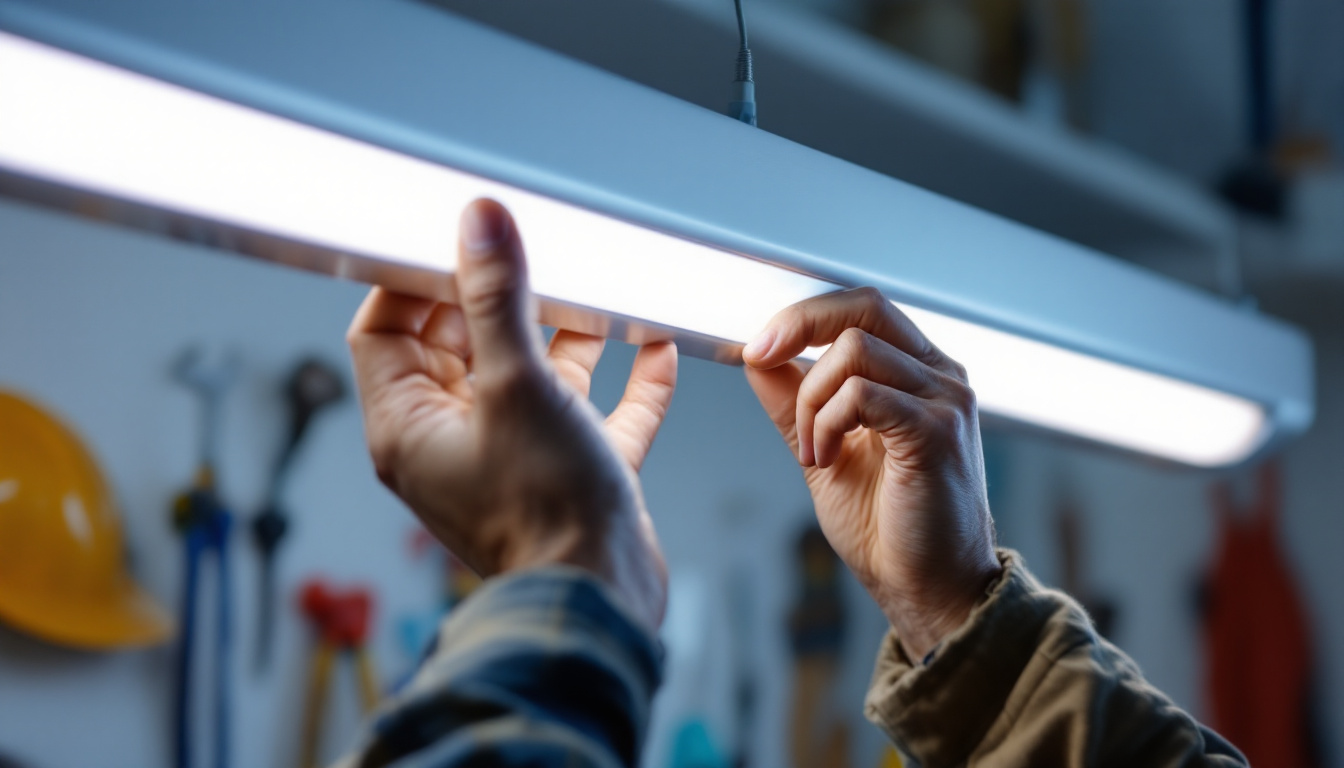
With the old bulb removed, the next step is to install the new fluorescent tube. Begin by aligning the pins of the new bulb with the slots in the fixture. Insert the pins into the slots and gently twist the bulb until it locks into place. Ensure that the bulb is seated securely to avoid flickering or other issues.
After the bulb is installed, it is advisable to check the fixture for any signs of wear or damage. Inspect the ballast and wiring for frays or corrosion, as these issues can affect performance and safety. If any problems are detected, they should be addressed before powering on the fixture.
Powering On and Testing
Once the new bulb is securely in place, it’s time to restore power to the fixture. Turn the circuit breaker back on and test the light. The new bulb should illuminate without flickering. If flickering occurs, it may indicate an issue with the ballast or the bulb itself.
In some cases, it may be necessary to replace the ballast if it is not functioning correctly. This step is often overlooked, but a faulty ballast can lead to premature bulb failure and should be addressed promptly. Contractors should be prepared to troubleshoot and replace ballasts as needed.
Common Mistakes to Avoid
Neglecting to Check Compatibility
One of the most common mistakes lighting contractors make is failing to check the compatibility of the bulb with the fixture. Not all fluorescent tubes are created equal, and using the wrong type can lead to inefficiencies or even damage. Always consult the fixture specifications before purchasing replacement bulbs.
Additionally, contractors should be aware of the different types of fluorescent tubes available, such as T5, T8, and T12. Each type has distinct characteristics and is designed for specific applications. Using the wrong type can result in poor lighting quality and increased energy consumption.
Overlooking Ballast Issues
As previously mentioned, ballasts play a crucial role in the operation of fluorescent lights. Contractors often overlook the importance of checking the ballast during installation. A faulty ballast can cause flickering, buzzing, or even complete failure of the bulb.
When installing a new bulb, it is essential to test the ballast and replace it if necessary. Ignoring this step can lead to repeated bulb failures and increased maintenance costs over time. Properly addressing ballast issues during installation can enhance the longevity and performance of fluorescent lighting systems.
Ignoring Proper Disposal Methods
Due to the presence of mercury, proper disposal of fluorescent tubes is critical. Many contractors overlook this aspect, leading to environmental hazards and potential legal issues. It is essential to stay informed about local regulations regarding the disposal of fluorescent bulbs.
Contractors should establish a protocol for safe disposal, including using designated recycling facilities that accept fluorescent tubes. This not only ensures compliance with regulations but also demonstrates a commitment to environmental responsibility.
Maintenance Tips for Fluorescent Lighting
Regular Inspections
To ensure optimal performance, regular inspections of fluorescent lighting systems are essential. This includes checking for signs of wear, such as flickering lights or discoloration of the bulbs. Early detection of issues can prevent more significant problems down the line.
Contractors should also inspect the fixtures and ballasts periodically to ensure they are functioning correctly. This proactive approach can help maintain the efficiency and longevity of the lighting system.
Cleaning the Fixtures
Dust and debris can accumulate on fluorescent fixtures, reducing their efficiency and light output. Regular cleaning of the fixtures is vital to maintain optimal performance. Use a soft cloth or duster to gently remove dust from the surface.
Additionally, the bulbs themselves should be cleaned periodically to remove any grime that may have built up. This simple maintenance task can significantly enhance the quality of light produced by the fixtures.
Replacing Bulbs in a Timely Manner
Fluorescent bulbs have a finite lifespan, and waiting too long to replace them can lead to decreased performance and increased energy consumption. Contractors should establish a schedule for replacing bulbs based on usage and manufacturer recommendations.
By proactively replacing bulbs, contractors can ensure consistent lighting quality and energy efficiency, ultimately benefiting both their clients and their business.
Conclusion
Installing a fluorescent tube light bulb may seem like a straightforward task, but there are numerous factors that lighting contractors must consider to ensure a successful installation. By understanding the components, preparing adequately, and avoiding common pitfalls, contractors can enhance their efficiency and provide better service to their clients.
From ensuring compatibility and addressing ballast issues to following proper disposal methods, attention to detail is crucial. Regular maintenance and proactive replacement of bulbs can significantly improve the longevity and performance of fluorescent lighting systems. By adhering to these best practices, lighting contractors can elevate their work and provide top-notch lighting solutions.
Get Your Premium Lighting Supplies at LumenWholesale
Ready to take your lighting installations to the next level? Choose LumenWholesale for all your fluorescent tube light bulb needs and more. Our spec-grade lighting products not only meet but exceed industry standards, ensuring you deliver exceptional service to your clients. With unbeatable wholesale prices and the convenience of free shipping on bulk orders, you can trust us to provide the best value without any hidden costs. Elevate your projects with the quality, affordability, and convenience that LumenWholesale offers. Wholesale Lighting at the Best Value is just a click away.