Why Fluorescent Tube Socket Replacement Matters
Fluorescent lighting remains a staple in commercial and industrial spaces, prized for its efficiency and brightness. Yet, the socket—the unsung hero holding the tube in place and providing electrical connection—often gets overlooked until it fails. A faulty fluorescent tube socket can lead to flickering lights, intermittent operation, or complete failure of the fixture. For lighting contractors, understanding the nuances of socket replacement is essential to delivering reliable, long-lasting lighting solutions.
Socket failure is one of the most common reasons fluorescent fixtures underperform. Over time, heat, corrosion, and mechanical wear degrade the socket’s contacts and housing. Ignoring these symptoms can lead to increased maintenance calls, dissatisfied clients, and potential safety hazards. Replacing the socket is often more cost-effective than swapping out the entire fixture, making it a practical skill for contractors.
Moreover, the importance of a well-functioning socket extends beyond mere functionality; it also plays a critical role in energy efficiency. A compromised socket can cause the fluorescent tube to operate inefficiently, leading to increased energy consumption and higher utility bills. This not only impacts the bottom line for businesses but also contributes to unnecessary environmental strain. By ensuring that sockets are in optimal condition, contractors can help clients achieve better energy efficiency, which is increasingly becoming a priority in today’s eco-conscious market.
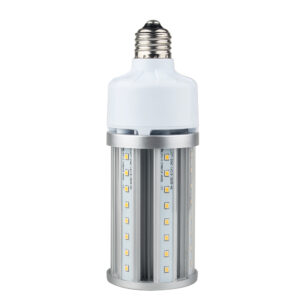
Additionally, the variety of fluorescent tube sockets available can be daunting, with options ranging from standard bi-pin to more specialized configurations. Understanding the specific requirements of different fixtures and tubes is crucial for contractors to ensure compatibility and performance. This knowledge not only aids in the immediate task of replacement but also empowers contractors to make informed recommendations for future upgrades, such as transitioning to LED options, which can further enhance lighting quality and efficiency. By staying updated on the latest advancements in lighting technology, contractors can position themselves as trusted advisors, helping clients navigate the evolving landscape of commercial lighting solutions.
Identifying When a Fluorescent Tube Socket Needs Replacement
Signs and Symptoms to Watch For
Before jumping into replacement, it’s crucial to diagnose the socket accurately. Flickering lights are a classic warning sign, but they can also stem from ballast issues or wiring problems. If the tube fails to light at all or only lights intermittently despite a good ballast and tube, the socket is a prime suspect. Additionally, if you notice a buzzing sound emanating from the fixture, it could indicate that the socket is not making proper contact with the fluorescent tube, leading to inefficient energy use and potential damage to the tube itself.
Visual inspection often reveals telltale signs: discoloration, cracking, or melting of the socket housing; corrosion on metal contacts; or loose fittings that fail to hold the tube securely. If the socket feels unusually warm or emits a burnt smell, immediate replacement is warranted to avoid fire risks. Furthermore, it’s wise to check for any signs of moisture or water damage around the socket area, as this could exacerbate existing issues and lead to short circuits or further electrical hazards. Regular maintenance and checks can help catch these problems before they escalate, ensuring a safer and more efficient lighting system.
Testing the Socket
Using a multimeter to check for continuity and voltage at the socket terminals helps confirm whether the socket is functioning correctly. A lack of continuity indicates broken or corroded contacts inside the socket. Measuring voltage ensures the socket is receiving power from the ballast and wiring. These tests provide objective data to back up visual inspections and client reports. Additionally, it’s beneficial to test the socket under different conditions, such as after the lights have been on for a while, to see if heat affects performance. This can reveal intermittent issues that may not be apparent during a standard test.
Moreover, if you find that the socket is indeed faulty, it’s essential to consider the type of replacement socket you choose. Different fluorescent tubes may require specific socket types, and using the wrong one can lead to further complications down the line. Always consult the manufacturer’s specifications or guidelines to ensure compatibility. This attention to detail not only enhances the longevity of your lighting system but also contributes to overall energy efficiency, reducing costs and environmental impact in the long run.
Essential Tools and Materials for Socket Replacement
Tools Every Lighting Contractor Should Have
Efficient fluorescent tube socket replacement hinges on having the right tools. A reliable set of insulated screwdrivers and wire strippers is fundamental. Needle-nose pliers assist with delicate wiring tasks, while a multimeter is indispensable for testing electrical continuity and voltage. Additionally, a torque wrench can be beneficial for ensuring that screws are tightened to the appropriate specifications, preventing future loosening that could lead to electrical issues.
For socket removal, a flathead screwdriver or a specialized socket removal tool can help pry out stubborn sockets without damaging the fixture. Heat-resistant gloves protect hands from sharp edges and residual heat, especially in fixtures that have been operating recently. Furthermore, having a good quality flashlight or headlamp can illuminate dark spaces, making it easier to see what you’re working on, especially in commercial settings where fixtures may be located in less accessible areas.
Choosing the Right Replacement Sockets
Not all fluorescent tube sockets are created equal. Contractors must select sockets compatible with the tube type (T8, T12, etc.), voltage rating, and fixture design. Sockets come in various mounting styles—snap-in, screw-in, or push-in—so matching the replacement to the original setup ensures a secure fit. It’s also important to consider the wattage the socket can handle, as using a socket rated for lower wattage than required can lead to overheating and potential failures.
Opting for sockets made from high-quality, heat-resistant materials extends fixture lifespan and reduces callbacks. Some sockets feature corrosion-resistant contacts, which are particularly valuable in humid or industrial environments. Additionally, many modern sockets are designed with improved safety features, such as built-in fuses or thermal protection, which can provide an extra layer of security against electrical faults. When selecting sockets, it’s also wise to consider the manufacturer’s warranty and reputation, as this can be indicative of the product’s reliability and performance in the long term.
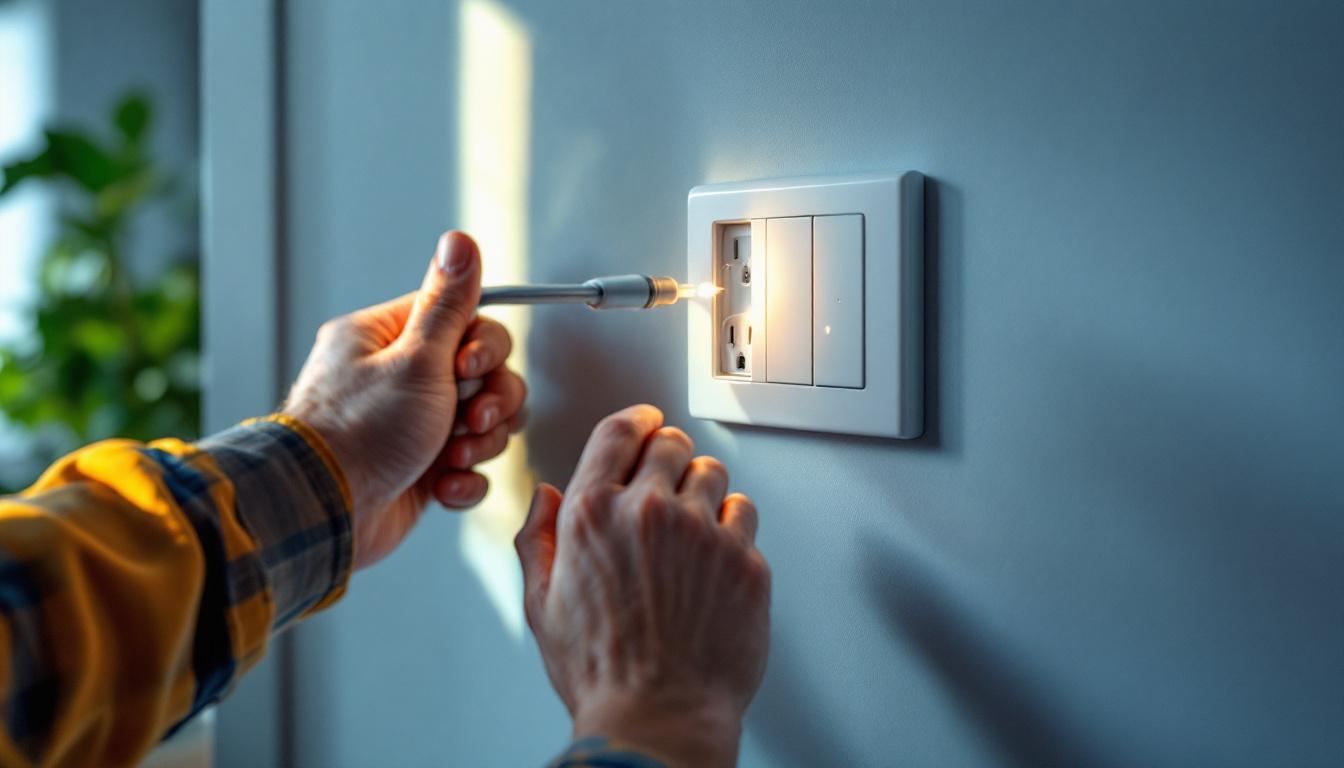
Step-by-Step Fluorescent Tube Socket Replacement Process
Safety First: Power Down and Verify
Always cut power to the fixture at the circuit breaker before beginning any work. Confirm that the fixture is de-energized using a non-contact voltage tester. This simple step prevents electrical shock and protects both the contractor and the client’s property.
Removing the Fluorescent Tube and Old Socket
Carefully remove the fluorescent tube by rotating it 90 degrees to release it from the socket pins. Handle the tube gently to avoid breakage. If the tube is damaged or old, consider replacing it alongside the socket for optimal performance.
Next, detach the old socket. Depending on the fixture, this may involve unscrewing it or gently prying it out. Take note of how the socket is wired-photographing the connections can be helpful for reference during reinstallation.
Installing the New Socket
Secure the new socket in place, ensuring it fits snugly and aligns correctly with the fixture’s mounting points. Reconnect the wiring according to the original configuration, matching wire colors and terminal positions precisely. Use wire nuts or terminal connectors rated for the fixture’s voltage and current.
Double-check all connections for tightness and proper insulation. Loose or exposed wires can cause arcing or short circuits, compromising safety and functionality.
Testing and Final Checks
Before reinstalling the tube, restore power and test the socket with a multimeter to verify voltage presence. If everything checks out, power down again, reinstall the fluorescent tube, and power up to observe the fixture in operation.
Look for steady illumination without flicker or dimming. If issues persist, re-examine wiring and socket seating. Confirm that the ballast and tubes are in good condition to rule out other causes.
Common Challenges and How to Overcome Them
Dealing with Corroded or Stuck Sockets
Corrosion can cause sockets to stick firmly in place, making removal tricky. Applying a small amount of penetrating lubricant and allowing it to sit can ease extraction. Use gentle prying tools to avoid damaging the fixture housing.
Wiring Complications
Older fixtures may have non-standard wiring or degraded insulation. In such cases, carefully strip back damaged wire sections and replace with fresh, appropriately rated wire. Always adhere to local electrical codes and standards.
Socket Compatibility Issues
Sometimes, original sockets are obsolete or unavailable. Contractors should source universal or compatible sockets designed to fit multiple fixture types. Consulting manufacturer datasheets or technical support can prevent costly mismatches.
Maintenance Tips to Extend Socket Life
Regular inspection of fluorescent fixtures can catch socket wear before failure. Cleaning sockets and contacts periodically removes dust and corrosion that impair electrical connections. Avoid using harsh chemicals that degrade plastic components.
Encourage clients to report flickering or dimming lights promptly. Early intervention often means a simple socket replacement instead of more extensive fixture repairs or replacements.
Why Mastering Socket Replacement Benefits Contractors
Fluorescent tube socket replacement is a skill that enhances a contractor’s service portfolio. It saves clients money by avoiding full fixture replacements and reduces downtime in commercial settings. Efficient socket replacement boosts contractor reputation through quick, effective repairs.
Moreover, understanding socket issues deepens troubleshooting capabilities, enabling contractors to diagnose lighting problems accurately and recommend the best solutions. This expertise translates into stronger client trust and repeat business.
Final Thoughts
Fluorescent tube socket replacement may seem straightforward, but it demands attention to detail, safety, and proper tool use. Lighting contractors who master this task position themselves as reliable professionals capable of maintaining high-quality lighting environments.
Approach each replacement with a thorough checklist: diagnose correctly, use the right tools, select compatible parts, follow safe procedures, and test meticulously. This methodical approach ensures every fluorescent fixture shines bright and steady for years to come.
Get Your Premium Lighting Supplies at LumenWholesale
Ready to elevate your lighting projects with the highest quality sockets and fixtures? Look no further than LumenWholesale, where we provide contractors with spec-grade lighting products at unbeatable wholesale prices. Say goodbye to local distributor markups and hello to a vast selection of reliable, high-performance lighting that meets the strictest industry standards. Plus, with free shipping on bulk orders, you can stock up on premium lighting essentials at the best value — all without hidden fees or compromises. Make your next fluorescent tube socket replacement project a shining success with LumenWholesale. Wholesale Lighting at the Best Value.