Understanding the Impact of Recessed Lighting Designs
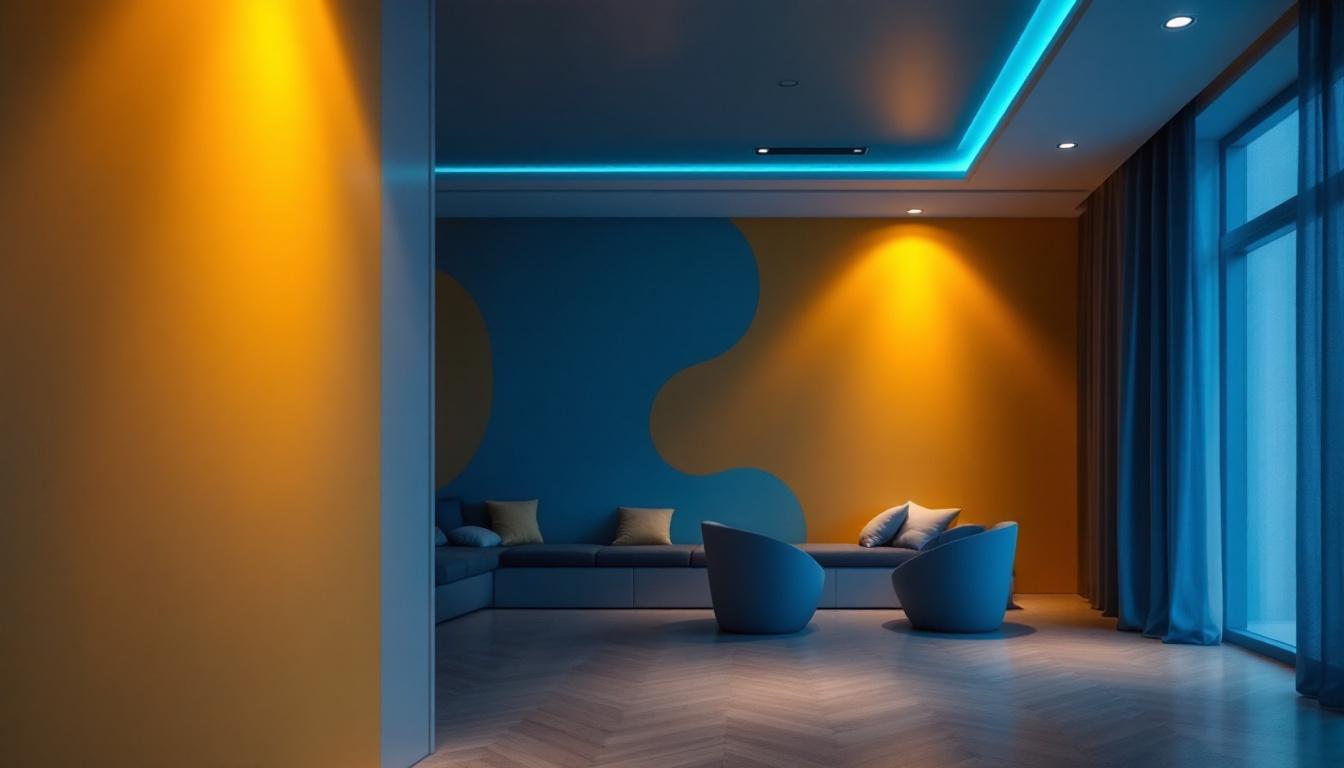
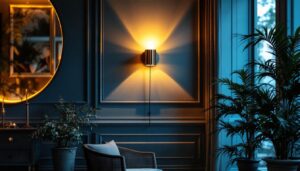
Recessed lighting is more than just a fixture; it’s a design element that can transform a space. For lighting contractors, showcasing pictures of recessed lighting installations is a powerful way to communicate potential outcomes to clients. These images help bridge the gap between technical specifications and real-world applications.
When clients see a well-executed recessed lighting layout, they grasp how the light interacts with the room’s architecture, furniture, and color scheme. This visual understanding often leads to better decision-making and smoother project approvals.
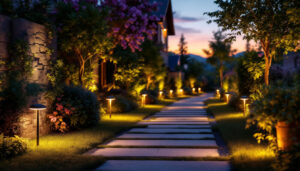
Contractors who curate a portfolio of diverse recessed lighting photos can demonstrate versatility—whether it’s a cozy residential kitchen, a sleek commercial lobby, or a dramatic gallery space. The right images highlight how lighting can enhance ambiance, functionality, and aesthetics simultaneously.
Moreover, the strategic placement of recessed lighting can significantly influence the perception of space. For instance, in smaller rooms, carefully positioned recessed lights can create an illusion of height and openness, making the area feel larger and more inviting. In contrast, in expansive spaces, varying the intensity and focus of the lighting can add depth and character, drawing attention to architectural features or artwork. This nuanced approach to lighting design not only elevates the overall aesthetic but also enhances the user experience, making spaces more enjoyable and functional.
Additionally, the choice of trim and bulb type in recessed lighting installations can further refine the look and feel of a space. Warm LED bulbs can create a cozy atmosphere perfect for living areas, while cooler tones might be more suitable for workspaces, promoting alertness and focus. The trim style—whether it’s baffle, reflector, or adjustable—also plays a crucial role in directing light and minimizing glare. By understanding these elements, contractors can provide tailored solutions that meet the specific needs and preferences of their clients, ensuring that each installation is not just a lighting solution but a well-thought-out design choice.
Key Elements to Highlight in Recessed Lighting Photos
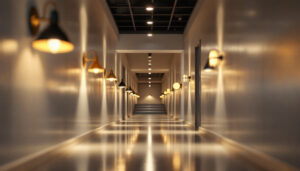
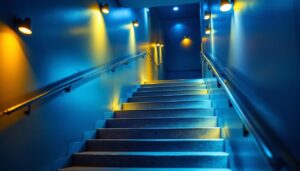
Light Distribution and Beam Angles
One of the most critical aspects to showcase is how light spreads from the recessed fixtures. Images that clearly depict beam angles—narrow, medium, or wide—help clients visualize the intensity and focus of the lighting. For example, narrow beams work well for accent lighting, while wider beams are better suited for general illumination.
Photos taken from different angles can reveal how shadows are cast and how evenly the light covers surfaces. This is essential for contractors to demonstrate expertise in avoiding common pitfalls like dark spots or glare. Additionally, showcasing the effects of dimmable recessed lighting can further illustrate versatility, allowing clients to see how the ambiance can shift from bright and vibrant to soft and cozy, depending on the occasion.
Fixture Placement and Spacing
Proper spacing between recessed lights is vital for balanced lighting. Pictures that illustrate spacing strategies—such as the “distance equals height” rule—provide practical insights. For instance, if the ceiling height is 8 feet, placing fixtures roughly 8 feet apart ensures even coverage.
Showing before-and-after photos or side-by-side comparisons can be particularly effective. Clients appreciate seeing how strategic placement eliminates uneven lighting and enhances room functionality. Furthermore, including images that demonstrate the impact of fixture placement in various room types—such as kitchens, living rooms, or home theaters—can help clients understand how to tailor their lighting choices to suit specific activities and moods within those spaces.
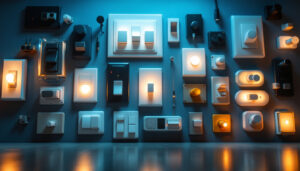
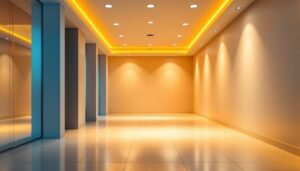
Trim Styles and Finishes
The trim of a recessed light affects both performance and style. Contractors should include images that highlight various trim options: baffle trims for glare reduction, reflector trims for brightness, and adjustable trims for directional lighting. Different finishes—white, black, bronze, or brushed nickel—also influence the fixture’s integration with the ceiling and overall decor.
Visual examples help clients select trims that complement their design preferences while meeting lighting needs. Additionally, discussing the benefits of using trims with integrated LED technology can be beneficial; these options not only enhance energy efficiency but also provide a sleek, modern look that appeals to contemporary design sensibilities. Including close-up shots that reveal the texture and quality of different finishes can further assist clients in making informed decisions about their lighting aesthetics.
Practical Tips for Capturing Effective Recessed Lighting Photos
Use Natural and Artificial Light to Your Advantage
Balancing natural daylight with artificial recessed lighting can be tricky but rewarding. Photos taken during different times of day reveal how the lighting performs under varying conditions. Early morning or late afternoon shots often provide soft, diffused natural light that complements the recessed fixtures. This interplay can enhance the overall aesthetic of the space, allowing shadows to play gracefully across surfaces and highlighting textures that might otherwise go unnoticed.
When shooting interiors, turn off other light sources that might interfere with the recessed lighting’s effect. This isolates the fixture’s contribution and prevents color casts from other bulbs. Additionally, consider using reflectors or bounce cards to redirect light and fill in shadows without overpowering the recessed fixtures. This technique can help create a more balanced exposure and bring out the best features of the room, making it feel inviting and well-lit.
Choose the Right Camera Settings
For contractors without professional photography gear, modern smartphones can still capture excellent images. Use manual or pro modes to adjust exposure, ISO, and white balance. Lower ISO settings reduce graininess, while custom white balance ensures accurate color representation of the light. If available, utilize HDR (High Dynamic Range) settings to capture the full range of light and dark areas in your photos, especially in spaces where recessed lighting creates stark contrasts.
Wide-angle lenses are helpful for showing the overall layout, but close-up shots of trims and beam patterns add depth to the portfolio. Experiment with different focal lengths to create a comprehensive visual story. Additionally, consider taking multiple shots at varying exposures to ensure you capture the best representation of the lighting. This technique not only showcases the recessed fixtures but also allows potential clients to visualize how the lighting can transform their spaces.
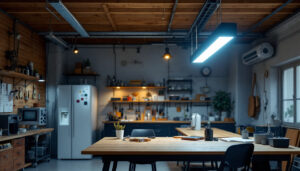
Highlight Functional Zones
Rooms often have multiple functional zones—kitchen prep areas, dining spaces, reading nooks. Photos that focus on how recessed lighting supports these zones resonate with clients. For example, a well-lit kitchen island with task lighting contrasts nicely with softer ambient lighting in the adjacent living area. This strategic use of lighting not only enhances functionality but also creates a warm and inviting atmosphere that encourages social interaction and comfort.
Including images that demonstrate layered lighting strategies—combining recessed lights with pendants or under-cabinet fixtures—can also showcase your expertise in creating versatile environments. Showcasing these combinations in your portfolio can help clients envision the potential of their own spaces. Additionally, consider capturing before-and-after shots of spaces that have undergone lighting transformations, as this can powerfully illustrate the impact of thoughtful lighting design on the overall ambiance and usability of a room.
Common Challenges and How to Address Them in Photos
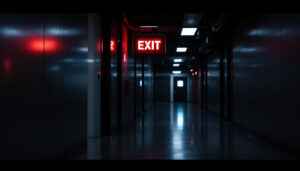
Dealing with Glare and Hotspots
Glare is a frequent issue with recessed lighting, especially when fixtures are improperly installed or lack the right trims. Photographs that reveal glare problems can be used as teaching tools to explain why certain trims or baffles are necessary.
Conversely, images that show glare-free installations reinforce your professionalism and attention to detail. Use these photos to highlight how proper fixture selection and placement enhance comfort and usability.
Capturing Light Color and Temperature Accurately
Light color temperature dramatically affects the mood of a room. Warm light (around 2700K to 3000K) creates a cozy atmosphere, while cooler light (3500K to 4100K) feels more energetic and modern. Photos must accurately represent these differences to avoid misleading clients.
Adjust your camera’s white balance or edit images carefully to maintain true-to-life color. Including side-by-side images of different color temperatures in the same space can help clients choose what suits their needs best.
Showing Integration with Ceiling Types
Recessed lighting doesn’t look the same on every ceiling. Photos that depict installations on drywall, drop ceilings, or exposed beams illustrate how fixture choice and installation methods vary. For example, shallow housings are necessary for tight ceiling cavities, and certain trims work better with textured ceilings.
Highlighting these nuances in your photo portfolio educates clients and builds trust in your technical knowledge.
Using Recessed Lighting Photos to Boost Client Engagement
Creating Before-and-After Galleries
Before-and-after images are compelling. They show the transformative power of recessed lighting and provide tangible proof of your skills. Such galleries can be featured on websites, social media, or in client presentations to make a strong impression.
Choose projects with noticeable improvements in brightness, ambiance, or spatial perception. Include captions that explain the challenges and solutions implemented.
Incorporating Client Testimonials with Visuals
Pairing photos with client testimonials adds credibility. When a satisfied client praises the lighting design and installation quality alongside images of the finished space, potential customers are more likely to trust your services.
This combination also personalizes your portfolio, making it relatable and authentic.
Utilizing Photos for Training and Team Development
Recessed lighting photos are valuable internal tools. Use them in training sessions to discuss best practices, common mistakes, and innovative solutions. Visual examples help team members understand technical concepts more quickly and retain information better.
Encourage your crew to contribute photos from job sites, fostering a culture of continuous learning and pride in workmanship.
Final Thoughts on Leveraging Recessed Lighting Imagery
For lighting contractors, pictures of recessed lighting installations are more than just marketing materials-they are educational resources, communication aids, and proof of expertise. Investing time in capturing high-quality, diverse images pays off by enhancing client trust, improving project outcomes, and strengthening your professional reputation.
Focus on showcasing the nuances of light distribution, fixture selection, and installation quality. Use photos to tell a story that resonates with clients’ needs and aspirations. When done right, your portfolio becomes a powerful tool that sets you apart in a competitive market.
Illuminate Your Projects with LumenWholesale
Ready to elevate your lighting projects with the finest selection of recessed lighting options? At LumenWholesale, we provide lighting contractors like you with spec-grade products that promise quality and performance. Say goodbye to local distributor markups and hello to our unbeatable wholesale prices. With our commitment to excellence and convenience, you’ll find everything you need to create stunning, efficient lighting designs. Plus, with free shipping on bulk orders, your investment in superior lighting is even more cost-effective. Don’t compromise on quality or value — discover the best wholesale lighting deals at LumenWholesale today.