recessed lighting has become a staple in modern interior design, offering a clean, unobtrusive way to illuminate spaces. For lighting contractors, understanding the nuances of installing recessed cans in drop ceilings is essential for delivering high-quality results. This article explores best practices, common pitfalls, and innovative techniques to ensure successful installations.
Understanding Recessed Cans
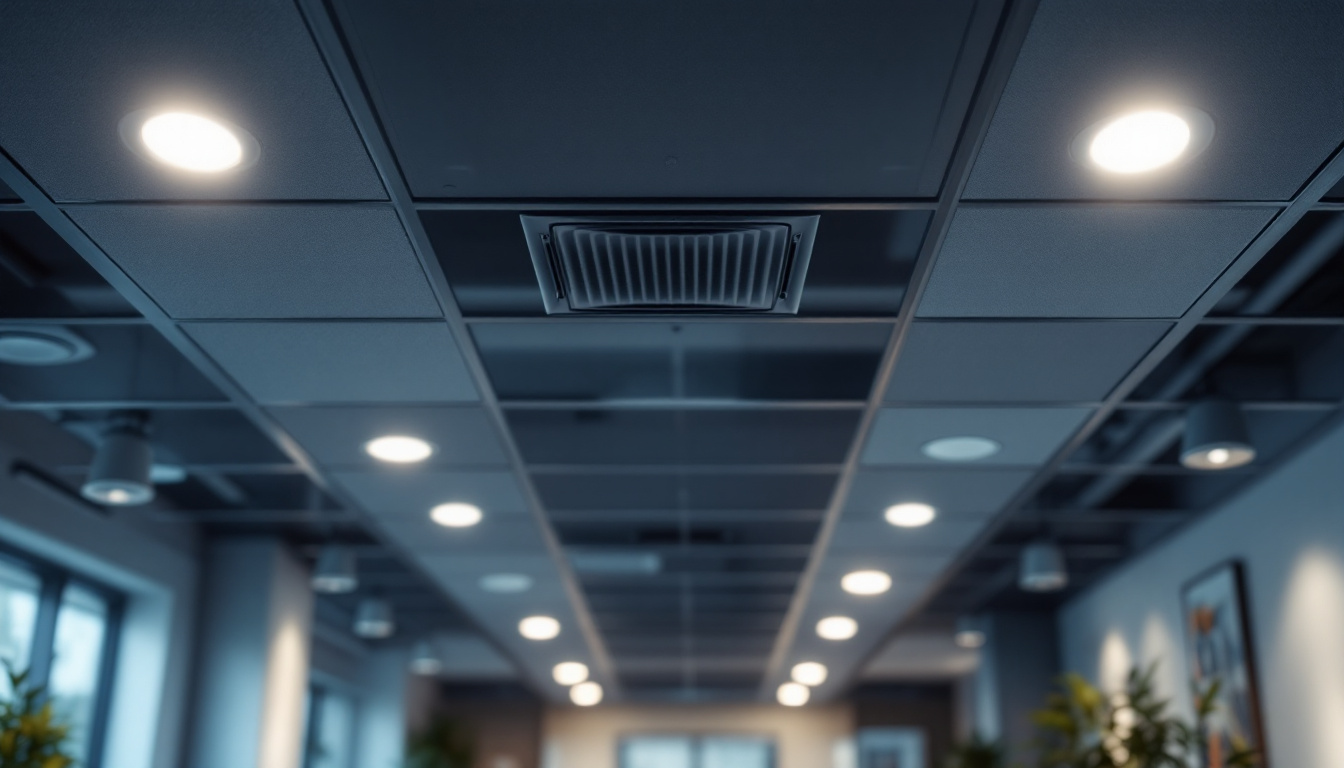
Recessed cans, also known as can lights or downlights, are fixtures that are installed into a hollow opening in the ceiling. Their design allows them to provide focused lighting while minimizing their visual footprint. When installed in a drop ceiling, which consists of a grid system with tiles, there are specific considerations that contractors must keep in mind. Proper placement and spacing are essential to ensure that the light is evenly distributed throughout the space, avoiding dark spots or overly bright areas. Additionally, understanding the ceiling height and the intended use of the room can influence the choice of bulb type and wattage, further enhancing the effectiveness of the lighting.
Types of Recessed Cans
There are various types of recessed cans available, each suited for different applications. Understanding these options is crucial for selecting the right fixture for a project. Some common types include:
- New Construction Cans: Designed for installation in ceilings that are still being built, these cans typically have adjustable brackets for easy placement.
- Remodel Cans: Ideal for existing ceilings, remodel cans can be installed without the need for attic access, making them perfect for retrofitting.
- IC Rated Cans: These are insulated contact rated, meaning they can be installed in ceilings with insulation without risk of overheating.
Choosing the right type of recessed can is critical, as it affects not only the installation process but also the overall performance of the lighting system. For instance, new construction cans often allow for more flexibility in terms of placement, while remodel cans are specifically designed to fit into tight spaces without extensive renovation. Furthermore, the choice between IC rated and non-IC rated cans can significantly impact energy efficiency and safety, particularly in homes where insulation is a key feature.
Benefits of Using Recessed Cans
Recessed cans offer several advantages, making them a popular choice among contractors and clients alike:
- Space-Saving: They provide a sleek appearance, allowing for a clean ceiling line and maximizing headroom.
- Versatile Lighting: Recessed cans can be used for general, task, or accent lighting, depending on the bulb and placement.
- Energy Efficiency: Many recessed lighting options now come with LED bulbs, which consume less energy and have a longer lifespan.
In addition to their aesthetic and functional benefits, recessed cans can also enhance the overall ambiance of a room. By strategically placing these fixtures, homeowners can create layered lighting effects that add depth and warmth to their spaces. For example, using dimmable LED bulbs in recessed cans allows for adjustable brightness, enabling a transition from bright, focused lighting during the day to softer, more intimate lighting in the evening. Furthermore, with the advent of smart lighting technology, recessed cans can now be integrated into home automation systems, allowing users to control their lighting remotely or set schedules for different times of the day, further enhancing convenience and energy savings.
Planning the Installation
Proper planning is essential for a successful recessed can installation in a drop ceiling. This phase involves assessing the space, determining the layout, and ensuring compliance with local codes.
Assessing the Space
Before installation, contractors should evaluate the space to determine the best locations for recessed cans. This involves considering the room’s purpose, existing structures, and the desired lighting effect. Key factors to consider include:
- Ceiling Height: Higher ceilings may require more powerful bulbs or additional fixtures to achieve adequate illumination.
- Room Function: Different areas, such as kitchens or living rooms, may require different lighting intensities and styles.
- Obstructions: Be mindful of any beams, ducts, or plumbing that may interfere with the installation.
Creating a Lighting Layout
Once the space has been assessed, the next step is to create a lighting layout. This layout should include the number of fixtures needed and their placement. A few tips for creating an effective layout include:
- Spacing: A common rule of thumb is to space recessed cans about 4 to 6 feet apart, depending on the wattage of the bulbs used.
- Placement: Align fixtures with key features in the room, such as artwork or furniture, to enhance the overall aesthetic.
- Layering Light: Combine recessed cans with other lighting types, such as pendant lights or wall sconces, for a well-rounded lighting design.
Installation Techniques
With a solid plan in place, the installation process can begin. Proper techniques are crucial for ensuring that the recessed cans are securely mounted and function effectively.
Preparing the Ceiling
Before installing recessed cans in a drop ceiling, it is essential to prepare the area. This includes:
- Removing Ceiling Tiles: Carefully remove the tiles where the cans will be installed, ensuring not to damage adjacent tiles.
- Marking Locations: Use a pencil to mark the locations of the cans on the ceiling grid, ensuring alignment with the planned layout.
- Checking for Obstructions: Use a stud finder to ensure there are no hidden obstructions behind the ceiling tiles.
Installing the Recessed Cans
Once the ceiling is prepared, the actual installation can begin. Follow these steps for a successful installation:
- Cutting Openings: Use a drywall saw to cut openings in the ceiling tiles according to the size of the recessed cans.
- Wiring: Run electrical wiring to each can, ensuring that connections are secure and comply with local electrical codes.
- Mounting the Cans: Secure the cans in place using the provided clips or brackets, ensuring they are flush with the ceiling.
Electrical Considerations
Electrical safety is paramount when installing recessed cans in drop ceilings. Contractors must adhere to all relevant codes and regulations to ensure a safe and compliant installation.
Wiring Practices
Proper wiring is essential for the functionality and safety of recessed lighting. Here are some best practices to follow:
- Use the Right Gauge: Ensure that the wiring gauge is appropriate for the load to prevent overheating and potential fire hazards.
- Secure Connections: Use wire nuts to secure connections and electrical tape to insulate them, ensuring a stable and safe electrical system.
- Grounding: Always ensure that fixtures are properly grounded to prevent electrical shocks.
Compliance with Codes
It is crucial to be familiar with local electrical codes and regulations. This includes:
- Permits: Determine if a permit is required for the installation and ensure it is obtained before work begins.
- Inspections: Be prepared for inspections, which may be required to ensure compliance with safety standards.
- Energy Efficiency Standards: Familiarize yourself with energy efficiency requirements that may apply to recessed lighting installations.
Post-Installation Tips
After the installation is complete, there are several steps to take to ensure the recessed cans perform optimally and meet client expectations.
Testing the Installation
Before finalizing the project, it is important to test the installation. This includes:
- Powering On: Turn on the lights to ensure all fixtures are working correctly and providing the intended illumination.
- Adjusting Angles: If adjustable cans are used, make sure they are positioned correctly to achieve the desired lighting effect.
- Checking for Flickering: Monitor for any flickering lights, which could indicate wiring issues or compatibility problems with the bulbs.
Client Education
Educating the client about their new lighting system is an essential part of the installation process. Key points to cover include:
- Bulb Replacement: Inform clients about the type of bulbs used and how to replace them when necessary.
- Maintenance: Discuss any maintenance required to keep the recessed cans functioning optimally.
- Energy Savings: Highlight the energy efficiency of the installed system and how it can contribute to lower utility bills.
Common Pitfalls to Avoid
Even experienced contractors can encounter challenges when installing recessed cans in drop ceilings. Being aware of common pitfalls can help avoid costly mistakes.
Overcrowding Fixtures
One of the most frequent mistakes is overcrowding fixtures, which can lead to inadequate lighting and an unappealing aesthetic. To prevent this:
- Follow Spacing Guidelines: Adhere to recommended spacing to ensure even illumination throughout the space.
- Consider Light Output: Take into account the wattage and lumen output of the bulbs to avoid overloading the system.
Ignoring Ceiling Structure
Failing to consider the drop ceiling structure can lead to installation issues. Key considerations include:
- Weight Distribution: Ensure that the weight of the recessed cans is adequately supported by the ceiling grid.
- Tile Compatibility: Verify that the ceiling tiles can accommodate the cutouts for the recessed cans without compromising structural integrity.
Conclusion
Installing recessed cans in drop ceilings requires a blend of technical knowledge, planning, and attention to detail. By following best practices, understanding the nuances of the installation process, and being aware of common pitfalls, lighting contractors can deliver exceptional results that meet client expectations. As the demand for modern lighting solutions continues to grow, mastering the art of recessed can installation will undoubtedly enhance a contractor’s reputation and success in the field.
Get Your Premium Lighting Supplies at LumenWholesale
Ready to elevate your lighting installations with the highest quality recessed cans on the market? Look no further than LumenWholesale. Our spec-grade lighting products are designed to meet the rigorous demands of modern contractors, ensuring every project shines with excellence. With unbeatable wholesale prices and the convenience of free shipping on bulk orders, you can stock up on the best lighting solutions without the worry of hidden fees. Don’t let inflated markups dim your business’s potential. Choose LumenWholesale for a seamless blend of quality, affordability, and convenience. Discover our extensive selection and experience wholesale lighting at the best value today.