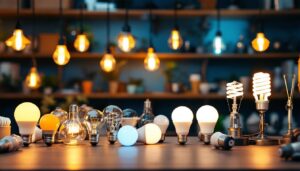
Understanding Fluorescent Lamps and Their Components
Fluorescent lamps have been a staple in commercial and industrial lighting for decades, prized for their energy efficiency and long lifespan. Before diving into the connection process, it’s essential to understand the basic components that make up a fluorescent lamp fixture. This knowledge ensures safe installation and optimal performance.
A typical fluorescent lamp setup includes the lamp itself (the tube), the ballast, the starter (in older models), and the fixture wiring. The ballast regulates the current to the lamp, preventing it from drawing too much power and burning out prematurely. Modern electronic ballasts have largely replaced older magnetic types, offering quieter operation and improved efficiency. These electronic ballasts not only enhance the overall performance of the lamp but also contribute to a reduction in flickering, which can be a common annoyance in environments where consistent lighting is crucial.
Knowing these parts and their functions helps in troubleshooting and ensures the correct wiring sequence during installation. For lighting contractors, familiarity with these elements is non-negotiable for delivering reliable lighting solutions. Furthermore, understanding the different types of fluorescent lamps available, such as T8, T5, and compact fluorescent lamps (CFLs), can significantly impact the choice of lighting in a given space. Each type has its unique specifications, including size, wattage, and light output, which can affect everything from energy consumption to the ambiance of the area being illuminated.
Additionally, the environmental impact of fluorescent lamps is an important consideration. While they are more energy-efficient than traditional incandescent bulbs, they do contain small amounts of mercury, which necessitates careful disposal and recycling practices. Many manufacturers are now focusing on creating more eco-friendly options, such as LED alternatives, which not only eliminate the mercury issue but also offer even greater energy savings and longer lifespans. As the lighting industry continues to evolve, staying informed about these advancements can help consumers and professionals alike make more sustainable choices in their lighting solutions.
Preparing for Installation: Tools and Safety Measures
Before connecting any fluorescent lamp, preparation is key. Having the right tools and adhering to safety protocols protects both the installer and the equipment.
Essential tools include a voltage tester, wire strippers, screwdrivers, needle-nose pliers, and a ladder if working on ceiling fixtures. A multimeter is invaluable for verifying electrical connections and ensuring the circuit is de-energized before starting work. Additionally, a flashlight can be helpful for illuminating dark spaces, especially when working in attics or basements where lighting may be inadequate. It’s also wise to have a small container or magnetic tray to hold screws and small components, preventing them from getting lost during the installation process.
Safety cannot be overstated. Always turn off the power at the circuit breaker before handling wiring. Use insulated gloves and wear safety glasses to guard against accidental shocks or debris. Confirm the power is off by testing the fixture terminals with a voltage tester. Following lockout/tagout procedures is recommended on job sites to prevent accidental energizing. Furthermore, it’s beneficial to familiarize yourself with the specific installation instructions provided by the lamp manufacturer, as different models may have unique requirements or safety considerations. Keeping a first-aid kit nearby is also a prudent measure, ensuring that you are prepared for any minor accidents that could occur during the installation process. Remember, taking the time to prepare properly not only enhances safety but also contributes to a smoother and more efficient installation experience.
Step-by-Step Guide to Connecting a Fluorescent Lamp
1. Identify the Wiring Configuration
Fluorescent lamps come in various configurations, including single-lamp and multi-lamp fixtures. The wiring setup depends on the ballast type and lamp count. Most modern fixtures use a two-wire or four-wire ballast.
Check the ballast label for wiring diagrams. These diagrams provide color codes for input and output wires, which are critical to making the correct connections. Common wire colors include black (line/hot), white (neutral), blue and red (lamp connections), and sometimes yellow or other colors for additional lamp circuits. Understanding these color codes is essential, as they ensure that you connect the wires correctly, preventing potential electrical issues that could arise from miswiring.
Additionally, it’s worth noting that older fluorescent fixtures may use different wiring configurations, such as magnetic ballasts, which can require different handling and installation techniques. If you’re working with an older system, consider consulting the manufacturer’s specifications or a professional electrician to ensure safety and compliance with current electrical codes.
2. Connect the Power Supply Wires
Start by connecting the incoming power supply wires to the ballast. Typically, the black (live) wire connects to the ballast’s black input wire, and the white (neutral) wire connects to the ballast’s white input wire. Use wire nuts to secure these connections and wrap them with electrical tape for extra safety.
Ensure the connections are tight and that no bare wire is exposed. Loose connections can cause flickering or intermittent operation and pose fire hazards. It’s also advisable to turn off the circuit breaker before starting any electrical work to avoid accidental shocks. Using a voltage tester can provide an additional layer of safety, confirming that the power is indeed off before you begin connecting the wires.
Moreover, consider the environment where the fixture will be installed. If it’s in a damp area, such as a basement or garage, ensure that the wiring and fixtures are rated for such conditions to prevent moisture-related issues. Using weatherproof connectors and enclosures can also enhance safety and longevity.
3. Wire the Lamp Holders to the Ballast
Next, connect the ballast output wires to the lamp holders (also called tombstones). The ballast wires usually correspond to the lamp pins: one side of the lamp connects to one set of wires, and the other side connects to another set. For example, in a two-lamp fixture, the blue wires might connect to one lamp holder, and the red wires to the other.
Refer to the ballast wiring diagram to match the correct wires. Incorrect wiring can prevent the lamp from starting or cause damage to the ballast. Additionally, ensure that the lamp holders are securely mounted and in good condition, as damaged holders can lead to poor electrical contact and reduced lamp performance.
It’s also beneficial to inspect the lamp holders for any signs of wear or corrosion, as these can affect the electrical connection. If you notice any issues, replacing the holders before proceeding can save you from troubleshooting later on. Proper maintenance of these components ensures that your fluorescent lighting operates efficiently and lasts longer.
4. Install the Fluorescent Tube
Once wiring is complete, carefully insert the fluorescent tube into the lamp holders. Align the pins with the slots and rotate the lamp until it locks into place. The lamp should fit snugly without excessive force.
After installation, restore power and observe the lamp. It should light up promptly without flickering. If it doesn’t, double-check wiring connections and ballast compatibility. If the lamp still fails to illuminate, consider replacing the lamp itself, as fluorescent tubes can wear out over time and may not function properly even if the wiring is correct.
Furthermore, when installing fluorescent tubes, it’s important to handle them with care, as they can be fragile and prone to breakage. Always wear safety glasses and gloves to protect yourself from any potential glass shards in case of an accident. Additionally, disposing of old fluorescent tubes should be done in accordance with local regulations, as they contain small amounts of mercury, which is hazardous to the environment.
Common Issues and Troubleshooting Tips
Even experienced lighting contractors encounter challenges when connecting fluorescent lamps. Understanding common problems helps in quick diagnosis and resolution.
Flickering or Failure to Light
Flickering often indicates a loose connection, ballast failure, or an incompatible lamp. Start by inspecting all wire nuts and connections. If secure, test the ballast with a multimeter or swap it with a known good unit.
Starter Problems in Older Fixtures
Older fluorescent lamps use starters to initiate the lighting process. If the lamp fails to start or flickers, the starter may be faulty. Replacing the starter is a simple fix but remember that many modern fixtures no longer use starters, relying instead on electronic ballasts.
Ballast Overheating
Overheating ballasts can be a sign of improper wiring or a ballast that is not rated for the lamp type. Ensure the ballast specifications match the lamp’s wattage and type. Also, verify that the fixture has adequate ventilation.
Upgrading to Electronic Ballasts: Benefits and Installation Tips
Electronic ballasts have become the industry standard for fluorescent lighting. They offer several advantages over magnetic ballasts, including reduced energy consumption, less heat generation, and instant start capabilities.
When upgrading, ensure the new ballast is compatible with the existing lamps and fixture. Installation follows similar wiring principles but often involves fewer wires and no starter. Electronic ballasts typically have clear wiring diagrams printed on the unit, simplifying the process.
Contractors should inform clients about the benefits of electronic ballasts, such as lower maintenance costs and improved lighting quality, to promote upgrades during service visits.
Compliance with Electrical Codes and Standards
Adhering to local electrical codes is mandatory when connecting fluorescent lamps. These codes ensure safety and reliability in lighting installations.
Key considerations include using appropriately rated wiring, securing all connections in junction boxes, and grounding the fixture properly. Grounding prevents electrical shock hazards and is often overlooked in rushed installations.
Contractors should stay updated on the National Electrical Code (NEC) or local equivalents, as requirements can evolve. Proper documentation and permits may be required for commercial installations, so always verify before starting work.
Maintenance Tips for Long-Lasting Fluorescent Lighting
Proper installation is just the beginning. Regular maintenance extends the life of fluorescent lamps and ensures consistent lighting quality.
Schedule routine inspections to check for signs of wear, such as flickering, dimming, or discoloration. Replace lamps and ballasts proactively rather than waiting for failure, which can disrupt operations.
Keep fixtures clean and free from dust, as buildup can reduce light output and cause overheating. Use appropriate cleaning agents and avoid moisture exposure to electrical components.
Conclusion: Mastering Fluorescent Lamp Connections
Connecting fluorescent lamps requires a clear understanding of the components, proper wiring techniques, and adherence to safety standards. For lighting contractors, mastering these skills ensures efficient installations and satisfied clients.
Staying informed about advancements like electronic ballasts and local code changes further enhances professionalism and service quality. With the right tools, knowledge, and attention to detail, connecting fluorescent lamps becomes a straightforward task that delivers reliable, energy-efficient lighting solutions.
Illuminate Your Projects with LumenWholesale
Ready to take your lighting installations to the next level? At LumenWholesale, we provide lighting contractors with the highest quality, spec-grade fluorescent lamps and accessories at unbeatable wholesale prices. Say goodbye to local distributor markups and hello to a vast selection of top-tier lighting solutions that meet the most rigorous industry standards. Plus, with free shipping on bulk orders, you can stock up on all the lighting essentials you need without worrying about hidden fees. Elevate your lighting game and enjoy the best value in wholesale lighting by visiting LumenWholesale today.