In the ever-evolving world of lighting design, flat LED tape lights have emerged as a versatile and efficient solution for various applications. Whether used for accent lighting, task lighting, or ambient illumination, these lights offer a plethora of benefits. However, lighting contractors must be aware of common pitfalls that can compromise the quality and effectiveness of their installations. This guide aims to highlight critical mistakes to avoid when working with flat LED tape lights, ensuring both aesthetic appeal and functional performance.
Understanding Flat LED Tape Lights
Flat LED tape lights, also known as LED strip lights, are flexible circuit boards populated with light-emitting diodes (LEDs). Their slim profile makes them ideal for installation in tight spaces, while their adhesive backing allows for easy application on various surfaces. These lights come in different colors, brightness levels, and lengths, providing a wide range of options for contractors. The versatility of flat LED tape lights is one of their most appealing features, enabling creative lighting solutions that can transform any environment.
Moreover, advancements in LED technology have led to the development of smart LED tape lights that can be controlled via mobile apps or voice commands. This allows users to adjust brightness, color, and even set schedules for when the lights should turn on or off. Such features not only enhance convenience but also contribute to energy savings, making them an attractive option for both residential and commercial applications.
Applications of Flat LED Tape Lights
Flat LED tape lights can be utilized in numerous settings. Common applications include:
- Under-cabinet lighting: Enhances visibility in kitchens and workspaces.
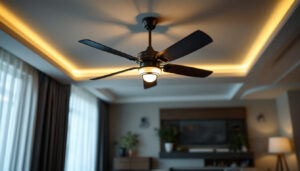
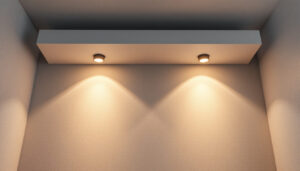
- Accent lighting: Highlights architectural features or artwork.
- Backlighting: Creates a halo effect behind televisions or mirrors.
- Decorative lighting: Adds a touch of flair to events and displays.
Understanding these applications allows contractors to better advise clients on the best use cases for flat LED tape lights, ultimately leading to more satisfied customers. For instance, in retail environments, these lights can be strategically placed to draw attention to products, creating an inviting atmosphere that encourages purchases. Additionally, in hospitality settings, they can be used to create mood lighting that enhances the overall guest experience, making spaces feel more welcoming and luxurious.
Specifications to Consider
When selecting flat LED tape lights, it is essential to consider several specifications:
- Brightness (lumens): Determines how much light the tape emits.
- Color temperature: Affects the ambiance, ranging from warm to cool tones.
- Voltage: Typically available in 12V or 24V options, influencing installation requirements.
- IP rating: Indicates the tape’s resistance to dust and moisture, crucial for outdoor or humid environments.
By understanding these specifications, contractors can make informed choices that align with their project requirements. Additionally, it is important to consider the tape’s flexibility and cut-ability, which allows for customization in length and shape, making it easier to fit into unique spaces. Some models even offer features like dimming capabilities or RGB color-changing options, giving users the ability to tailor their lighting to suit different moods or occasions.
Common Mistakes to Avoid
While flat LED tape lights offer numerous advantages, several common mistakes can hinder their performance. Awareness of these pitfalls can save time and resources during installation.
1. Improper Surface Preparation
One of the most prevalent errors is neglecting surface preparation before installing flat LED tape lights. The adhesive backing requires a clean, dry surface to adhere effectively. Dust, grease, or moisture can compromise the bond, leading to peeling or detachment over time.
To ensure optimal adhesion, contractors should clean the installation surface thoroughly. Using isopropyl alcohol can help remove any residues. Additionally, it is advisable to test the adhesion on a small section before proceeding with the entire installation. This precaution allows for adjustments if the tape does not adhere as expected, preventing future issues that could arise from a poor bond. Furthermore, considering the type of surface—be it painted, wooden, or metal—can influence the choice of adhesive, as some surfaces may require additional primers or adhesives for a secure fit.
2. Overloading Circuits
Flat LED tape lights have specific power requirements, and exceeding these can lead to overheating or failure. Contractors must calculate the total wattage of the installed tape lights and ensure that the power supply can handle the load.
Using a power supply with inadequate capacity can result in flickering lights or a complete shutdown. It is wise to choose a power supply rated for at least 20% more than the total wattage of the tape lights to accommodate any fluctuations in power demand. Additionally, it is crucial to consider the length of the tape run; longer runs may require multiple power supplies or additional wiring to maintain consistent brightness and performance. Understanding the electrical layout can prevent potential hazards and ensure a smooth installation process.
3. Inadequate Heat Management
Heat dissipation is a critical factor in the longevity of flat LED tape lights. When installed in enclosed spaces without proper ventilation, the heat generated can shorten the lifespan of the LEDs. Contractors should consider using aluminum channels or heat sinks to promote airflow and dissipate heat effectively.
Additionally, selecting tape lights with a higher wattage per foot can produce more heat. Balancing brightness requirements with heat management is essential for ensuring the durability of the installation. It’s also beneficial to monitor the ambient temperature of the installation area, as extreme heat can exacerbate the problem. Implementing timers or dimmers can help manage energy consumption and reduce heat output, contributing to a more efficient lighting solution. By prioritizing heat management, contractors can enhance the performance and lifespan of their LED installations, ensuring they remain a reliable source of illumination for years to come.
Installation Techniques
Proper installation techniques are crucial for maximizing the performance and aesthetic appeal of flat LED tape lights. Here are some best practices to consider:
1. Planning the Layout
Before installation, it is essential to plan the layout of the flat LED tape lights carefully. Consider the desired effect, the location of power sources, and any potential obstacles. Creating a detailed plan can help avoid unnecessary cuts or adjustments during installation.
Using design software or simple sketches can aid in visualizing the final look, ensuring that the lighting meets client expectations. Additionally, consider the color temperature of the LED lights, as this can significantly affect the ambiance of the space. Warmer tones create a cozy atmosphere, while cooler tones can evoke a more modern and energetic feel. It’s also beneficial to take into account the height and angle of installation, as this can influence how light is distributed throughout the room.
2. Cutting and Connecting Tape Lights
Flat LED tape lights can be cut to fit specific lengths, but it is crucial to cut them at designated points. Most tape lights have marked lines indicating where cuts can be made without damaging the circuit. Cutting at the wrong point can render the entire strip unusable.
When connecting multiple strips, use appropriate connectors or soldering techniques to ensure a secure and reliable connection. Poor connections can lead to voltage drops and inconsistent lighting. It’s also important to consider the power supply’s capacity when connecting multiple strips, as overloading can lead to overheating or failure. Using a multimeter to check voltage levels can help ensure that the installation is safe and effective. Furthermore, applying heat shrink tubing over soldered connections can provide additional protection against moisture and dust, enhancing the longevity of the installation.
3. Testing Before Finalizing Installation
Before securing the tape lights in place, it is advisable to test the installation. Power on the lights to check for any flickering or dead sections. This step allows for adjustments before the adhesive sets, saving time and effort in the long run.
Conducting a thorough test can help identify any issues early, ensuring a smoother installation process and a higher quality end result. Additionally, consider dimming options or smart controls that can enhance the functionality of your LED tape lights. Integrating these features not only adds convenience but also allows for customizable lighting scenarios that can adapt to different occasions. Lastly, remember to document the installation process, as this can be invaluable for future maintenance or upgrades, ensuring that you have a clear reference for any adjustments that may be needed down the line.
Maintenance and Troubleshooting
Flat LED tape lights require minimal maintenance, but contractors should be prepared to address common issues that may arise over time. Understanding troubleshooting techniques can enhance customer satisfaction and prolong the lifespan of the installation.
1. Identifying Flickering Lights
Flickering lights can be a sign of several issues, including insufficient power supply, poor connections, or voltage drops. Contractors should first check the power supply to ensure it meets the required specifications.
If the power supply is adequate, inspect all connections for any signs of wear or damage. Tightening loose connections or replacing faulty components can often resolve flickering issues.
2. Addressing Color Inconsistencies
Color inconsistencies can occur when using multiple strips of different batches or brands. LEDs can vary slightly in color temperature, leading to an uneven appearance. To avoid this, it is advisable to purchase all tape lights from the same manufacturer and batch.
If inconsistencies arise post-installation, consider using color filters or adjusting the brightness levels to create a more uniform look.
3. Cleaning and Maintenance Tips
While flat LED tape lights are relatively low-maintenance, occasional cleaning can enhance their performance. Dust and grime can accumulate on the surface, diminishing brightness. Using a soft, damp cloth to wipe down the lights can help maintain their clarity.
Contractors should also remind clients to avoid using harsh chemicals or abrasive materials, as these can damage the LED surface and affect performance.
Conclusion
Flat LED tape lights offer immense potential for enhancing spaces through effective lighting design. However, avoiding common mistakes is crucial for ensuring a successful installation. By understanding the specifications, employing proper installation techniques, and being prepared for maintenance, lighting contractors can deliver high-quality results that satisfy their clients.
As the demand for innovative lighting solutions continues to grow, staying informed about the best practices for flat LED tape lights will empower contractors to excel in their projects. By adhering to this guide, contractors can enhance their expertise and reputation in the lighting industry.
Get Your Premium Flat LED Tape Lights at LumenWholesale
Ready to elevate your lighting projects with the highest quality flat LED tape lights? Look no further than LumenWholesale, where we offer spec-grade lighting products at unbeatable wholesale prices. Say goodbye to local distributors and their inflated markups, and hello to superior lighting solutions that meet the highest industry standards. With LumenWholesale, bulk buying is a breeze, thanks to our hassle-free process and free shipping. Don’t compromise on quality or price. Click now to experience the best value in Wholesale Lighting at the Best Value and make your next installation a shining success.