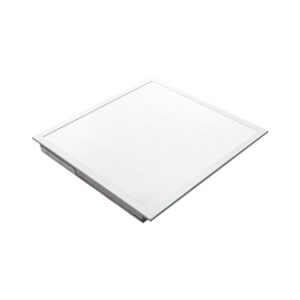
In the ever-evolving world of lighting design, recessed LED fixtures have become a staple for both residential and commercial projects. Their sleek appearance, energy efficiency, and versatility make them a preferred choice for lighting contractors. However, with the myriad of options available, it is essential for contractors to have a comprehensive checklist to ensure the successful installation and performance of recessed LED lights. This article serves as the ultimate guide for lighting contractors, detailing key considerations, installation tips, and maintenance practices.
Understanding Recessed LED Lighting
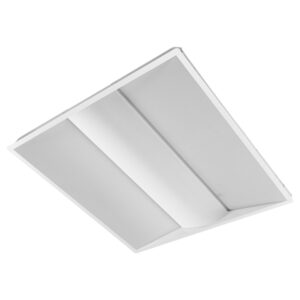
Before diving into the checklist, it is vital to understand what recessed LED lighting entails. Recessed lights, often referred to as can lights or pot lights, are fixtures installed into a hollow opening in the ceiling. They provide a clean, modern look while offering ample illumination for various spaces. The sleek design of recessed lighting allows it to blend seamlessly into the ceiling, creating an unobtrusive lighting solution that enhances the overall aesthetic of a room without the bulkiness of traditional fixtures.
Benefits of Recessed LED Lighting
Recessed LED lights come with numerous advantages that make them a popular choice among lighting contractors. Firstly, they are energy-efficient, consuming significantly less power than traditional incandescent bulbs. This efficiency translates to lower energy bills for clients and a reduced carbon footprint. In addition to energy savings, the reduced heat output of LED lights contributes to a cooler environment, which can be particularly beneficial in warmer climates or during the summer months.
Additionally, recessed LEDs have a longer lifespan, often lasting up to 25,000 hours or more. This longevity means fewer replacements and maintenance, making them a cost-effective solution in the long run. Furthermore, their ability to provide focused lighting makes them ideal for highlighting architectural features, artwork, or specific areas in a room. The versatility of recessed lighting allows it to be used in various applications, from residential settings to commercial spaces, ensuring that it meets the diverse needs of different environments.
Types of Recessed LED Fixtures
Understanding the different types of recessed LED fixtures is crucial for contractors. There are various styles available, including adjustable, fixed, and gimbal options. Adjustable fixtures allow for directional lighting, making them suitable for accent lighting. Fixed fixtures provide a more uniform light distribution, ideal for general illumination, while gimbal fixtures offer flexibility in light direction. This adaptability can be particularly useful in spaces where the layout may change over time or where specific areas require more attention.
Moreover, contractors should be aware of the different trim options, such as baffle, reflector, and shower trims, each serving distinct purposes and aesthetics. Baffle trims help to minimize glare and soften the light, making them a popular choice for living spaces. Reflector trims, on the other hand, can enhance brightness and are often used in areas where maximum light output is desired, such as kitchens or workspaces. Shower trims are designed for use in wet locations, making them ideal for bathrooms or outdoor settings. Selecting the right type of fixture and trim can significantly impact the overall lighting design and functionality, allowing contractors to create customized solutions that cater to the specific needs and preferences of their clients.
Essential Tools and Materials
Having the right tools and materials is critical for the successful installation of recessed LED lighting. Below is a checklist of essential items that every lighting contractor should have on hand.
Tools Required for Installation
- Drill and drill bits
- Wire cutters and strippers
- Voltage tester
- Measuring tape
- Level
These tools are fundamental for making precise cuts, ensuring proper wiring, and achieving a level installation. A voltage tester is particularly important for safety, allowing contractors to confirm that the power is off before beginning any electrical work. Additionally, a good-quality drill with a variety of bits can make the installation process smoother, as different materials may require specific types of bits for optimal results. Having a reliable level ensures that the fixtures are not only aesthetically pleasing but also functionally effective, as uneven installations can lead to issues with light distribution.
Materials Needed
In addition to tools, contractors should stock up on essential materials, including:
- Recessed LED fixtures
- Electrical wiring
- Wire nuts
- Mounting brackets
- Insulation support clips
Choosing high-quality fixtures and materials can significantly affect the installation’s longevity and performance. It is advisable to source products from reputable manufacturers to ensure reliability and compliance with industry standards. Furthermore, considering the energy efficiency ratings of the LED fixtures can lead to long-term savings on electricity bills, making it a wise investment for both contractors and homeowners. Additionally, having a variety of mounting brackets and insulation support clips on hand can accommodate different ceiling types and insulation materials, ensuring a versatile approach to any installation scenario. This attention to detail not only enhances the quality of the work but also builds trust with clients who appreciate a thorough and professional installation process.
Installation Process
The installation of recessed LED lighting requires careful planning and execution. Following a systematic approach can help ensure a successful outcome. Below is a step-by-step guide for lighting contractors.
Planning the Layout
Before any physical work begins, planning the layout is crucial. Contractors should consider the purpose of the lighting, the size of the room, and the desired ambiance. A well-thought-out layout will help determine the number of fixtures needed and their placement.
It is also essential to account for the ceiling height and any obstructions, such as ductwork or plumbing, that may affect the installation. Using a measuring tape, mark the proposed locations on the ceiling to visualize the final arrangement.
Cutting the Ceiling Openings
Once the layout is finalized, the next step is to cut the openings for the fixtures. Using a drywall saw, carefully cut along the marked lines. It is advisable to wear safety goggles and a dust mask to protect against debris.
After cutting, check for any electrical wiring or plumbing that may be present before proceeding. Ensuring that the area is clear will help avoid any potential hazards during installation.
Wiring the Fixtures
With the openings cut, contractors can begin wiring the fixtures. First, run the electrical wiring from the power source to each fixture location. Use wire nuts to connect the fixture wires to the electrical supply, ensuring that all connections are secure.
It is essential to follow local electrical codes and regulations during this process. If unsure, consulting with a licensed electrician can provide additional assurance of compliance and safety.
Testing and Adjustments
After installation, testing the recessed LED lights is a critical step before finalizing the project. This phase ensures that everything is functioning correctly and allows for any necessary adjustments.
Powering Up the Fixtures
Once all fixtures are wired, restore power to the circuit and turn on the lights. Observe each fixture to ensure they illuminate properly. If any lights do not turn on, it may indicate a wiring issue or a faulty fixture.
Contractors should also check for flickering lights, which could signal an issue with the connection or the fixture itself. Addressing these problems promptly will enhance customer satisfaction and prevent future complaints.
Adjusting Light Direction and Trim
If adjustable fixtures were installed, take the time to direct the light where it is most needed. This could involve angling the fixtures to highlight specific areas or features in the room. For fixed fixtures, ensure that the trim is flush with the ceiling for a polished look.
Making these adjustments not only improves functionality but also enhances the overall aesthetic appeal of the lighting design.
Maintenance and Troubleshooting
To ensure the longevity and performance of recessed LED lighting, regular maintenance is essential. Contractors should educate clients on how to care for their fixtures and troubleshoot common issues.
Regular Maintenance Practices
Regular cleaning of recessed LED fixtures is vital to maintain their brightness and appearance. Dust and debris can accumulate over time, diminishing the quality of light. A soft, damp cloth can be used to wipe down the fixtures, while a vacuum with a brush attachment can help remove dust from the surrounding area.
Additionally, checking the fixtures periodically for any signs of wear or damage can prevent larger issues down the line. If a fixture is flickering or not functioning, it may need to be replaced or repaired promptly.
Troubleshooting Common Issues
Even with proper installation and maintenance, issues may arise with recessed LED lighting. Common problems include flickering lights, dimming, or complete failure to illuminate. Understanding the potential causes can help contractors provide effective solutions.
Flickering lights may indicate a loose connection or an incompatible dimmer switch. In such cases, checking the wiring and ensuring that the dimmer is rated for LED use can resolve the issue. For dimming problems, it may be necessary to replace the dimmer switch or adjust the settings.
Conclusion
Recessed LED lighting is an excellent choice for modern lighting solutions, offering energy efficiency, versatility, and aesthetic appeal. For lighting contractors, having a comprehensive checklist is crucial for ensuring successful installations and satisfied clients.
From understanding the types of fixtures to mastering the installation process and maintenance practices, this guide provides valuable insights for contractors looking to excel in their field. By following these steps, contractors can enhance their reputation and deliver high-quality lighting solutions that meet their clients’ needs.
In a competitive market, staying informed and prepared is key to success. With this ultimate checklist in hand, lighting contractors can confidently tackle any recessed LED project, ensuring both functionality and style in their designs.
Get Your Premium Lighting Supplies at LumenWholesale
Ready to elevate your lighting projects with the efficiency and style of recessed LED lighting? Look no further than LumenWholesale for all your lighting needs. We provide contractors with high-quality, spec-grade lighting products at unbeatable wholesale prices, ensuring you get the best value for your investment. With our extensive selection that meets the highest industry standards, you can trust that your installations will shine with reliability and performance. Plus, with free shipping on bulk orders, you can stock up on superior lighting products without the worry of hidden fees. Don’t compromise on quality or price. Visit LumenWholesale now to discover the perfect blend of quality, affordability, and convenience for your next project.