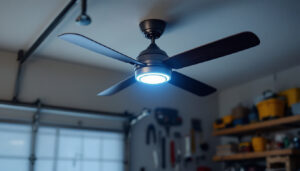
Recessed lighting has become a staple in modern interior design, offering a sleek and unobtrusive way to illuminate spaces. For lighting contractors, understanding how to efficiently change bulbs in these fixtures is crucial. This article delves into the essentials of changing bulbs in recessed lights, providing valuable insights for contractors looking to enhance their service offerings.
Understanding Recessed Lighting Fixtures
Before diving into the specifics of bulb replacement, it is essential to understand the components of recessed lighting fixtures. These fixtures, often referred to as can lights or downlights, are installed into the ceiling, providing a clean and modern look. They can be used for general, task, or accent lighting, depending on the design and layout of the space. Their versatility makes them suitable for various settings, from residential homes to commercial spaces, enhancing both functionality and ambiance.
Components of Recessed Lights
A typical recessed lighting fixture consists of several key components: the housing, trim, and bulb. The housing is the part that is installed into the ceiling, while the trim is the visible part that holds the bulb and completes the aesthetic. Understanding these components will help contractors identify the correct bulbs and tools needed for replacement. Additionally, the choice of trim can significantly affect the light’s distribution and overall appearance; options range from baffle trims that reduce glare to reflector trims that enhance brightness. This variety allows for customization based on the specific lighting needs and style preferences of the space.
Types of Bulbs Used in Recessed Lighting
Recessed lights can accommodate various types of bulbs, including incandescent, halogen, compact fluorescent (CFL), and light-emitting diode (LED) bulbs. Each type has its own advantages and disadvantages, which can influence the choice of bulb for a specific application. For instance, LED bulbs are energy-efficient and have a longer lifespan, making them a popular choice among homeowners and contractors alike. Furthermore, the color temperature of the bulbs can greatly impact the mood of a room; warmer tones create a cozy atmosphere, while cooler tones can make a space feel more vibrant and energetic. This aspect is particularly important in areas like kitchens and living rooms, where the right lighting can enhance both functionality and comfort.
Tools and Safety Precautions
Changing bulbs in recessed lights requires specific tools and safety precautions to ensure a smooth and safe process. Contractors should be well-equipped and aware of the necessary steps to take before starting the job.
Essential Tools for Bulb Replacement
While changing a bulb may seem straightforward, having the right tools can make the task easier and more efficient. Essential tools include a ladder or step stool for reaching high ceilings, a voltage tester to ensure the fixture is not live, and a soft cloth or gloves to handle the bulbs safely. Additionally, a screwdriver may be needed to remove the trim or housing in certain fixtures. A flashlight can also be beneficial, especially in dimly lit areas, allowing for better visibility while working. For those who frequently work with recessed lighting, investing in a bulb changer tool can save time and effort, as it allows for easy removal and replacement of bulbs without the need for a ladder.
Safety First: Precautions to Consider
Safety should always be the top priority when working with electrical fixtures. Before changing a bulb, contractors should turn off the power at the circuit breaker to avoid any risk of electric shock. Using a voltage tester to confirm that the power is off is a prudent step. Furthermore, wearing gloves can prevent oils from fingers from transferring to the bulb, which can cause overheating and reduce the lifespan of the bulb. It’s also advisable to wear safety goggles to protect your eyes from any accidental glass shards in case a bulb breaks during removal. Additionally, ensuring that the work area is clear of clutter and that the ladder is stable can significantly reduce the risk of accidents while working at heights. Always be mindful of the surrounding environment, as overhead fixtures may be located near ceiling fans or other obstacles that could pose a hazard during the replacement process.
Step-by-Step Guide to Changing Bulbs
With the right tools and safety precautions in place, contractors can follow a systematic approach to changing bulbs in recessed lights. This step-by-step guide outlines the process to ensure efficiency and effectiveness.
Step 1: Turn Off the Power
Before beginning any work, the first step is to turn off the power to the recessed lighting fixture at the circuit breaker. This simple action can prevent accidents and ensure a safe working environment. It is advisable to label the circuit breaker to avoid confusion in the future. Additionally, using a voltage tester can provide extra assurance that the power is indeed off, adding an extra layer of safety before proceeding with the task.
Step 2: Remove the Trim
In many recessed light fixtures, the trim can be removed to access the bulb. Depending on the design, it may simply pull down or require a screwdriver to detach. Contractors should be gentle during this process to avoid damaging the trim or the fixture itself. It’s also beneficial to inspect the trim for any signs of wear or damage, as this could affect both the functionality of the light and the overall appearance of the ceiling. If the trim is damaged, it may need to be replaced to ensure a proper fit and finish.
Step 3: Replace the Bulb
Once the trim is removed, the bulb can be accessed. If it is a screw-in bulb, it can be turned counterclockwise to remove it. For pin-based bulbs, gently pull the bulb straight out. It is important to check the wattage and type of the bulb before inserting a new one to ensure compatibility with the fixture. Furthermore, considering the use of energy-efficient LED bulbs can not only reduce electricity costs but also extend the lifespan of the lighting fixture, making it a smart choice for both contractors and homeowners alike.
Step 4: Reattach the Trim
After the new bulb is in place, the trim should be reattached securely. Ensure that it sits flush against the ceiling to maintain the aesthetic appeal of the recessed light. This step may also involve tightening screws or clips, depending on the fixture design. It’s worth taking a moment to clean the trim and surrounding area before reattaching, as dust and debris can accumulate over time, detracting from the overall look of the lighting installation.
Step 5: Restore Power and Test the Light
Once everything is reassembled, the final step is to restore power at the circuit breaker and test the light. This is a crucial moment to ensure that the bulb is functioning correctly. If the light does not turn on, it may be necessary to double-check connections or consider that the new bulb may be faulty. Additionally, if the light flickers or exhibits unusual behavior, it may indicate a deeper electrical issue that should be addressed by a qualified electrician to ensure safety and proper functionality.
Common Challenges and Solutions
While changing bulbs in recessed lights is generally a straightforward task, contractors may encounter common challenges. Being prepared to address these issues can save time and enhance service quality.
Dealing with Stuck Bulbs
Occasionally, bulbs can become stuck in the socket due to heat or age. If a bulb is difficult to remove, contractors can use a rubber glove for a better grip or a pair of pliers, taking care not to apply too much force that could damage the fixture. In extreme cases, using a bulb extractor tool may be necessary.
Identifying Electrical Issues
If a new bulb does not work after installation, it may indicate an underlying electrical issue. Contractors should check the socket for damage, ensure that the power is restored, and verify that the correct bulb type is being used. If problems persist, further investigation into the wiring or fixture may be required.
Best Practices for Lighting Contractors
To provide the best service to clients, lighting contractors should adopt best practices when changing bulbs in recessed lights. These practices not only enhance efficiency but also improve customer satisfaction.
Maintain a Clean Work Environment
Keeping the work area clean and organized is essential for any contractor. This includes removing any debris or old bulbs from the site and ensuring that tools are put away after use. A tidy workspace reflects professionalism and can help prevent accidents.
Educate Clients on Bulb Options
Contractors should take the opportunity to educate clients about the different types of bulbs available for recessed lighting. Discussing the benefits of energy-efficient options, such as LED bulbs, can help clients make informed decisions that align with their preferences and budget.
Offer Regular Maintenance Services
In addition to bulb replacement, offering regular maintenance services can be a valuable addition to a contractor’s service portfolio. This can include checking the condition of fixtures, cleaning lenses, and ensuring that all electrical components are functioning properly. Regular maintenance can extend the lifespan of the lighting system and enhance client satisfaction.
Conclusion
Changing bulbs in recessed lights is a fundamental task for lighting contractors that requires knowledge, skill, and attention to detail. By understanding the components of recessed fixtures, utilizing the right tools, and following a systematic approach, contractors can efficiently replace bulbs while ensuring safety and quality service. Additionally, adopting best practices and being prepared for common challenges can further enhance the contractor-client relationship and lead to successful project outcomes.
Ultimately, the ability to change bulbs in recessed lights effectively not only showcases a contractor’s expertise but also contributes to the overall satisfaction of clients. As the demand for recessed lighting continues to grow, mastering this essential skill will undoubtedly be beneficial for any lighting contractor.
Get Your Lighting Supplies at LumenWholesale
Ready to take your lighting projects to the next level? LumenWholesale is here to support you with premium, spec-grade lighting products at unbeatable wholesale prices. Say goodbye to local distributor markups and hello to a vast selection of reliable, high-performance lighting that meets the highest industry standards. With free shipping on bulk orders, you can stock up on everything you need for efficient bulb replacements and more, ensuring every recessed lighting project shines bright. Wholesale Lighting at the Best Value is just a click away. Elevate your service offerings with LumenWholesale today!