When it comes to installing light fan fixtures, lighting contractors face a myriad of tasks that require careful planning and execution. This checklist serves as a comprehensive guide to ensure that every aspect of the installation process is covered, from preparation to final adjustments. By following this structured approach, contractors can enhance their efficiency and deliver high-quality results to their clients.
Understanding the Basics of Light Fan Fixtures
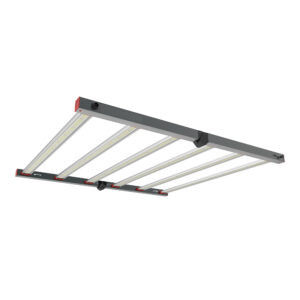
Light fan fixtures combine the functionality of a ceiling fan with the illumination of light fixtures, providing both comfort and aesthetics. These versatile units can be installed in various settings, including residential homes, commercial spaces, and outdoor areas. Understanding the fundamental components and types of light fan fixtures is crucial for any lighting contractor. The integration of light and air circulation not only enhances the ambiance of a room but also contributes to energy efficiency, making these fixtures a popular choice among homeowners and designers alike.
In addition to their practical benefits, light fan fixtures come in a wide variety of styles and finishes, allowing them to complement any interior design theme. From sleek modern designs with minimalist features to ornate vintage styles that evoke a sense of nostalgia, there is a light fan fixture to suit every taste. Furthermore, many contemporary models are equipped with smart technology, enabling users to control lighting and fan speed via mobile apps or voice commands, adding an extra layer of convenience to their operation.
Types of Light Fan Fixtures
There are several types of light fan fixtures available on the market, each designed to meet specific needs. The most common types include:
- ceiling fans with Integrated Lights: These fixtures feature built-in lighting, making them ideal for rooms where space is limited. They often come with energy-efficient LED bulbs that not only reduce electricity costs but also have a longer lifespan compared to traditional bulbs.
- Flush Mount Fans: Perfect for rooms with low ceilings, flush mount fans sit directly against the ceiling. Their compact design ensures that they do not obstruct movement, making them a safe choice for areas like hallways and bedrooms.
- Downrod Fans: These fans hang from the ceiling using a downrod, allowing for better air circulation in larger spaces. They are particularly effective in rooms with high ceilings, where the downrod can help maximize airflow and cooling efficiency.
Key Components of Light Fan Fixtures
Each light fan fixture consists of several essential components that contribute to its functionality:
- Motor: The motor powers the fan blades and is a critical component for performance. High-quality motors are designed for quiet operation and durability, ensuring that the fan can operate smoothly without excessive noise.
- Blades: Fan blades come in various sizes and materials, affecting airflow and aesthetics. Wooden blades offer a classic look, while metal or plastic blades can provide a more contemporary feel. The pitch of the blades also plays a significant role in determining the volume of air moved.
- Light Kit: The light kit may include bulbs, shades, and other accessories to enhance illumination. Some kits are designed to be adjustable, allowing users to change the direction and intensity of the light to suit different activities, whether it’s reading, entertaining, or simply creating a cozy atmosphere.
Additionally, many light fan fixtures now come with remote controls or wall-mounted switches that allow users to easily adjust settings from anywhere in the room. This feature is particularly advantageous for larger spaces where reaching the pull chain may be inconvenient. Moreover, the ability to dim the lights or change fan speeds adds to the versatility of these fixtures, catering to various moods and occasions. As energy efficiency continues to be a priority for many consumers, selecting light fan fixtures with Energy Star ratings can further enhance sustainability efforts while maintaining stylish design.
Preparation for Installation
Before diving into the installation process, thorough preparation is essential. This phase involves understanding the project requirements, gathering necessary tools, and ensuring compliance with safety standards. Proper preparation not only saves time but also helps to avoid potential issues that could arise during the installation.
Site Assessment
Conducting a site assessment is the first step in the preparation phase. This involves evaluating the space where the light fan fixture will be installed. Key factors to consider include:
- The height of the ceiling and the type of mounting required.
- Existing electrical wiring and whether it meets code requirements.
- Room dimensions to determine the appropriate size of the fan.
Additionally, it’s important to assess the overall layout of the room. Consider the placement of furniture and other fixtures, as these can influence the fan’s effectiveness and airflow. If the room has any obstructions, such as beams or ductwork, these should also be noted, as they may affect the installation process or the fan’s performance. Furthermore, evaluating the room’s aesthetic can help in selecting a fan that complements the existing decor.
Gathering Tools and Materials
Having the right tools and materials on hand can significantly streamline the installation process. Essential tools include:
- Drill and drill bits
- Screwdrivers (flathead and Phillips)
- Wire strippers
- Voltage tester
- Level
Additionally, ensure that all necessary materials, such as mounting brackets, screws, and electrical wire, are available before starting the installation. It can also be beneficial to have a step ladder on hand, especially for high ceilings, to ensure safe access to the installation area. If you’re installing a fan with a light kit, check that you have the appropriate bulbs and any additional wiring that may be required. Preparing a checklist of all tools and materials can help ensure nothing is overlooked, making the installation process more efficient and less stressful.
Installation Process
The installation process can be broken down into several key steps. Each step must be executed with precision to ensure safety and functionality.
Turning Off Power
Safety should always be the top priority. Before beginning any installation, turn off the power at the circuit breaker to prevent electrical shock. Use a voltage tester to confirm that the power is off before proceeding.
Mounting the Fixture
Once safety measures are in place, the next step is to mount the fixture. This typically involves the following sub-steps:
- Install the Mounting Bracket: Secure the mounting bracket to the ceiling using appropriate screws and anchors.
- Attach the Fan Motor: Connect the fan motor to the mounting bracket, ensuring it is securely fastened.
- Install the Blades: Attach the fan blades to the motor, following the manufacturer’s instructions for proper alignment.
Electrical Connections
Connecting the electrical wiring is a critical step that requires attention to detail. Follow these guidelines:
- Connect the black (or red) wire from the fan to the black wire from the ceiling.
- Connect the white wire from the fan to the white wire from the ceiling.
- Secure the ground wire to the grounding screw on the mounting bracket.
Once the connections are made, carefully tuck the wires into the electrical box and secure the cover plate.
Final Adjustments and Testing
After the installation is complete, it’s time for final adjustments and testing to ensure everything is functioning correctly.
Testing the Fixture
Before restoring power, double-check all connections and ensure that the fixture is securely mounted. Once confirmed, turn the power back on at the circuit breaker. Test the light and fan functions separately to ensure they operate smoothly. If any issues arise, troubleshoot the connections and settings as needed.
Adjusting Fan Speed and Direction
Most light fan fixtures come with adjustable speed settings and directional controls. Familiarize yourself with these features to guide clients on how to use them effectively. Typically, fans should rotate counterclockwise in summer for a cooling effect and clockwise in winter to circulate warm air.
Maintenance Tips for Light Fan Fixtures
Proper maintenance is essential for the longevity and performance of light fan fixtures. Providing clients with maintenance tips can enhance their satisfaction and prolong the life of the installation.
Regular Cleaning
Dust and debris can accumulate on fan blades and light fixtures, affecting performance and aesthetics. Advise clients to clean the fan blades and light covers regularly using a soft cloth or a duster. For more thorough cleaning, a damp cloth can be used, but ensure the fan is turned off and unplugged during the process.
Checking Electrical Connections
Over time, electrical connections may loosen, leading to performance issues. Encourage clients to periodically check the connections and tighten any loose screws. If they notice flickering lights or unusual noises, it may be time to consult a professional.
Common Issues and Troubleshooting
Even with careful installation, issues may arise with light fan fixtures. Being prepared to troubleshoot common problems can save time and enhance client satisfaction.
Fan Not Working
If the fan does not operate after installation, check the following:
- Ensure the power is turned on at the circuit breaker.
- Confirm that all electrical connections are secure.
- Test the remote control or wall switch to ensure it is functioning properly.
Light Flickering
Flickering lights can be caused by several factors. To troubleshoot:
- Check the light bulbs to ensure they are securely installed.
- Inspect the wiring connections for any signs of damage or looseness.
- Consider replacing the bulbs with compatible options if flickering persists.
Conclusion
Installing light fan fixtures requires a blend of technical knowledge and practical skills. By following this comprehensive checklist, lighting contractors can ensure a smooth installation process that meets safety standards and client expectations. From understanding the basics to troubleshooting common issues, this guide serves as a valuable resource for contractors looking to enhance their service offerings. With proper preparation, execution, and maintenance, light fan fixtures can provide lasting comfort and style to any space.
Get Your Premium Light Fan Fixtures at LumenWholesale
Ready to elevate your lighting installations with the best products on the market? Look no further than LumenWholesale for all your light fan fixture needs. Our extensive selection of spec-grade lighting products ensures you have access to high-quality, reliable options that will impress your clients and enhance any space. With unbeatable wholesale prices and the convenience of free shipping on bulk orders, you can trust that you’re getting the best value without any hidden fees. Make your next project shine with the perfect blend of quality, affordability, and convenience. Visit LumenWholesale today and experience wholesale lighting at the best value.