In the ever-evolving world of commercial lighting, the transition from traditional T12 fluorescent tubes to energy-efficient LED alternatives has become a critical focus for lighting professionals. This conversion not only enhances energy efficiency but also improves lighting quality and reduces maintenance costs. However, undertaking a T12 LED conversion project requires careful planning and execution. This article provides a comprehensive checklist to guide lighting contractors through the process, ensuring a successful transition.
Understanding the Benefits of T12 LED Conversion
Before diving into the checklist, it’s essential to grasp the myriad benefits that come with converting T12 systems to LED. The advantages extend beyond mere energy savings, impacting both operational costs and environmental sustainability.
Energy Efficiency
One of the most compelling reasons for conversion is energy efficiency. LED lights consume significantly less power compared to T12 fluorescents. This reduction in energy consumption leads to lower utility bills, making it a financially sound decision for businesses.
Moreover, LEDs have a longer lifespan, often lasting up to 25,000 hours or more. This longevity means fewer replacements, which translates to lower labor costs and reduced waste in landfills. The environmental impact is significant; by reducing the frequency of bulb replacements, businesses can minimize the carbon footprint associated with manufacturing, transporting, and disposing of lighting products.
Improved Lighting Quality
LEDs provide superior lighting quality, offering better color rendering and brightness. This enhancement can create a more pleasant and productive environment for employees and customers alike. The ability to choose from various color temperatures also allows for customization that meets specific needs.
Additionally, LEDs emit less heat compared to traditional fluorescent lights, contributing to a more comfortable atmosphere, especially in enclosed spaces. This reduction in heat output not only enhances comfort but also decreases the load on air conditioning systems, further driving down energy costs. Furthermore, the instant-on feature of LEDs eliminates the flickering and warm-up time associated with T12 fluorescents, ensuring consistent and immediate illumination, which is particularly beneficial in work environments where safety and visibility are paramount.
Another noteworthy aspect of LED lighting is its versatility. LEDs can be easily integrated into smart lighting systems, allowing for advanced features such as dimming, scheduling, and remote control. This adaptability not only enhances user experience but also promotes energy conservation by allowing users to tailor lighting levels to their specific needs throughout the day.
Essential Checklist for T12 LED Conversion
With a clear understanding of the benefits, it’s time to delve into the essential checklist that lighting professionals should follow when converting T12 fixtures to LED.
1. Assess Existing Fixtures
The first step in any conversion project is to conduct a thorough assessment of the existing T12 fixtures. This includes evaluating the condition of the fixtures, the type of ballast used, and the overall layout of the lighting system.
Take note of the wattage of the current T12 tubes, as this will help determine the appropriate LED replacement. Additionally, inspect for any signs of wear or damage that may need addressing before the conversion. Understanding the layout is also crucial; consider how the existing lighting interacts with the space, including shadows and hotspots, to ensure that the new LED setup will provide uniform illumination.
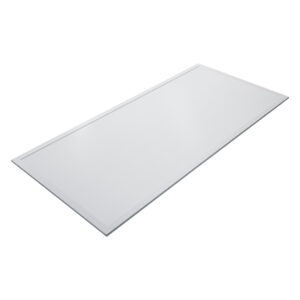
2. Choose the Right LED Replacement
Selecting the right LED replacement is crucial for achieving optimal performance. Consider the following factors when making your choice:
- Wattage: Ensure the wattage of the LED replacement is compatible with the existing fixture and provides sufficient light output.
- Color Temperature: Choose a color temperature that aligns with the desired ambiance of the space. Common options include warm white (3000K), neutral white (4000K), and cool white (5000K).
- Ballast Compatibility: Determine if the existing ballast is compatible with LED technology. Some LEDs are designed to work with existing ballasts, while others require a direct wire installation.
In addition to these factors, consider the beam angle of the LED tubes. A wider beam angle may be preferable in large spaces to ensure even light distribution, while a narrower beam angle might be suitable for focused tasks. Furthermore, look into the lumen output of the LED replacements to ensure they meet or exceed the illumination levels provided by the T12 tubes.
3. Evaluate Cost and ROI
Before proceeding with the conversion, conduct a cost analysis to evaluate the return on investment (ROI). Consider the initial costs of purchasing LED fixtures, installation expenses, and potential rebates or incentives available for energy-efficient upgrades.
Calculate the expected energy savings and reduced maintenance costs over time to determine the payback period. This financial assessment will help justify the investment to stakeholders and clients. Additionally, factor in the longevity of LED technology, which typically lasts much longer than traditional T12 tubes, leading to fewer replacements and lower overall lifecycle costs. The reduced heat output of LEDs also contributes to energy savings by decreasing the load on HVAC systems, further enhancing the financial benefits of the conversion.
Installation Considerations
Once the planning phase is complete, the next step is installation. Proper installation is critical to ensure the longevity and performance of the new LED system.
1. Safety First
Safety should be the top priority during installation. Ensure all electrical systems are de-energized before beginning work. Use appropriate personal protective equipment (PPE) and follow all local electrical codes and regulations.
Additionally, consider the use of proper lifting equipment when working with high ceilings or hard-to-reach fixtures to prevent accidents and injuries. It’s also wise to have a first aid kit on hand and ensure all team members are familiar with emergency procedures in case of an accident. Regular safety briefings can help reinforce the importance of these practices and keep everyone informed about potential hazards associated with the installation process.
2. Remove Existing Fixtures
Carefully remove the existing T12 fixtures, taking care to disconnect the electrical wiring and ballast. Dispose of the old fixtures in accordance with local regulations, especially if they contain hazardous materials.
Document the removal process, as this can be helpful for future reference or warranty claims related to the new LED installation. Additionally, take note of the layout and positioning of the old fixtures, as this can provide valuable insights into optimizing the placement of the new LED fixtures for maximum efficiency and light distribution. Consider conducting a light level measurement before and after the installation to assess the improvements in illumination and energy savings.
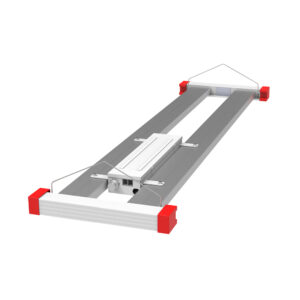
3. Install LED Fixtures
When installing the new LED fixtures, follow the manufacturer’s instructions closely. If direct wiring is required, ensure that all connections are secure and that the wiring is properly insulated.
For retrofitting existing fixtures, make sure to install any necessary adapters or components that facilitate the conversion. Test each fixture after installation to confirm proper functionality. It’s also beneficial to familiarize yourself with the specific features of the LED fixtures, such as dimming capabilities or color temperature adjustments, which can enhance the overall ambiance of the space. Additionally, consider the potential for smart technology integration, allowing for remote control and automation of lighting, which can further improve energy efficiency and user convenience.
Post-Installation Evaluation
After installation, it’s essential to evaluate the performance of the new LED system to ensure it meets the expected standards.
1. Conduct Lighting Tests
Perform lighting tests to assess the quality and distribution of light throughout the space. This includes checking for uniformity, brightness levels, and color rendering. Adjustments may be necessary to optimize performance.
Utilizing a light meter can provide quantitative data on light levels, helping to confirm that the new system meets the required specifications.
2. Gather Feedback
Solicit feedback from occupants regarding the new lighting. Their insights can provide valuable information about the effectiveness of the installation and any areas that may require adjustments.
Consider conducting a follow-up survey after a few weeks to gather more comprehensive feedback on the lighting experience.
3. Monitor Energy Savings
Track energy usage over time to verify the anticipated savings. Comparing utility bills before and after the conversion can help demonstrate the financial benefits of the project.
Monitoring systems can also be installed to provide real-time data on energy consumption, further validating the success of the conversion.
Maintenance and Longevity
Post-installation, maintaining the LED system is vital to ensure its longevity and consistent performance. Proper maintenance practices can extend the life of the fixtures and keep energy costs low.
1. Regular Inspections
Schedule regular inspections of the lighting system to check for any signs of wear, damage, or malfunction. This proactive approach can help identify issues before they become significant problems.
Inspect the fixtures for dust accumulation, which can reduce light output, and clean them as necessary to maintain optimal performance.
2. Update Lighting Controls
Consider implementing advanced lighting controls, such as occupancy sensors and dimmers, to further enhance energy efficiency. These controls can adjust lighting levels based on occupancy and natural light availability, contributing to additional energy savings.
Regularly review and update these systems to ensure they are functioning correctly and meeting the needs of the space.
3. Educate Staff
Educating staff about the new lighting system is crucial for maintaining its effectiveness. Provide training on how to operate any new controls and the importance of reporting any issues promptly.
Encouraging a culture of awareness around lighting can lead to better maintenance practices and prolonged fixture life.
Conclusion
The transition from T12 fluorescent tubes to LED lighting represents a significant opportunity for lighting professionals to enhance energy efficiency, improve lighting quality, and reduce operational costs. By following this essential checklist, contractors can navigate the complexities of T12 LED conversion with confidence.
From assessing existing fixtures to ensuring proper installation and maintenance, each step plays a vital role in the success of the project. As the demand for sustainable lighting solutions continues to grow, staying informed and prepared will position lighting professionals as leaders in the industry.
Embracing the shift to LED technology not only benefits clients but also contributes to a greener future, making it a win-win for all involved.
Start Your T12 LED Conversion with LumenWholesale
Ready to take the next step in your T12 LED conversion journey? At LumenWholesale, we provide lighting professionals like you with the highest quality, spec-grade LED lighting products at unbeatable wholesale prices. Say goodbye to local distributor markups and hello to a vast selection of reliable lighting solutions that meet the strictest industry standards. With free shipping on bulk orders, you can stock up on premium lighting without worrying about hidden fees or compromises. Elevate your lighting projects with the perfect combination of quality, affordability, and convenience. Visit LumenWholesale today and discover the best value in wholesale lighting.