Why Removing Ballasts Matters for LED Lighting Projects
Lighting contractors frequently encounter ballasts when upgrading or installing LED lighting systems. Ballasts, which regulate current in fluorescent and HID fixtures, become redundant with LED technology. Removing them not only simplifies the electrical setup but also enhances system efficiency and reliability.
Many contractors hesitate to remove ballasts due to concerns about complexity or potential code violations. However, understanding the benefits and best practices can transform ballast removal from a daunting task into a straightforward step that saves time and money.
Energy Efficiency and Cost Savings
Ballasts consume power themselves, often accounting for 5-10% of a fixture’s total energy use. When LEDs are retrofitted without removing the ballast, the ballast still draws power even if it’s not needed, reducing the overall energy savings. Eliminating ballasts ensures that the LED system operates at peak efficiency, lowering energy bills and improving return on investment for clients.
Moreover, the shift to LED lighting not only provides immediate savings but also contributes to long-term financial benefits. LEDs have a significantly longer lifespan compared to traditional lighting options, often lasting up to 25,000 hours or more. This longevity means fewer replacements and reduced labor costs, which can be a substantial advantage for businesses looking to minimize operational expenses. Additionally, many utility companies offer rebates or incentives for upgrading to energy-efficient lighting, further enhancing the financial appeal of removing ballasts and fully transitioning to LED technology.
Reducing Maintenance and Failure Points
Ballasts are mechanical and electrical components prone to failure over time. When left in place, they can cause flickering, noise, or complete fixture failure, complicating troubleshooting. Removing ballasts reduces the number of components that can fail, resulting in a more reliable lighting system with fewer callbacks and maintenance visits.
Furthermore, by streamlining the lighting system, contractors can also improve the overall aesthetic and functionality of the space. With fewer components, the design becomes cleaner and less cluttered, allowing for more innovative lighting layouts. This can be particularly beneficial in commercial settings where ambiance and lighting quality are crucial for customer experience. In addition, the reduced risk of failure translates into enhanced safety; fewer electrical components mean less chance of overheating or electrical hazards, creating a safer environment for both employees and customers alike.
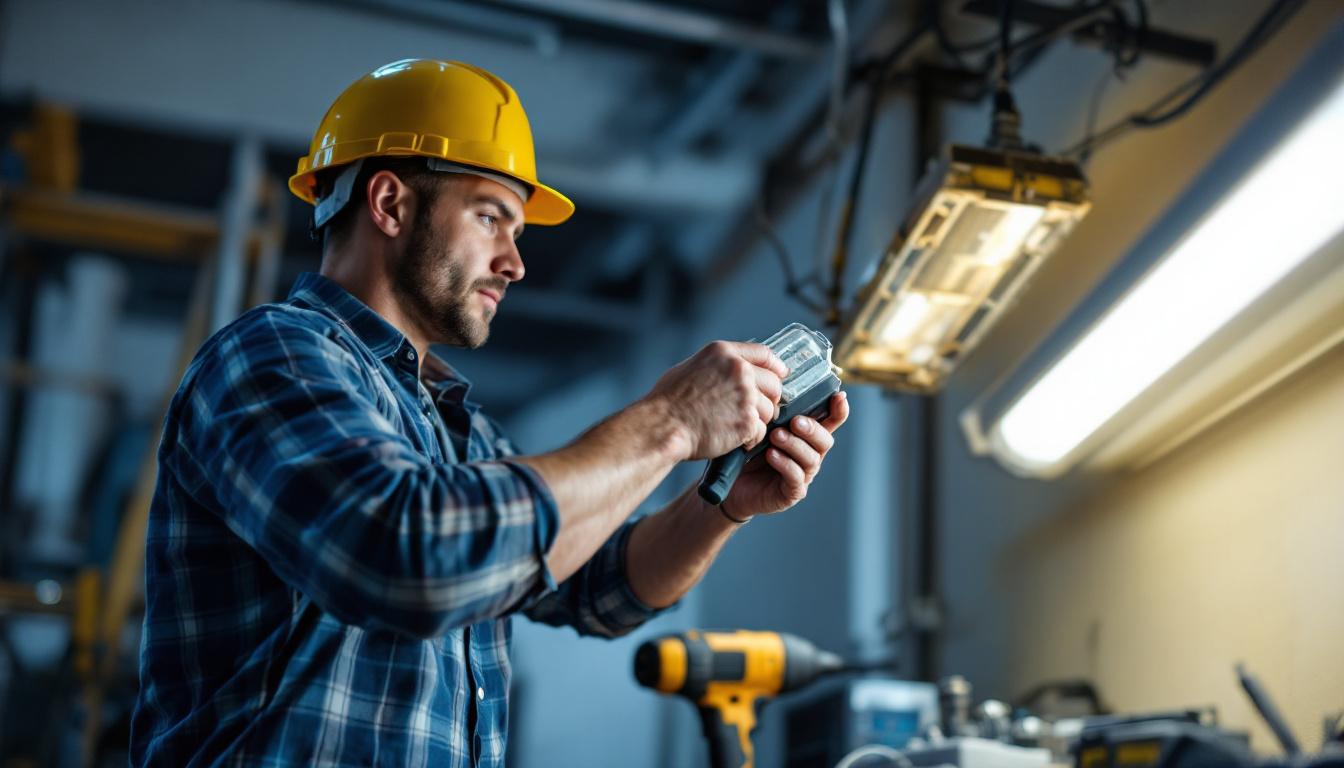
Understanding the Ballast Removal Process
Removing ballasts might seem intimidating, but with the right approach, it becomes a routine part of LED retrofits. The key is to follow a systematic process that ensures safety, code compliance, and optimal performance.
Assessing the Existing Fixture
Before starting, inspect the fixture to identify the type of ballast installed—magnetic or electronic—as removal steps differ slightly. Also, check the fixture’s wiring configuration and whether it’s compatible with direct LED replacement lamps or requires rewiring for LED modules.
Some fixtures have integrated ballasts that require more extensive modification, while others allow for easy ballast bypass. Understanding the fixture’s design helps in planning the removal and rewiring strategy. Additionally, take note of the fixture’s age and condition; older fixtures may have deteriorated components that could complicate the removal process. Documenting the existing setup can also be beneficial for troubleshooting any issues that may arise during the retrofit.
Safety Precautions and Power Isolation
Always ensure the power is completely turned off at the circuit breaker before beginning work. Use a voltage tester to confirm no current is present. Wearing insulated gloves and following lockout/tagout procedures adds an extra layer of safety. It’s also wise to use safety goggles to protect your eyes from any debris that may fall during the removal process. Having a first aid kit nearby is a good practice, just in case of minor accidents. Remember, safety should always be your top priority when working with electrical components.
Step-by-Step Ballast Removal
Start by disconnecting the fixture wiring from the ballast terminals. Remove the ballast from its mounting bracket carefully, avoiding damage to the fixture housing. Cap off any unused wires with wire nuts or heat shrink tubing to prevent accidental contact.
In many cases, the ballast wires can be removed entirely, and the fixture rewired to supply line voltage directly to the LED driver or LED lamp holder. This rewiring often involves connecting the line and neutral wires directly to the lamp sockets, bypassing the ballast circuit. It’s important to ensure that the connections are secure and insulated to avoid any electrical hazards. After rewiring, double-check all connections and ensure that the new LED components are compatible with the existing fixture to maximize energy efficiency and performance. Testing the fixture before final installation can help catch any issues, ensuring a smooth transition to LED lighting.
Rewiring Considerations for LED Compatibility
Simply removing the ballast is not enough; the fixture must be rewired to ensure the LED lights receive the correct voltage and current. Failure to do so can result in poor performance or damage to the LED components. In addition, improper rewiring can lead to safety hazards, including electrical shocks or fire risks, making it essential to approach this task with caution and precision.
Bypass Wiring for LED Tubes
Many LED tube lamps are designed to operate on line voltage and require ballast bypass wiring. This involves disconnecting the ballast and rewiring the fixture so that the lamp holders receive direct power. It’s important to follow the LED manufacturer’s wiring diagrams precisely to avoid electrical hazards. Additionally, when performing the bypass, ensure that all connections are secure and insulated to prevent any accidental shorts. Using wire nuts or electrical tape can provide extra security to your connections, ensuring that the installation remains safe and reliable over time.
Maintaining Polarity and Socket Compatibility
LED tubes are polarity sensitive. Ensuring correct wiring polarity prevents flickering and extends lamp life. Additionally, some LED tubes require single-ended power, while others can work with power at both ends. Confirming socket type and wiring method is critical to a successful retrofit. It’s also worth noting that not all LED tubes are created equal; some may feature built-in drivers that can simplify installation by eliminating the need for complex rewiring. Therefore, it’s advisable to research the specific LED tube model you intend to use and understand its unique requirements before starting the installation process.
Code Compliance and Inspection
Local electrical codes may have specific requirements for ballast removal and rewiring. For example, some jurisdictions mandate labeling the fixture to indicate ballast removal and LED compatibility. Always consult local codes and obtain necessary permits before proceeding. Furthermore, after completing the installation, it may be beneficial to have the work inspected by a qualified electrician. This not only ensures compliance with safety standards but also provides peace of mind that the installation has been performed correctly. In some cases, an inspection can also help identify any potential issues that may arise in the future, allowing for proactive maintenance and ensuring the longevity of your LED lighting system.
Tools and Materials for Efficient Ballast Removal
Having the right tools on hand makes ballast removal faster and safer. Lighting contractors should equip their kits with essentials tailored to this task.
Basic Electrical Tools
A reliable voltage tester, wire strippers, insulated screwdrivers, and needle-nose pliers are fundamental. These tools help with safe disconnection and precise wiring adjustments.
Wire Nuts and Connectors
High-quality wire nuts or push-in connectors ensure secure and durable wire terminations. Heat shrink tubing provides additional insulation and protection against moisture and corrosion.
Ballast Disposal Supplies
Ballasts often contain hazardous materials like PCBs (in older models) and must be disposed of according to environmental regulations. Contractors should have access to approved disposal containers and be familiar with local hazardous waste protocols.
Common Challenges and How to Overcome Them
Ballast removal can present unexpected hurdles. Recognizing these challenges ahead of time helps contractors prepare and avoid costly delays.
Dealing with Integrated or Hardwired Ballasts
Some fixtures have ballasts integrated into the housing or hardwired in a way that complicates removal. In these cases, contractors may need to replace the entire fixture or perform more extensive rewiring. Planning for these scenarios avoids surprises on the job site.
Ensuring Fixture Compatibility
Not all fixtures are suitable for ballast removal and LED retrofits. Some older or specialty fixtures may require custom solutions. Testing a sample fixture before full-scale retrofit can prevent wasted effort and client dissatisfaction.
Time Management and Scheduling
Ballast removal and rewiring add steps to the retrofit process. Efficient scheduling and clear communication with clients about expected timelines help manage expectations and maintain project momentum.
Benefits Beyond the Job Site
Removing ballasts offers advantages that extend beyond immediate project outcomes.
Enhancing Contractor Reputation
Contractors who master ballast removal and LED retrofitting demonstrate expertise and professionalism. Clients appreciate the energy savings, improved lighting quality, and reduced maintenance, leading to repeat business and referrals.
Supporting Sustainability Goals
Ballast removal aligns with green building initiatives by reducing energy consumption and hazardous waste. Contractors contribute to environmental stewardship, which can be a compelling selling point in competitive markets.
Future-Proofing Lighting Installations
LED systems without ballasts are easier to upgrade and maintain as technology evolves. This flexibility benefits building owners and contractors alike, simplifying future retrofits and repairs.
Conclusion: Making Ballast Removal a Standard Practice
For lighting contractors, removing ballasts when installing LED lighting is more than a technical step-it’s a strategic move that improves efficiency, reliability, and client satisfaction. By understanding the process, adhering to safety and code requirements, and preparing for common challenges, contractors can streamline their workflows and deliver superior lighting solutions.
Embracing ballast removal as a standard practice positions contractors as knowledgeable professionals ready to meet the demands of modern lighting projects with confidence and skill.
Upgrade Your Lighting Projects with LumenWholesale
Ready to take your LED lighting installations to the next level? At LumenWholesale, we provide lighting contractors with the highest quality, spec-grade lighting products at unbeatable wholesale prices. Say goodbye to unnecessary markups and hello to a vast selection of reliable, high-performance lighting solutions that meet the strictest industry standards. Plus, with free shipping on bulk orders, you can stock up on premium lighting without any hidden fees. Don’t let ballast removal slow you down—equip yourself with the best tools for the job. Discover wholesale lighting at the best value and make LumenWholesale your go-to for efficient, cost-effective lighting projects.