Introduction to Fluorescent Lighting and Its Importance in Modern Projects
Fluorescent lighting remains a staple in commercial, industrial, and institutional environments due to its energy efficiency and longevity compared to traditional incandescent bulbs. For lighting contractors, mastering the wiring of fluorescent fixtures is essential—not only to ensure safety and compliance but also to deliver reliable, high-quality lighting solutions to clients. The versatility of fluorescent lighting allows it to be utilized in various settings, from office buildings to manufacturing plants, where bright, consistent illumination is crucial for productivity and safety.
Training your team in the proper wiring techniques for fluorescent lights is a foundational skill that enhances project outcomes and client satisfaction. This article will provide a comprehensive guide on how to wire fluorescent lights effectively and how to train your team to become proficient in this critical task. Understanding the components of fluorescent lighting, such as ballasts, tubes, and starters, is vital for troubleshooting issues and optimizing performance. Moreover, as technology advances, newer fluorescent options, including compact fluorescent lamps (CFLs) and high-output fluorescent tubes, are becoming popular choices that require specific wiring considerations and installation techniques.
In addition to technical skills, it’s important for contractors to stay informed about the latest energy codes and regulations that govern fluorescent lighting installations. Compliance not only ensures the safety of the installation but also maximizes energy savings for clients, making projects more appealing in a competitive market. Furthermore, educating your team on the environmental benefits of fluorescent lighting, such as reduced carbon footprints and lower energy consumption, can enhance their understanding of the broader implications of their work, fostering a sense of responsibility and pride in their craft.
Understanding Fluorescent Lighting Components and Wiring Basics
Key Components of a Fluorescent Fixture
Before diving into wiring, it’s crucial that your team understands the main components of a fluorescent light fixture. These include the ballast, lamp holders (also called tombstones), fluorescent tubes, and the wiring harness. The ballast regulates the current to the lamps, preventing them from drawing too much power and burning out prematurely. Lamp holders secure the tubes and provide electrical connections.
Familiarity with these components ensures that your team can troubleshoot issues and perform installations with confidence and accuracy. Additionally, understanding the differences in fluorescent tube types, such as T8, T12, and T5, can enhance your team’s ability to select the right fixture for specific applications. Each type has unique dimensions, light output, and energy efficiency ratings, which can significantly impact the overall performance of the lighting system in a given space.
Types of Ballasts and Their Wiring Requirements
Fluorescent ballasts come in two primary types: magnetic and electronic. Magnetic ballasts are older, heavier, and less energy-efficient, while electronic ballasts are lighter, more efficient, and reduce flickering and noise. Each type has specific wiring requirements that your team must follow.
Electronic ballasts often feature color-coded wires that correspond to the lamp holders and power supply, simplifying installation. Magnetic ballasts, however, may require more detailed wiring diagrams and careful attention to polarity and wire connections. Moreover, it’s important to note that some electronic ballasts are designed to work with dimmable fluorescent tubes, offering flexibility in lighting control that can contribute to energy savings and enhanced ambiance in various environments, such as offices or retail spaces.
Basic Wiring Principles for Fluorescent Fixtures
When wiring fluorescent lights, safety and adherence to electrical codes are paramount. The wiring typically involves connecting the fixture’s hot (live) wire to the power source, the neutral wire to the neutral bus, and grounding the fixture properly. The ballast serves as the intermediary, controlling current flow to the lamps.
Understanding how to interpret wiring diagrams and color codes is essential for your team to avoid common pitfalls such as reversed polarity or improper grounding, which can lead to fixture failure or safety hazards. Additionally, it’s beneficial for your team to be aware of the importance of wire gauge and insulation ratings, as these factors can affect the overall efficiency and safety of the installation. Using the correct gauge wire ensures that the fixture operates within its designed parameters, minimizing the risk of overheating and electrical fires, while proper insulation protects against moisture and environmental factors that could compromise the wiring integrity over time.
Step-by-Step Guide to Wiring a Fluorescent Light
Preparation and Safety Measures
Before beginning any wiring task, ensure the power supply is turned off at the circuit breaker to prevent electrical shock. Equip your team with insulated tools, gloves, and safety glasses. Confirm that all materials, including the fluorescent fixture, ballast, wires, and connectors, meet local electrical codes and standards.
Review the fixture’s wiring diagram and verify compatibility with the power supply voltage and lamp type. This preparation reduces errors and streamlines the installation process. Additionally, it is wise to familiarize yourself with the specific characteristics of the fluorescent light you are installing, such as its wattage and lumens output, as this can affect both the brightness and energy efficiency of the lighting in your space. Understanding the layout of the area where the fixture will be installed can also help you determine the optimal positioning to maximize light distribution and minimize shadows.
Wiring Process Explained
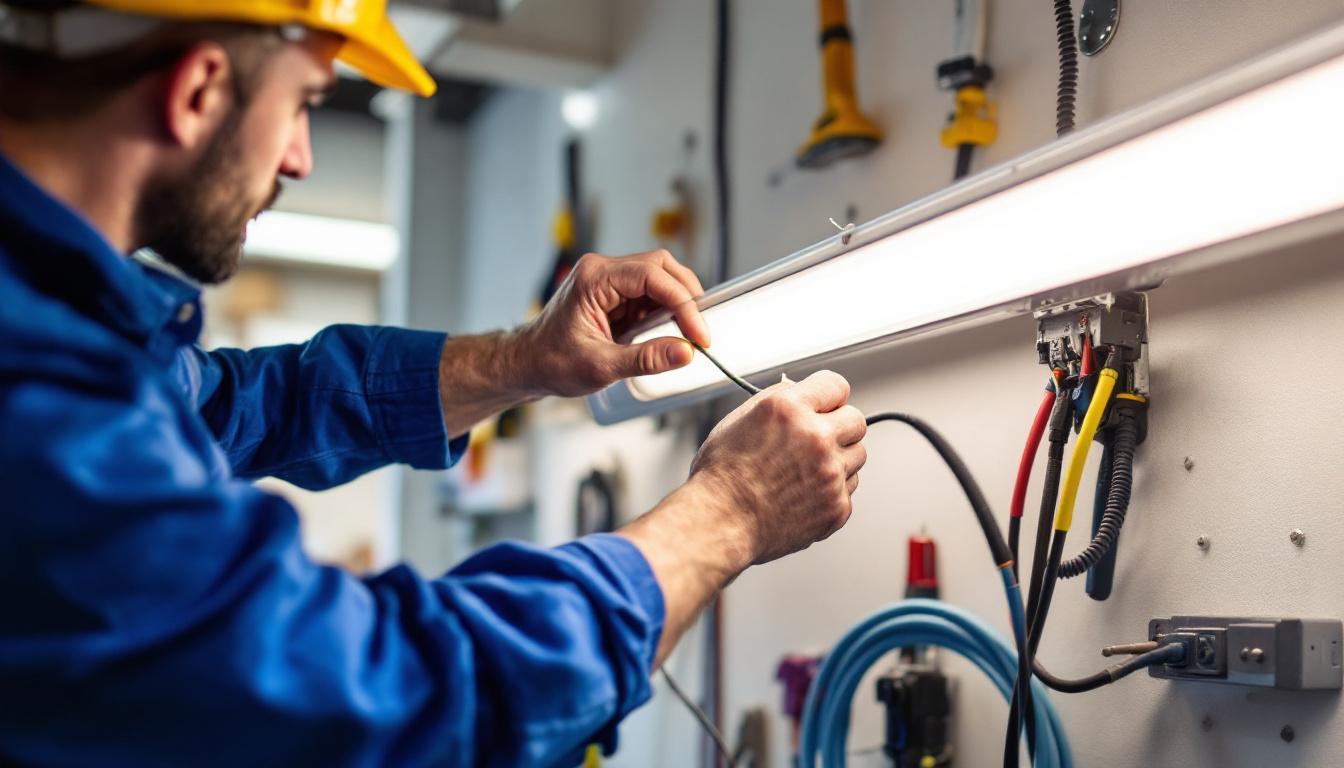
Start by mounting the fixture securely to the ceiling or wall according to manufacturer instructions. Next, connect the fixture’s grounding wire (usually green or bare copper) to the building’s grounding system. This step is critical for safety and code compliance.
Then, connect the ballast wires to the power supply wires. For electronic ballasts, typically, the black wire connects to the hot line, and the white wire connects to neutral. The ballast’s output wires connect to the lamp holders. Color coding usually follows a standard: blue and red wires connect to one end of the fluorescent tube, while yellow wires connect to the other end. Always verify with the ballast’s wiring diagram. It’s also beneficial to double-check the condition of the wires for any signs of wear or damage before making connections. Using heat-shrink tubing or electrical tape on exposed wire ends can provide additional protection against short circuits and ensure longevity.
After making all connections, secure wire nuts or connectors tightly and tuck wires neatly into the fixture’s wiring compartment. Install the fluorescent tubes by aligning the pins with the lamp holders and twisting them into place. Ensure that the tubes are seated correctly to avoid flickering, which can indicate improper installation. It’s also a good practice to clean the fixture and surrounding area before installation to prevent dust and debris from interfering with the fixture’s performance.
Testing and Troubleshooting
Once wiring is complete, restore power and test the fixture. The fluorescent tubes should light immediately without flickering or buzzing. If issues arise, check all connections for tightness and correctness. Confirm that the ballast is functioning and that the tubes are properly seated.
Common troubleshooting steps include swapping out tubes, verifying ballast compatibility, and ensuring the power supply voltage matches fixture requirements. If the fixture still fails to operate correctly, consider checking for any tripped breakers or blown fuses in the circuit that may affect power supply. Additionally, it may be helpful to consult the manufacturer’s troubleshooting guide for specific issues related to the model you are working with, as some fixtures may have unique characteristics or requirements that need to be addressed. Keeping a multimeter handy can also assist in diagnosing electrical issues by allowing you to measure voltage and continuity throughout the circuit.
Training Your Team: Best Practices and Techniques
Structured Training Programs
Effective training combines theoretical knowledge with hands-on practice. Begin with classroom-style sessions covering electrical theory, safety protocols, and component identification. Use wiring diagrams and real fixtures to demonstrate key concepts.
Follow up with supervised practical exercises where trainees wire fluorescent fixtures under experienced supervision. This approach builds confidence and competence.
Utilizing Visual Aids and Documentation
Visual aids such as wiring schematics, color-coded diagrams, and step-by-step checklists enhance understanding and retention. Provide your team with laminated quick-reference guides they can carry on-site.
Encourage trainees to document their work and note any issues encountered. This habit fosters accountability and continuous improvement.
Emphasizing Safety and Code Compliance
Safety must be the cornerstone of all training. Reinforce the importance of de-energizing circuits, using personal protective equipment, and following National Electrical Code (NEC) guidelines. Regularly review updates to local codes and standards with your team.
Incorporate safety drills and scenario-based training to prepare your team for real-world challenges.
Advanced Considerations and Troubleshooting Tips
Dealing with Multi-Lamp Fixtures and Complex Wiring
Multi-lamp fluorescent fixtures require more intricate wiring, often involving multiple lamp holders and ballasts. Train your team to carefully follow wiring diagrams and verify each connection point. Understanding series and parallel wiring configurations is essential to ensure proper operation.
Encourage double-checking each step and using voltage testers to verify circuits before finalizing installations.
Energy Efficiency and Upgrading to LED Alternatives
While fluorescent lighting is still prevalent, many projects now consider LED alternatives for superior energy efficiency and reduced maintenance. Training your team to understand the differences, including wiring modifications needed for LED retrofit kits, prepares them for evolving client demands.
Discuss the pros and cons of fluorescent versus LED lighting and when to recommend upgrades.
Common Troubleshooting Scenarios
Equip your team with strategies to diagnose common issues such as flickering lights, ballast failure, and tube burnout. For example, flickering often indicates ballast problems or loose connections, while a tube that won’t light may be faulty or improperly installed.
Encourage systematic troubleshooting: start with visual inspections, then test wiring continuity, and finally replace components as needed.
Conclusion: Building Expertise and Delivering Quality Lighting Solutions
Wiring fluorescent lights correctly is a vital skill for lighting contractors, impacting safety, functionality, and client satisfaction. By providing comprehensive training that blends theory, practice, and safety awareness, contractors can develop a skilled team capable of handling diverse lighting projects with confidence.
Staying current with industry standards, embracing new technologies, and fostering a culture of continuous learning will position your team as trusted experts in the lighting field. Properly trained professionals not only reduce installation errors but also enhance the reputation and success of your contracting business.
Get Your Premium Lighting Supplies at LumenWholesale
Ready to elevate your lighting projects with the best in spec-grade materials? Look no further than LumenWholesale for all your fluorescent and LED lighting needs. Our commitment to quality and affordability ensures that you can wire up your projects with confidence, backed by the finest products at wholesale prices. Say goodbye to middleman markups and hello to free shipping on bulk orders, making your purchases even more cost-effective. Don’t compromise on quality or value—click over to Wholesale Lighting at the Best Value and start experiencing the LumenWholesale difference today.