Fluorescent lighting has long been a staple in both commercial and residential settings, offering an energy-efficient alternative to traditional incandescent bulbs. For lighting contractors, mastering the installation of fluorescent tubes is essential not only for enhancing energy efficiency but also for meeting the diverse needs of clients. This guide provides a comprehensive overview of the installation process, ensuring that contractors can execute this task with confidence and precision.
Understanding Fluorescent Tubes
Before diving into the installation process, it is crucial to understand what fluorescent tubes are and how they work. Fluorescent tubes consist of a glass tube filled with a low-pressure mixture of gas and mercury vapor. When electricity passes through the gas, it produces ultraviolet light, which then excites a phosphor coating inside the tube, emitting visible light.
These tubes come in various sizes and color temperatures, making them suitable for a wide range of applications. Their energy efficiency and longevity make them a popular choice for lighting contractors looking to provide sustainable solutions to their clients. In fact, fluorescent tubes can last up to 20,000 hours or more, significantly reducing the frequency of replacements compared to traditional incandescent bulbs. This durability not only saves money on replacement costs but also minimizes waste, aligning with eco-friendly practices that many businesses and homeowners are now prioritizing.
Types of Fluorescent Tubes
Fluorescent tubes are available in several types, including T8, T5, and T12. The number indicates the diameter of the tube in eighths of an inch. For example, a T8 tube is 1 inch in diameter, while a T5 tube is 5/8 inch. Understanding the differences can help contractors choose the right type for specific projects. T5 tubes, being slimmer, are often favored in applications where space is limited, such as in under-cabinet lighting or in fixtures that require a more compact design. Conversely, T12 tubes, while less common today due to their lower energy efficiency, may still be found in older installations and can be replaced with T8 or T5 options for improved performance.
In addition to size, fluorescent tubes vary in color temperature, which affects the ambiance of a space. Options typically range from warm white (around 3000K) to cool white (around 4000K) and daylight (around 5000K). Selecting the appropriate color temperature is essential for achieving the desired effect in different environments. For instance, warm white is often preferred in residential settings, creating a cozy and inviting atmosphere, while cool white and daylight options are more commonly used in commercial spaces, such as offices and retail stores, where bright, clear lighting can enhance visibility and productivity. Furthermore, the choice of color temperature can also impact mood and energy levels, making it an important consideration in both design and functionality.
Tools and Materials Needed for Installation
Having the right tools and materials on hand is vital for a smooth installation process. Below is a list of essential items that every contractor should consider before starting the installation of fluorescent tubes.
Essential Tools
- Wire cutters and strippers
- Screwdriver (flathead and Phillips)
- Voltage tester
- Drill and drill bits
- Safety goggles and gloves
These tools will help ensure that the installation is both safe and efficient. A voltage tester is particularly important for confirming that the electrical circuit is de-energized before beginning work.
Materials Required
- Fluorescent tubes (appropriate size and type)
- Ballast (if required)
- Mounting brackets
- Wire connectors
- Electrical tape
Contractors should ensure that all materials meet local electrical codes and regulations. This not only guarantees safety but also ensures that the installation is compliant with industry standards.
Preparation for Installation
Preparation is key to a successful installation. Before beginning, contractors should assess the installation site to ensure it is suitable for the fluorescent tubes being installed. This includes checking the existing fixtures and electrical connections.
Assessing the Existing Fixtures
Examine the fixtures where the fluorescent tubes will be installed. Ensure that they are clean and free of any debris that could interfere with the installation. If the existing fixtures are outdated or damaged, it may be necessary to replace them before proceeding.
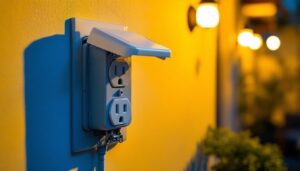
Additionally, confirm that the electrical supply is compatible with the fluorescent tubes and ballasts being used. This step is crucial to avoid any electrical issues that could arise during or after installation.
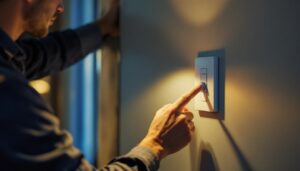
Safety Precautions
Safety should always be the top priority when working with electrical components. Before starting, contractors should turn off the power to the circuit at the breaker box. Using a voltage tester, double-check that the power is off before proceeding.
Wearing safety goggles and gloves is also recommended to protect against any potential hazards. If working at heights, ensure that proper ladders or scaffolding are used to maintain stability and safety during the installation process.
Step-by-Step Installation Process
With the necessary tools, materials, and safety precautions in place, contractors can now proceed with the installation of fluorescent tubes. The following steps outline the process in detail.
Removing the Old Tubes and Fixtures
Start by carefully removing the old fluorescent tubes from their fixtures. Gently twist and pull the tubes out of the sockets, taking care not to break them. Once the tubes are removed, disconnect the fixture from the electrical supply if it has not already been done.
Next, remove the fixture from the ceiling or wall by unscrewing any mounting hardware. Inspect the wiring and ballast for any signs of damage or wear, as these may need to be replaced before installing new tubes.
Installing the New Ballast
If the new fluorescent tubes require a different ballast than the one currently installed, it is essential to replace it. Disconnect the old ballast by removing the wires and unscrewing it from its mounting location. Follow the manufacturer’s instructions for wiring the new ballast, ensuring that all connections are secure and properly insulated with electrical tape.
Once the new ballast is installed, double-check all connections to ensure they are correct. This step is crucial for the proper functioning of the fluorescent tubes.
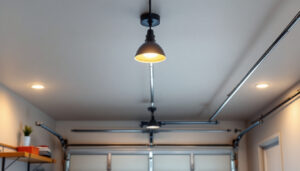
Mounting the New Fixture
With the ballast in place, it’s time to mount the new fixture. Position the fixture on the ceiling or wall, aligning it with the mounting brackets. Secure it in place with screws, ensuring that it is level and stable.
Next, connect the fixture to the electrical supply. Carefully follow the wiring diagram provided with the fixture to ensure proper connections. Once everything is connected, secure the wires with wire connectors and wrap them with electrical tape for added safety.
Installing the Fluorescent Tubes
With the fixture securely mounted and connected, the final step is to install the new fluorescent tubes. This process is straightforward but requires attention to detail to ensure proper installation.
Inserting the Tubes
Begin by aligning the pins of the fluorescent tube with the sockets in the fixture. Gently insert one end of the tube into the socket, then twist the tube until it locks into place. Repeat this process for the other end of the tube, ensuring that it is securely seated in the fixture.
For fixtures that use multiple tubes, repeat this process for each tube, taking care to match the correct wattage and type as specified by the manufacturer.
Testing the Installation
Once all tubes are installed, it’s time to restore power to the circuit. Turn on the breaker and test the fixture to ensure that all tubes light up correctly. If any tubes fail to illuminate, double-check the connections and the tubes themselves for any issues.
In the event of a malfunction, it may be necessary to replace the faulty tube or recheck the wiring connections. Ensuring that all components are functioning properly is essential for a successful installation.
Maintenance Tips for Fluorescent Tubes
After the installation is complete, educating clients on maintenance can help extend the lifespan of fluorescent tubes and maintain optimal performance. Regular maintenance is essential for ensuring that the lighting remains efficient and effective.
Regular Cleaning
Dust and grime can accumulate on fluorescent tubes over time, reducing their efficiency and brightness. Encourage clients to clean the tubes regularly using a soft, damp cloth. This simple maintenance task can significantly improve light output and prolong the life of the tubes.
It is advisable to turn off the power before cleaning to ensure safety. Additionally, using a gentle cleaning solution can help remove stubborn stains without damaging the tubes.
Monitoring Performance
Clients should be encouraged to monitor the performance of their fluorescent tubes. If they notice flickering or dimming, it may indicate that a tube is nearing the end of its life or that there is an issue with the ballast. Prompt attention to these signs can prevent more extensive issues down the line.
Regularly replacing tubes that are showing signs of wear can help maintain consistent lighting levels and energy efficiency in the space.
Conclusion
Installing fluorescent tubes is a valuable skill for lighting contractors, providing clients with energy-efficient lighting solutions. By understanding the types of tubes available, preparing adequately, and following a systematic installation process, contractors can ensure successful outcomes.
Moreover, educating clients on maintenance practices can enhance the longevity and performance of fluorescent lighting systems. As energy efficiency remains a priority in modern lighting design, mastering the installation of fluorescent tubes is not just beneficial—it’s essential for any lighting contractor looking to stay competitive in the industry.
Get Your Fluorescent Tubes at LumenWholesale
Ready to elevate your lighting projects with energy-efficient fluorescent tubes? Look no further than LumenWholesale for the highest quality, spec-grade lighting products at unbeatable wholesale prices. Say goodbye to local distributor markups and hello to superior lighting solutions that meet the strictest industry standards. With our hassle-free bulk buying and free shipping, you’ll enjoy premium lighting at the best value — no hidden fees, no compromises. Enhance your lighting installations today and experience the best in wholesale lighting with LumenWholesale.