Fluorescent tubes are a common lighting solution in commercial and industrial settings, providing efficient illumination for a variety of applications. However, changing a fluorescent tube can sometimes seem daunting, especially for those new to the field. This article aims to demystify the process, offering essential insights and practical tips for lighting contractors. Understanding the intricacies of tube replacement is crucial for ensuring safety, efficiency, and optimal performance.
Understanding Fluorescent Tube Basics
Before diving into the replacement process, it is essential to understand the basic components and functioning of fluorescent tubes. These tubes operate by passing an electric current through a gas, which produces ultraviolet light. This light then interacts with a phosphor coating inside the tube, creating visible light. Familiarity with this process helps contractors appreciate the importance of proper handling and disposal. Moreover, understanding the underlying science can aid in troubleshooting common issues such as flickering or dim lighting, which can often be attributed to faulty components or incorrect installation.
Components of a Fluorescent Tube
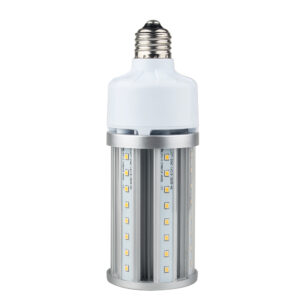
A typical fluorescent tube consists of several key components: the glass tube, the electrodes, and the phosphor coating. The glass tube is filled with a low-pressure gas, usually a mixture of argon and mercury vapor. The electrodes, located at each end, facilitate the flow of electricity. The phosphor coating inside the tube is what ultimately emits visible light when energized. Understanding these components is vital for troubleshooting and ensuring proper installation. Additionally, the ballast, which regulates the current to the electrodes, plays a crucial role in the operation of fluorescent tubes. A malfunctioning ballast can lead to inconsistent lighting or even complete failure of the tube, making it an important aspect to consider during maintenance and replacement tasks.
Types of Fluorescent Tubes
Fluorescent tubes come in various sizes and types, including T8, T5, and T12, which refer to their diameter in eighths of an inch. Each type has its unique characteristics and applications. For instance, T8 tubes are commonly used in commercial settings due to their energy efficiency and longer lifespan. T5 tubes, being slimmer and more efficient, are often utilized in spaces where energy conservation is a priority, such as in offices and retail environments. Knowing the differences between these types is essential for contractors when recommending replacements or upgrades to clients. Furthermore, the color temperature of fluorescent tubes can vary widely, ranging from warm white to cool daylight, allowing for tailored lighting solutions that enhance the ambiance of a space and meet specific aesthetic preferences. Understanding these nuances not only aids in selecting the right tube for a project but also helps in educating clients about their options, ensuring satisfaction with the final outcome.
Preparing for Tube Replacement
Preparation is key to a successful fluorescent tube replacement. This stage involves gathering the necessary tools, ensuring safety measures are in place, and understanding the specific requirements of the lighting fixture.
Essential Tools for Replacement
To change a fluorescent tube effectively, several tools may be required. A ladder or step stool is often necessary to reach high fixtures safely. Additionally, a pair of safety gloves can protect hands from sharp edges or broken glass. A voltage tester is crucial for ensuring that the fixture is powered off before beginning the replacement process. Having these tools on hand will streamline the replacement procedure and enhance safety. Furthermore, a flashlight can be handy for illuminating dark areas, especially in basements or garages where lighting may be inadequate. A small tool kit containing screwdrivers and pliers may also be useful if any minor adjustments or repairs are needed during the tube replacement.
Safety Precautions
Safety should always be the top priority when working with electrical fixtures. Before starting the replacement, it is essential to turn off the power at the circuit breaker to avoid any risk of electric shock. Using a voltage tester to confirm that the power is off adds an extra layer of safety. Wearing safety goggles and gloves can also protect against potential hazards, such as shattered glass or electrical components. Additionally, it is wise to ensure that the area around the fixture is clear of any obstructions and that there is adequate ventilation, particularly if you are working in an enclosed space. If the fluorescent tube has been in use for a long time, it may be hot to the touch, so allowing it to cool down before handling is also a critical safety step. Taking these precautions not only safeguards your health but also ensures a smoother and more efficient replacement process.
Step-by-Step Guide to Changing a Fluorescent Tube
Now that the preparation is complete, it’s time to delve into the step-by-step process of changing a fluorescent tube. Following these steps will ensure a smooth and effective replacement.
Step 1: Turn Off the Power
As previously mentioned, the first step is to turn off the power at the circuit breaker. This action prevents any electrical accidents during the replacement process. It is crucial to double-check with a voltage tester to ensure that there is no power running to the fixture.
Step 2: Remove the Old Tube
With the power off, the next step is to remove the old fluorescent tube. Most tubes are secured in place by a simple twist-lock mechanism. Gently rotate the tube until it releases from the socket. If the tube is stuck, a little wiggle may help, but avoid using excessive force to prevent breakage. Once released, carefully lower the tube to avoid dropping it, as broken glass can pose a safety risk.
Step 3: Inspect the Fixture
After removing the old tube, it’s a good practice to inspect the fixture for any signs of damage or wear. Look for frayed wiring, burnt-out sockets, or any other issues that may need addressing before installing a new tube. This inspection ensures that the new tube will function correctly and safely.
Installing the New Fluorescent Tube
Once the old tube has been removed and the fixture inspected, the next step is to install the new fluorescent tube. This process is straightforward but requires attention to detail to ensure proper functionality.
Step 4: Insert the New Tube
Begin by aligning the pins of the new fluorescent tube with the sockets in the fixture. Gently push the tube into place, ensuring that it is seated securely. Once aligned, rotate the tube until it locks into position. This twist-lock mechanism is designed to hold the tube firmly in place, preventing it from coming loose during operation.
Step 5: Turn the Power Back On
After the new tube is securely installed, it is time to restore power to the fixture. Return to the circuit breaker and turn the power back on. It’s advisable to stand clear of the fixture initially, as there may be a brief flicker when the power is restored.
Step 6: Test the New Tube
With the power restored, check the new fluorescent tube to ensure it lights up correctly. If the tube does not illuminate, double-check the installation, ensuring it is securely in place. If issues persist, further inspection of the fixture and wiring may be necessary.
Disposing of Old Fluorescent Tubes
Proper disposal of old fluorescent tubes is an essential consideration for lighting contractors. These tubes contain small amounts of mercury, which can be hazardous to the environment if not disposed of correctly.
Understanding Local Regulations
Many regions have specific regulations regarding the disposal of fluorescent tubes due to their mercury content. Contractors should familiarize themselves with local laws and guidelines to ensure compliance. This knowledge not only protects the environment but also enhances the contractor’s reputation as a responsible professional.
Recycling Options
Many communities offer recycling programs for fluorescent tubes. These programs allow contractors to dispose of old tubes safely and responsibly. Additionally, some manufacturers provide take-back programs, where they accept used tubes for recycling. Utilizing these options can contribute to sustainability efforts while adhering to legal requirements.
Common Issues and Troubleshooting
Even with careful installation, issues can arise with fluorescent tubes. Understanding common problems and their solutions can save time and frustration for lighting contractors.
Flickering or Dim Lighting
If a newly installed fluorescent tube flickers or appears dim, several factors could be at play. One common cause is a faulty ballast, which regulates the electrical current to the tube. In such cases, replacing the ballast may be necessary. Additionally, ensure that the tube is correctly seated in the fixture, as a poor connection can lead to inconsistent lighting.
Uneven Light Distribution
Uneven light distribution can occur if the fluorescent tube is not properly aligned within the fixture. Ensure that the tube is securely locked in place and that there are no obstructions within the fixture that could affect light output. If issues persist, consider checking the fixture’s reflector for dirt or damage, as this can also impact light distribution.
Conclusion
Changing a fluorescent tube is a fundamental skill for lighting contractors, requiring a blend of knowledge, preparation, and attention to detail. By understanding the components of fluorescent tubes, following a systematic replacement process, and adhering to safety regulations, contractors can ensure efficient and effective lighting solutions for their clients.
Moreover, being aware of proper disposal methods and common troubleshooting techniques enhances a contractor’s expertise and professionalism. As the lighting industry continues to evolve, staying informed about new technologies and best practices will further empower contractors to meet the diverse needs of their customers.
In conclusion, the ability to change a fluorescent tube efficiently is not just about replacing a light source; it is about providing reliable, safe, and sustainable lighting solutions. By mastering this skill, lighting contractors can enhance their service offerings and contribute positively to the environments they illuminate.
Upgrade Your Lighting Solutions with LumenWholesale
Ready to take your lighting projects to the next level? At LumenWholesale, we provide lighting contractors with the highest quality, spec-grade lighting products at unbeatable wholesale prices. Say goodbye to local distributor markups and hello to superior lighting solutions that meet the strictest industry standards. Plus, with free shipping on bulk orders, you can stock up on reliable, high-performance lighting without worrying about hidden fees. Don’t compromise on quality or value; choose LumenWholesale for the perfect blend of affordability and convenience. Elevate your service offerings and illuminate your projects with confidence. Explore our extensive selection and find the best value in wholesale lighting at LumenWholesale.