Lighting professionals understand that the right tools and techniques can make all the difference in achieving the perfect ambiance. Among the various lighting options available, gimbal can lights have gained popularity due to their versatility and functionality. This article serves as an essential checklist for lighting contractors, ensuring that they are well-equipped to utilize gimbal can lights effectively in their projects.
Understanding Gimbal Can Lights
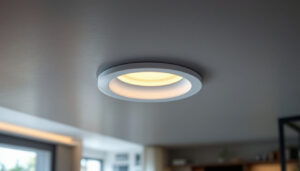
Gimbal can lights, also known as adjustable recessed lights, offer the unique ability to direct light precisely where it is needed. Unlike traditional fixed can lights, gimbal lights can pivot and tilt, allowing for greater control over the lighting effects in a space. This flexibility makes them ideal for highlighting artwork, architectural features, or creating dynamic lighting scenes in residential and commercial settings. Their sleek, unobtrusive design allows them to blend seamlessly into ceilings, providing a clean look while delivering exceptional functionality.
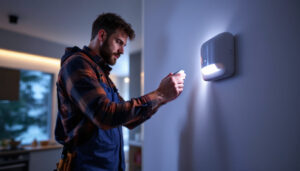
Furthermore, gimbal can lights can be integrated with smart home technology, enabling users to control the intensity and color of the light through mobile apps or voice commands. This modern capability not only enhances convenience but also allows homeowners to customize their lighting to suit different moods or occasions, making gimbal can lights a forward-thinking choice for contemporary living spaces.
Key Features of Gimbal Can Lights
When selecting gimbal can lights, it is essential to consider several key features that can impact performance and suitability for specific applications. One of the most important aspects is the beam angle, which determines how wide or narrow the light spreads. A narrow beam angle is perfect for accent lighting, while a wider angle can provide general illumination. Understanding the beam angle can help in creating the desired ambiance, whether it’s a cozy reading nook or a vibrant entertaining area.
Another critical feature is the adjustability of the gimbal. Some models allow for a full 360-degree rotation and a 30-degree tilt, providing maximum flexibility in directing light. This adjustability can be particularly beneficial in spaces with high ceilings or unique architectural elements that require targeted lighting. Additionally, the color temperature of the LED can significantly affect the atmosphere of a room, with options ranging from warm white to cool daylight. Choosing the right color temperature can enhance the overall aesthetic, making spaces feel more inviting or energizing depending on the desired effect.
Applications of Gimbal Can Lights
Gimbal can lights are incredibly versatile and can be used in various applications. In residential settings, they are often installed in living rooms, kitchens, and hallways to create layered lighting effects. Their ability to focus light on specific areas makes them an excellent choice for accentuating artwork or architectural details. For instance, placing gimbal lights above a piece of art can create a gallery-like atmosphere, drawing attention to the artwork while providing an elegant touch to the overall decor.
In commercial environments, gimbal can lights can enhance retail displays, highlight merchandise, and create inviting atmospheres in restaurants and cafes. Their adaptability makes them a popular choice among lighting designers and contractors seeking to elevate the aesthetic appeal of a space. Moreover, in office settings, gimbal can lights can be strategically positioned to reduce glare on screens while providing adequate illumination for work tasks. This multifunctionality not only improves productivity but also contributes to a more comfortable working environment, showcasing the practicality and effectiveness of gimbal can lights in various contexts.
Essential Tools for Installation
To ensure a successful installation of gimbal can lights, lighting professionals should have a well-equipped toolkit. The right tools not only facilitate the installation process but also enhance safety and efficiency.
Basic Hand Tools
Every lighting contractor should have a set of basic hand tools, including a screwdriver, wire stripper, and pliers. These tools are essential for connecting wires and securing fixtures in place. A stud finder is also crucial for locating ceiling joists, ensuring that the lights are installed securely and at the correct height.
Additionally, a level is necessary to ensure that the gimbal can lights are aligned properly. Misalignment can lead to uneven lighting and detract from the overall aesthetic of the installation.
Electrical Tools
Since gimbal can lights are often hardwired into the electrical system, having electrical tools is vital. A multimeter can help test voltage and ensure that the electrical connections are safe and functional. Electrical tape and wire connectors are also necessary for securing connections and preventing shorts.
For those working in larger installations, a circuit tester can be a valuable tool to ensure that circuits are functioning correctly before installation begins.
Installation Process
The installation of gimbal can lights requires careful planning and execution. Following a systematic approach can help ensure that the process goes smoothly and that the final result meets the desired specifications.
Planning the Layout
Before any installation begins, it is essential to plan the layout of the gimbal can lights. This involves determining the optimal placement of each fixture to achieve the desired lighting effects. Consider factors such as the height of the ceiling, the purpose of the space, and any architectural features that should be highlighted.
Using a lighting design software or simply sketching the layout can help visualize how the lights will interact with the space. This planning phase is crucial for avoiding any costly mistakes during installation.
Cutting the Ceiling Holes
Once the layout is finalized, the next step is cutting the holes for the gimbal can lights. Using a hole saw that matches the size of the can light is essential for ensuring a snug fit. It is advisable to wear protective eyewear and a dust mask during this process to prevent debris from causing injury or discomfort.
After cutting the holes, it is important to check for any electrical wiring or plumbing that may be hidden within the ceiling. This precaution can prevent damage to existing systems and ensure a safe installation.
Wiring and Mounting
With the holes cut, the next step is wiring the gimbal can lights. Following the manufacturer’s instructions is crucial for ensuring that the lights are connected correctly. This typically involves connecting the black (hot) wire, white (neutral) wire, and green or bare (ground) wire.
Once the wiring is complete, the gimbal can light can be mounted into the ceiling. Most models feature a spring clip or mounting bracket that secures the light in place. Ensuring that the fixture is flush with the ceiling will create a clean and professional look.
Testing and Adjusting
After installation, it is essential to test the gimbal can lights to ensure they are functioning correctly. This step not only verifies that the installation was successful but also allows for any necessary adjustments to be made.
Checking Light Functionality
Turn on the lights and check each fixture to ensure that they illuminate properly. If any lights do not turn on, it may indicate a wiring issue that needs to be addressed. Using a multimeter can help diagnose any electrical problems that may arise.
Additionally, it is essential to check the adjustability of each gimbal. Ensure that they can pivot and tilt smoothly without any obstructions. This functionality is crucial for achieving the desired lighting effects in the space.
Fine-Tuning the Direction
Once the lights are confirmed to be functioning, take the time to fine-tune the direction of each gimbal can light. This adjustment allows for optimal lighting effects, ensuring that the light is directed where it is needed most. Whether highlighting a piece of artwork or illuminating a workspace, the ability to adjust the light direction is one of the key benefits of gimbal can lights.
It may be helpful to walk around the space and observe how the lighting interacts with different surfaces and features. Making small adjustments can significantly enhance the overall lighting design.
Maintenance and Troubleshooting
To ensure the longevity and performance of gimbal can lights, regular maintenance and troubleshooting are necessary. Understanding common issues and how to address them can save time and resources in the long run.
Cleaning and Maintenance
Dust and debris can accumulate on gimbal can lights over time, affecting their performance and appearance. Regularly cleaning the fixtures with a soft cloth can help maintain their brightness and aesthetic appeal. It is advisable to turn off the lights and allow them to cool before cleaning to prevent any accidents.
In addition to cleaning, checking the electrical connections periodically can help prevent any potential issues. Loose connections can lead to flickering lights or complete outages, so ensuring that everything is secure is essential for optimal performance.
Troubleshooting Common Issues
Even with proper installation and maintenance, issues may arise with gimbal can lights. Common problems include flickering, dimming, or lights not turning on at all. In many cases, these issues can be traced back to wiring problems or incompatible dimmer switches.
If flickering occurs, it may be necessary to check the compatibility of the LED bulbs with the dimmer switch. Some LED bulbs require specific dimmers to function correctly. Additionally, if a light does not turn on, checking the circuit breaker and ensuring that the wiring is secure can help identify the problem.
Conclusion
Gimbal can lights are an invaluable tool for lighting professionals, offering versatility and adaptability for a variety of applications. By following this essential checklist, lighting contractors can ensure successful installations that meet their clients’ needs and enhance the overall aesthetic of any space.
From understanding the features and applications of gimbal can lights to mastering the installation process and maintaining them, this guide serves as a comprehensive resource for lighting professionals. By staying informed and prepared, contractors can elevate their work and deliver exceptional results in every project.
Get Your Gimbal Can Lights at LumenWholesale
Ready to enhance your lighting projects with the versatility of gimbal can lights? Look no further than LumenWholesale for the highest quality, spec-grade lighting products at unbeatable wholesale prices. Say goodbye to inflated markups and hello to superior lighting solutions that meet the highest industry standards. With LumenWholesale, bulk buying is a breeze, thanks to our hassle-free process and free shipping. Elevate your lighting game with the perfect blend of quality, affordability, and convenience. Discover the best value in wholesale lighting by visiting Wholesale Lighting at the Best Value today.