fluorescent light bulbs are a popular choice for both residential and commercial lighting due to their energy efficiency and long lifespan. For lighting contractors, understanding the proper installation process is crucial for ensuring optimal performance and safety. This article provides a comprehensive guide on how to put in fluorescent light bulbs, along with quick tips from experienced lighting contractors.
Understanding Fluorescent Light Bulbs
Before diving into the installation process, it is essential to understand the different types of fluorescent light bulbs available on the market. These bulbs come in various shapes, sizes, and configurations, each designed for specific applications. The efficiency and longevity of fluorescent bulbs make them a popular choice for both residential and commercial lighting solutions.
Types of Fluorescent Bulbs
Fluorescent bulbs can be categorized into several types, including linear tubes, compact fluorescent lamps (CFLs), and specialty bulbs. Linear tubes are commonly used in commercial settings, such as offices and warehouses, due to their ability to provide bright, even illumination across large areas. CFLs, on the other hand, are more suited for residential use, offering a compact design that fits standard light fixtures while consuming significantly less energy than traditional incandescent bulbs. Specialty bulbs are designed for specific applications, such as outdoor lighting or high-bay fixtures, and can include options like colored fluorescent bulbs for decorative purposes or high-output bulbs for industrial environments where bright light is essential.
Components of a Fluorescent Fixture
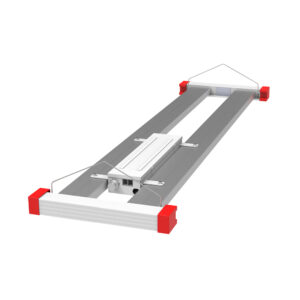
A typical fluorescent lighting fixture consists of several components, including the ballast, lamp holders, and the bulbs themselves. The ballast regulates the current flowing through the bulbs, ensuring they operate efficiently and safely. It can be either magnetic or electronic, with electronic ballasts generally providing better energy efficiency and reduced flickering. The lamp holders secure the bulbs in place, allowing for easy replacement when needed. Understanding these components is vital for a successful installation, as improper connections or incompatible parts can lead to reduced performance or even fixture failure. Additionally, many fixtures come equipped with reflectors that enhance light distribution, maximizing the effectiveness of the fluorescent bulbs and ensuring that spaces are well-lit without excessive energy consumption.
Moreover, it’s important to consider the color temperature of fluorescent bulbs, which can significantly affect the ambiance of a space. These bulbs are available in a range of color temperatures, typically measured in Kelvin (K), from warm white (around 2700K) to cool white (around 4000K) and daylight (5000K and above). The choice of color temperature can influence not only the aesthetic appeal of a room but also the mood and productivity of its occupants. For instance, cooler temperatures are often favored in work environments to enhance focus and alertness, while warmer tones are preferred in living areas for a cozy, inviting atmosphere. Understanding these nuances can help you select the right fluorescent lighting for your specific needs.
Preparation for Installation
Proper preparation is key to a smooth installation process. Before replacing or installing fluorescent light bulbs, ensure that the workspace is safe and well-organized. A clutter-free environment not only minimizes the risk of accidents but also allows for a more focused approach to the task at hand. Consider laying down a drop cloth to protect the floor and keep any tools or materials organized within easy reach. This will help streamline the process and reduce the chances of misplacing essential items during the installation.
Gathering Necessary Tools
Having the right tools on hand will make the installation process more efficient. Essential tools include a ladder, safety goggles, gloves, and a non-contact voltage tester. These items will help ensure safety and ease during the installation. Additionally, having a screwdriver set and a utility knife can be beneficial for removing any covers or fixtures that may be in the way. If you are working in a larger space, consider using a tool belt to keep your hands free while you move around the area. This not only saves time but also enhances your overall safety by reducing the need to frequently climb up and down the ladder.
Safety Precautions
Safety should always be a top priority when working with electrical components. Before starting any installation, turn off the power to the fixture at the circuit breaker. Use a non-contact voltage tester to confirm that the power is off. Wearing safety goggles and gloves can also protect against potential hazards. Moreover, it’s wise to inform anyone nearby that you will be working on electrical installations, so they are aware of the situation and can avoid the area. If you are unsure about any part of the process, consulting the manufacturer’s instructions or seeking advice from a professional electrician can provide additional peace of mind. Always remember that taking the time to prepare and prioritize safety can prevent accidents and ensure a successful installation experience.
Steps for Installing Fluorescent Light Bulbs
Now that the necessary preparations are complete, follow these steps to install fluorescent light bulbs effectively.
Step 1: Remove the Old Bulbs
Begin by carefully removing the old fluorescent bulbs from the fixture. For linear tubes, gently twist the bulb a quarter turn and pull it straight out. For CFLs, simply unscrew the bulb from its socket. Dispose of the old bulbs properly, as they may contain hazardous materials. Many local waste management services offer special recycling programs for fluorescent bulbs, so be sure to check your area for proper disposal methods. This not only protects the environment but also ensures compliance with local regulations regarding hazardous waste.
Step 2: Inspect the Fixture
Once the old bulbs are removed, inspect the fixture for any signs of damage or wear. Check the ballast, lamp holders, and wiring for any issues. If any components appear damaged, they should be replaced before installing new bulbs to ensure safe operation. Additionally, take a moment to clean the fixture and remove any dust or debris that may have accumulated. This can improve the efficiency of the lighting and prolong the life of the new bulbs. Using a damp cloth or a soft brush can help you reach those tricky spots without damaging the fixture.
Step 3: Install the New Bulbs
With the fixture inspected and ready, it’s time to install the new fluorescent bulbs. For linear tubes, align the pins of the bulb with the lamp holders, insert the pins into the sockets, and twist the bulb a quarter turn to secure it in place. For CFLs, align the base of the bulb with the socket and twist it clockwise until it is snug. After installation, turn on the power to the fixture to test the bulbs. If they flicker or do not light up, double-check that the bulbs are seated correctly and that the fixture is receiving power. It’s also advisable to keep an eye on the new bulbs for the first few hours of use; this can help identify any potential issues early on, ensuring a smooth and efficient lighting experience.
Testing the Installation
After installing the new bulbs, it is crucial to test the fixture to ensure everything is functioning correctly.
Step 1: Restore Power
Return to the circuit breaker and restore power to the fixture. Make sure to do this carefully, ensuring that no one is in contact with the fixture while power is being restored.
Step 2: Check for Proper Operation
Once power is restored, turn on the fixture to check for proper operation. Observe the bulbs to ensure they light up evenly and without flickering. If any issues arise, turn off the power again and double-check the installation.
Troubleshooting Common Issues
Even with careful installation, issues may arise. Understanding common problems and their solutions can save time and frustration.
Flickering Bulbs
If the newly installed bulbs flicker, it may indicate a problem with the ballast or the bulb itself. Ensure that the bulbs are properly seated in the sockets. If flickering persists, consider replacing the ballast, as a faulty ballast can cause inconsistent power delivery.
Bulbs Not Lighting Up
When bulbs fail to light up, check the power supply first. Ensure the circuit breaker is on and that there are no blown fuses. If the power supply is intact, inspect the bulbs for any visible damage or defects. Replacing the bulbs with new ones may resolve the issue.
Maintenance Tips for Fluorescent Lighting
Regular maintenance can prolong the life of fluorescent lighting fixtures and ensure optimal performance.
Cleaning the Fixtures
Dust and debris can accumulate on light fixtures, affecting their efficiency. Regularly cleaning the fixtures with a damp cloth can help maintain brightness and prevent overheating. Ensure the power is off before cleaning to avoid any accidents.
Replacing Bulbs on Schedule
To ensure consistent lighting, consider implementing a schedule for replacing fluorescent bulbs. Many contractors recommend replacing bulbs every 12 to 18 months, depending on usage. This proactive approach can prevent unexpected outages and maintain a well-lit environment.
Conclusion
Installing fluorescent light bulbs is a straightforward process that can significantly enhance lighting quality in various settings. By following the steps outlined above and adhering to safety precautions, lighting contractors can ensure successful installations. Additionally, understanding common troubleshooting techniques and maintenance practices will further enhance the longevity and efficiency of fluorescent lighting systems.
With these quick tips, lighting contractors can confidently tackle fluorescent bulb installations, providing clients with reliable and efficient lighting solutions.
Get Your Fluorescent Lighting Supplies at LumenWholesale
Ready to elevate your lighting installations with the highest quality fluorescent bulbs? Look no further than LumenWholesale, where we provide contractors with spec-grade lighting products at unbeatable wholesale prices. Say goodbye to local distributor markups and hello to a vast selection of reliable, high-performance lighting that meets the strictest industry standards. Plus, with free shipping on bulk orders, you can stock up on premium lighting solutions without worrying about hidden fees or compromises. Don’t miss out on the perfect blend of quality, affordability, and convenience. Visit LumenWholesale now for Wholesale Lighting at the Best Value and start your project with confidence.