Understanding the Basics: Why Retrofit Fluorescent Fixtures to LED?
Fluorescent lighting has been a staple in commercial and industrial settings for decades. It’s reliable, relatively energy-efficient compared to incandescent bulbs, and widely available. Yet, LED technology has dramatically shifted the lighting landscape. LEDs offer superior energy savings, longer lifespans, and improved light quality. For lighting contractors, knowing how to properly wire fluorescent fixtures to accommodate LED tubes is essential—not only to meet client expectations but also to ensure safety and code compliance.
Retrofitting fluorescent fixtures to LED isn’t just about swapping bulbs. It often involves rewiring, bypassing ballasts, or even replacing components to optimize performance. This process can be straightforward, but mistakes can lead to flickering, reduced lifespan, or safety hazards. Understanding the nuances of wiring fluorescent fixtures for LED tubes is critical for delivering professional, lasting results.
Moreover, the transition to LED lighting can significantly reduce energy costs over time. LEDs consume up to 75% less energy than traditional fluorescent bulbs, which translates into substantial savings on electricity bills for businesses. Additionally, many utility companies offer rebates and incentives for retrofitting to LED, making the initial investment even more appealing. This financial aspect is particularly important for businesses looking to enhance their sustainability practices while also improving their bottom line.
Another important consideration when retrofitting is the environmental impact. Fluorescent bulbs contain mercury, which poses a risk if they break or are improperly disposed of. By switching to LED, businesses not only reduce their carbon footprint but also eliminate the hazards associated with mercury disposal. Furthermore, LEDs are often made from recyclable materials, contributing to a more sustainable lifecycle. As awareness of environmental issues grows, more companies are looking to make responsible choices that reflect their values, and retrofitting to LED lighting is a significant step in that direction.
Types of LED Tubes and Their Wiring Requirements
Not all LED tubes are created equal. There are three main types you’ll encounter, each with distinct wiring needs:
Type A: Ballast-Compatible LED Tubes
Type A LED tubes are designed to work with existing fluorescent ballasts. This means minimal rewiring is needed. Contractors simply remove the fluorescent tubes and insert the LED replacements. However, compatibility is key. Using an LED tube with an incompatible ballast can cause flickering or premature failure. It’s important to check the ballast manufacturer’s specifications and the LED tube’s compatibility list before proceeding. Additionally, Type A tubes are often favored for their ease of installation, making them a popular choice for retrofitting projects in commercial spaces where downtime needs to be minimized. Their ability to utilize existing fixtures can also lead to significant cost savings in both labor and materials, allowing businesses to transition to energy-efficient lighting without a complete overhaul of their systems.
Type B: Ballast-Bypass LED Tubes
Type B tubes require bypassing or removing the ballast entirely. This involves rewiring the fixture to supply line voltage directly to the lamp holders (tombstones). It’s crucial to identify the wiring configuration correctly—whether single-ended or double-ended power supply—because incorrect wiring can cause electrical hazards or damage the LED tube. Type B installations often yield better energy savings and reduce maintenance since ballasts are eliminated. Moreover, since Type B tubes operate directly from line voltage, they typically provide a more consistent light output and can be more efficient in terms of energy consumption. This type of tube is particularly advantageous in environments where lighting is used for extended periods, such as warehouses or manufacturing facilities, as it can lead to significant reductions in electricity bills over time.
Type C: LED Tubes with External Drivers
Type C systems replace the ballast with an external LED driver. This setup requires more extensive rewiring but offers the best control over light output and efficiency. These drivers regulate current and voltage precisely, enhancing LED performance and longevity. Contractors must ensure the driver is compatible with the LED tubes and that wiring follows manufacturer guidelines closely. Additionally, Type C systems can be integrated with advanced lighting controls, such as dimmers and sensors, allowing for greater flexibility in lighting design. This adaptability makes Type C tubes ideal for applications where lighting needs may change frequently, such as in retail spaces or conference rooms. Furthermore, the external drivers can often be located in more accessible areas, simplifying future maintenance and replacement, which is a significant consideration for large-scale installations.
Step-by-Step Guide to Wiring Fluorescent Fixtures for LED Tubes
1. Safety First: Power Down and Verify
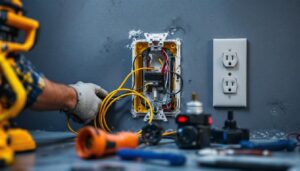
Before any work begins, always turn off power at the breaker and verify with a voltage tester that the fixture is de-energized. This step cannot be overstated. Working on live circuits can result in serious injury or death. Additionally, it’s wise to use lockout/tagout procedures to ensure that no one accidentally turns the power back on while you’re working. Wearing insulated gloves and safety goggles can provide an extra layer of protection, safeguarding you from unexpected electrical shocks or debris that may fall during the installation process.
2. Remove Fluorescent Tubes and Ballast (If Applicable)
Remove existing fluorescent tubes carefully. If you’re installing Type B or Type C LED tubes, you will likely need to remove the ballast. This involves disconnecting wiring and physically removing the ballast from the fixture. Keep in mind that ballasts may contain hazardous materials like PCBs, so dispose of them according to local regulations. It’s also a good idea to inspect the fixture for any signs of wear or damage during this process. Look for frayed wires, rust, or corrosion, as these can affect the performance of your new LED installation and pose safety risks.
3. Identify Wiring Configuration
Determine whether the fixture uses single-ended or double-ended power supply for the LED tubes. Single-ended means line voltage is supplied to one end of the tube, while the other end is neutral. Double-ended means line voltage is supplied to one end and neutral to the other. This distinction affects how you wire the tombstones and is critical for safe operation. Familiarize yourself with the manufacturer’s specifications for the LED tubes you plan to use, as different brands may have unique wiring requirements that could impact performance and longevity.
4. Rewire the Fixture
For Type B installations, rewire the fixture to bypass the ballast. Connect the line (hot) wire to the appropriate tombstone(s) and the neutral wire to the other end, depending on single or double-ended configuration. Ensure all connections are secure and insulated properly. For Type C, install the external LED driver according to manufacturer instructions, wiring the driver to the power source and the LED tubes accordingly. Take care to use wire nuts or electrical tape to cover any exposed wires, as this will prevent accidental contact and short circuits. Additionally, consider labeling your wires for future reference, which can save time and confusion during any future maintenance or upgrades.
5. Test the Installation
Once rewiring is complete, restore power and test the fixture. Look for consistent light output without flickering or buzzing. If issues arise, double-check wiring connections, compatibility, and tube orientation. LED tubes often have specific “end” markings indicating where power should be applied. It’s also beneficial to monitor the fixture over the next few days for any irregularities in performance. Sudden changes in brightness or color temperature can indicate underlying issues that may need to be addressed, such as poor connections or incompatible components. Keeping a log of your installation process and any observations can be helpful for troubleshooting in the future.
Common Challenges and How to Avoid Them
Compatibility Confusion
One of the biggest pitfalls is mixing LED tubes with incompatible ballasts or wiring configurations. This can cause flickering, reduced lifespan, or even damage to the fixture. Always verify compatibility before installation. Manufacturers typically provide detailed compatibility charts-use them.
Incorrect Tombstone Wiring
Miswiring tombstones is a frequent error, especially when converting to single-ended power. Using non-shunted tombstones in a single-ended setup or shunted tombstones in a double-ended setup can cause short circuits or no light output. Confirm the tombstone type and wiring method before installation.
Ignoring Local Codes and Regulations
Electrical codes vary by jurisdiction and often have specific requirements for lighting retrofits. For example, some areas mandate ballast removal for energy code compliance. Others require certain labeling or certifications. Staying current with local codes ensures your work passes inspection and avoids costly rework.
Energy and Cost Benefits of LED Retrofits
Switching from fluorescent to LED lighting can reduce energy consumption by 40-60%. LEDs convert more electricity into visible light rather than heat, making them far more efficient. This translates to lower utility bills for clients and a smaller carbon footprint.
Maintenance costs drop as well. LED tubes last up to 50,000 hours or more, compared to 10,000-20,000 hours for fluorescent tubes. Ballasts, which often fail and require replacement, are eliminated in many LED retrofit scenarios, further reducing maintenance headaches.
For lighting contractors, promoting these benefits can help close sales and build long-term client relationships. Demonstrating knowledge of proper wiring and installation techniques reinforces professionalism and trust.
Tools and Materials Lighting Contractors Should Have on Hand
Successful LED retrofitting requires the right tools and materials. Here’s a checklist of essentials:
- Voltage Tester: To verify power is off before working.
- Wire Strippers and Cutters: For precise wiring work.
- Screwdrivers: Both flathead and Phillips for fixture disassembly.
- Non-Shunted and Shunted Tombstones: Depending on the LED tube type and wiring method.
- Wire Nuts and Electrical Tape: For secure and insulated connections.
- LED Drivers: If installing Type C LED tubes.
- Ballast Disposal Containers: To safely handle and dispose of old ballasts.
Having these tools readily available streamlines the retrofit process and reduces the chance of delays or errors.
Final Thoughts: Best Practices for Lighting Contractors
Wiring fluorescent fixtures to LED tubes is a valuable skill that can set a lighting contractor apart. It requires attention to detail, a solid understanding of electrical principles, and familiarity with LED product types. Always prioritize safety and code compliance.
Document your work thoroughly. Label fixtures with the type of LED tube installed and wiring configuration. This helps future maintenance and ensures the client or other contractors understand the setup.
Stay informed about evolving LED technologies and local regulations. LED lighting continues to improve, and new products may simplify installation or offer enhanced features. Being proactive about education keeps your services competitive and reliable.
Illuminate Your Projects with LumenWholesale
Ready to elevate your lighting projects with the most efficient LED solutions? At LumenWholesale, we provide lighting contractors with the highest quality, spec-grade LED products at exceptional wholesale prices. Say goodbye to local distributor markups and hello to a vast selection of industry-standard lighting that promises performance and reliability. With free shipping on bulk orders, you can stock up on premium lighting essentials without any hidden costs. Make the smart choice for your next retrofit project and enjoy the unbeatable value and convenience that only LumenWholesale can offer. Discover our collection and take advantage of Wholesale Lighting at the Best Value today.