recessed LED lighting has become a popular choice for both residential and commercial spaces, offering a sleek, modern look while providing energy-efficient illumination. However, replacing recessed LED lights can be a complex task that requires careful planning and execution. This article aims to provide lighting contractors with essential tips and best practices for a successful recessed LED light replacement project.
Understanding Recessed LED Lighting
Before diving into the replacement process, it’s crucial to understand the components and benefits of recessed LED lighting. Unlike traditional light fixtures, recessed lights are installed into the ceiling, creating a clean and unobtrusive look. They are available in various sizes, shapes, and color temperatures, making them versatile for different applications. This adaptability allows homeowners and designers to create tailored lighting solutions that fit the specific needs of each room, whether it’s a cozy living area or a functional kitchen workspace.
Moreover, recessed LED lighting can also be strategically placed to highlight architectural features or artwork, adding depth and character to a space. With the ability to adjust brightness and color temperature, these lights can transform the ambiance of a room, making it feel warm and inviting or bright and energizing, depending on the desired effect.
Benefits of Recessed LED Lights
Recessed LED lights offer numerous advantages over traditional lighting options. They consume significantly less energy, which translates to lower electricity bills. Additionally, they have a longer lifespan, reducing the frequency of replacements. Their sleek design allows for better integration into various interior styles, enhancing the overall aesthetic of a space. Furthermore, the low heat emission of LED lights contributes to a more comfortable environment, especially in smaller rooms where heat buildup can be an issue.
Another noteworthy benefit is their environmental impact. By opting for recessed LED lighting, you are making a choice that is not only cost-effective but also eco-friendly. LEDs are free from toxic elements like mercury, which is commonly found in traditional bulbs, making them safer for disposal and reducing environmental hazards. This sustainable choice aligns with the growing trend of energy conservation and responsible living.
Components of Recessed Lighting
A typical recessed lighting fixture consists of several key components: the housing, trim, and bulb. The housing is the part that is installed into the ceiling, while the trim is the visible portion that can be customized in terms of color and style. The bulb, which can be an LED or other types, is responsible for providing illumination. Understanding these components is essential for a seamless replacement process. Additionally, the housing can vary in type, such as new construction or remodel housings, each designed for specific installation scenarios.
Moreover, the trim options extend beyond mere aesthetics; they can also affect the light distribution and glare. For instance, baffle trims can help reduce glare and soften the light, while reflector trims can enhance brightness and create a more focused beam. Choosing the right combination of housing and trim is crucial for achieving the desired lighting effect and ensuring that the recessed lights blend harmoniously with the overall design of the space.
Preparing for Replacement
Preparation is a critical step in any lighting project. Before starting the replacement of recessed LED lights, contractors should assess the existing fixtures and gather the necessary tools and materials. This ensures a smooth workflow and minimizes the risk of errors.
Assessing Existing Fixtures
Begin by examining the current recessed lights. Check the type of housing and trim used, as well as the wattage and type of bulbs installed. This information will guide the selection of compatible replacement fixtures. Additionally, inspect the wiring and electrical connections to ensure they are in good condition and meet safety standards. Look for any signs of wear or damage, such as frayed wires or corrosion, which could pose safety risks. Documenting the specifications of the existing fixtures can also be helpful for future reference, especially if you plan to make additional upgrades or changes down the line.
Gathering Tools and Materials
Having the right tools on hand can significantly streamline the replacement process. Essential tools include a screwdriver, wire cutters, a voltage tester, and a ladder. It’s also advisable to have safety gear, such as gloves and goggles, to protect against potential hazards. Make a checklist of all required materials, including the new LED fixtures, connectors, and any additional wiring or hardware needed for installation. Consider the benefits of energy-efficient LED options that not only provide better illumination but also reduce electricity costs over time. Additionally, it might be worthwhile to explore smart lighting solutions that can enhance convenience and energy management in the space. Familiarizing yourself with the installation instructions for the new fixtures can also save time and prevent complications during the actual replacement process.
Step-by-Step Replacement Process
Once preparations are complete, the actual replacement process can begin. Following a systematic approach can help ensure that the installation is done correctly and efficiently. It’s also beneficial to have all necessary tools and materials on hand before starting, as this can minimize interruptions during the process and help maintain focus.
Step 1: Turn Off Power
Safety should always be the top priority. Before starting any electrical work, turn off the power to the circuit at the breaker box. Use a voltage tester to confirm that the power is off before proceeding. This step is crucial to prevent electrical shocks and ensure a safe working environment. Additionally, it’s wise to label the circuit breaker to avoid any accidental re-energizing while you work. If you’re unsure about which breaker controls the lights, consider consulting a professional or using a circuit tracer to identify the correct one.
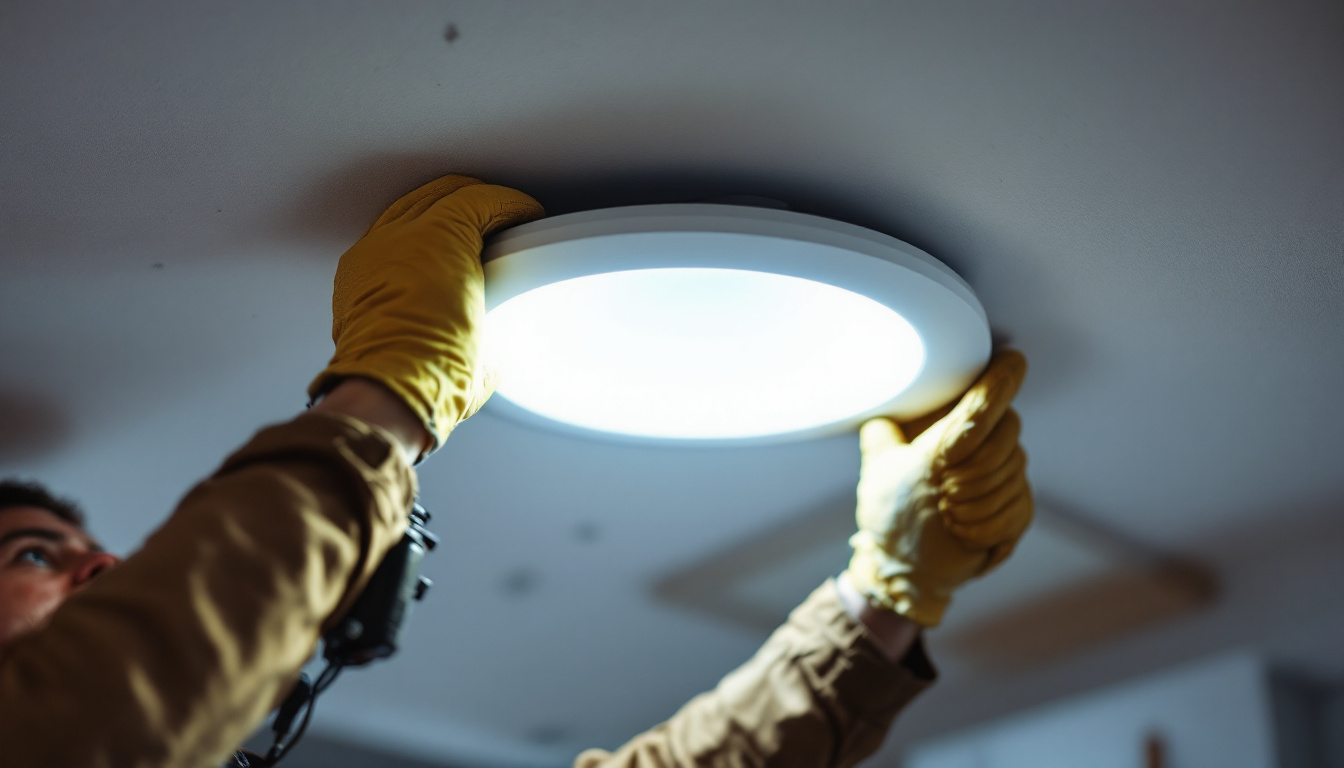
Step 2: Remove Existing Fixtures
Carefully remove the existing recessed lights. Depending on the type of fixture, this may involve unscrewing the trim or housing. Take care not to damage the ceiling or surrounding areas during removal. Once the fixture is detached, disconnect the wiring by unscrewing the wire nuts and separating the wires. It’s a good idea to take a photo of the wiring setup before disconnection, as this can serve as a reference for reconnecting the new fixtures. Additionally, inspect the area for any signs of wear or damage, such as frayed wires or loose connections, which may need to be addressed before installing the new lights.
Step 3: Install New Fixtures
With the old fixtures removed, it’s time to install the new recessed LED lights. Start by connecting the wiring of the new fixture to the existing electrical connections. Ensure that the wires are securely connected and properly insulated with wire nuts. Once the wiring is complete, carefully insert the new fixture into the housing and secure it in place according to the manufacturer’s instructions. Pay attention to the orientation of the fixture; many LED lights have a specific direction for optimal light output. After installation, take a moment to check the trim and ensure it fits snugly against the ceiling, as this will enhance the aesthetic appeal and prevent dust accumulation.
Common Challenges and Solutions
While replacing recessed LED lights can be straightforward, several challenges may arise during the process. Being prepared to tackle these issues can save time and prevent frustration.
Wiring Issues
One common challenge is dealing with outdated or damaged wiring. If the existing wiring is frayed or not up to code, it may need to be replaced. In such cases, it’s advisable to consult a licensed electrician to ensure compliance with local building codes and safety standards.
Compatibility Concerns
Another potential issue is compatibility between the new fixtures and the existing housing. Different manufacturers may have varying specifications, so it’s essential to verify that the new lights fit the existing housings. If there are discrepancies, consider using adapter kits or modifying the housing as needed.
Best Practices for Successful Replacement
To ensure a successful recessed LED light replacement, contractors should adhere to several best practices. These guidelines can help streamline the process and enhance the quality of the installation.
Follow Manufacturer Instructions
Each recessed LED fixture comes with specific installation instructions provided by the manufacturer. Following these guidelines is crucial for achieving optimal performance and ensuring safety. Pay attention to details such as wiring diagrams and mounting requirements, as these can vary between products.
Test the Installation
After completing the installation, it’s essential to test the new fixtures to confirm they are functioning correctly. Turn the power back on at the breaker and check each light to ensure it illuminates properly. If any issues arise, troubleshoot the wiring connections or consult the manufacturer’s guidelines for troubleshooting tips.
Maintenance and Troubleshooting
Regular maintenance can extend the lifespan of recessed LED lights and ensure they continue to operate efficiently. Understanding common issues and their solutions is also beneficial for contractors and clients alike.
Regular Cleaning
Dust and debris can accumulate on recessed lights, diminishing their brightness and overall effectiveness. Regular cleaning is essential to maintain optimal performance. Use a soft cloth or duster to gently clean the trim and lens of the fixtures. Avoid using harsh chemicals that could damage the finish.
Troubleshooting Common Issues
Occasionally, recessed LED lights may flicker or fail to turn on. Common causes include loose connections, incompatible dimmer switches, or faulty bulbs. If flickering occurs, check the connections and ensure they are tight. If the issue persists, consider replacing the dimmer switch with one designed for LED compatibility.
Conclusion
Replacing recessed LED lights can be a rewarding endeavor for lighting contractors, offering clients energy-efficient and aesthetically pleasing solutions. By understanding the components of recessed lighting, preparing adequately, and following best practices during installation, contractors can ensure a successful project. Regular maintenance and troubleshooting knowledge further enhance the longevity and performance of these fixtures, making them a valuable addition to any space.
With the right approach, contractors can not only meet but exceed client expectations, solidifying their reputation as skilled professionals in the lighting industry. Embracing new technologies and staying informed about the latest trends in lighting design will continue to position contractors as leaders in their field.
Get Your Premium Lighting Supplies at LumenWholesale
Ready to elevate your lighting projects with the highest quality recessed LED lights? Look no further than LumenWholesale, where we provide contractors with spec-grade lighting products at unbeatable wholesale prices. Say goodbye to local distributor markups and hello to superior lighting solutions that fit your budget. With our extensive selection that meets rigorous industry standards, you can confidently deliver reliable and high-performance lighting to your clients. Plus, enjoy the convenience of bulk buying with free shipping, ensuring you get the best value without any hidden fees. Make your next project shine by choosing Wholesale Lighting at the Best Value with LumenWholesale.