Replacing fluorescent lights can be a straightforward task, but it requires attention to detail and adherence to safety protocols. For lighting contractors, mastering the art of replacing fluorescent lights not only enhances efficiency but also ensures customer satisfaction. This article outlines best practices for replacing fluorescent lights, providing valuable insights for professionals in the field.
Understanding Fluorescent Lighting
Fluorescent lights are widely used in commercial and residential settings due to their energy efficiency and longevity. Understanding the components and functioning of these lights is crucial for effective replacement. A typical fluorescent lighting system consists of a tube, a ballast, and a starter. Each component plays a significant role in the overall performance of the lighting system.
Components of Fluorescent Lighting
The fluorescent tube is the most visible part of the system, available in various lengths and diameters. The ballast regulates the current flowing through the tube, while the starter helps initiate the lighting process. Knowing the specifications of these components is essential when selecting replacements. Additionally, the tube is coated on the inside with a phosphorescent material that emits visible light when exposed to ultraviolet radiation produced by the gas inside the tube. This interaction is what makes fluorescent lighting so efficient, as it converts a significant portion of the energy consumed into light rather than heat.
Types of Fluorescent Lights
There are several types of fluorescent lights, including T12, T8, and T5. Each type has different energy requirements and lumen outputs. Understanding these differences allows contractors to recommend the most suitable options for their clients, optimizing both performance and energy efficiency. For instance, T5 tubes are known for their compact size and higher efficiency, making them ideal for applications where space is limited. In contrast, T12 tubes, while being the oldest technology, are still found in many older installations and can be less efficient compared to their modern counterparts. Furthermore, advancements in technology have led to the development of high-output and low-profile fluorescent lights, catering to specialized needs in various environments, from retail spaces to industrial settings.
Preparation for Replacement
Before embarking on a fluorescent light replacement project, proper preparation is key. This involves gathering the necessary tools, ensuring safety protocols are in place, and assessing the existing lighting system.
Gathering Tools and Materials
Essential tools for replacing fluorescent lights include a ladder, safety goggles, gloves, and a voltage tester. Additionally, having replacement tubes and ballasts on hand can expedite the process. Ensuring that all tools are in good condition will enhance safety and efficiency during the replacement. It’s also wise to have a flashlight handy, as you may need extra light to see in dimly lit areas or inside fixtures. If you’re working in a larger space, consider having a helper who can assist with holding the ladder or passing tools to you, which can make the task smoother and quicker.
Safety Protocols
Safety should always be the top priority when working with electrical systems. Before starting the replacement, ensure that the power supply is turned off at the circuit breaker. Use a voltage tester to confirm that no electricity is flowing to the fixture. Wearing safety goggles and gloves protects against potential injuries from broken glass or electrical shocks. Furthermore, it is advisable to wear non-slip shoes to maintain stability while on the ladder. If you’re working in an area with multiple fixtures, label the circuit breaker to avoid accidental reactivation while you are still working. Additionally, be mindful of your surroundings; clear any clutter that could pose a tripping hazard, and ensure that pets and children are kept at a safe distance during the project to prevent any accidents.
Step-by-Step Replacement Process
Once preparations are complete, the actual replacement process can begin. Following a systematic approach ensures a smooth and efficient replacement.
Removing the Old Fluorescent Tube
Start by carefully removing the old fluorescent tube. Grasp the tube at both ends and gently twist it to disengage it from the socket. It’s important to handle the tube with care to avoid breakage. If the tube is stuck, gently wiggle it while applying slight pressure to release it from the fixture. Always remember to wear gloves, as fluorescent tubes can contain small amounts of mercury, which is hazardous if the tube breaks. Proper disposal of the old tube is also essential; many localities have specific recycling programs for fluorescent bulbs, so check your local regulations to ensure safe disposal.
Inspecting the Ballast and Starter
After removing the tube, inspect the ballast and starter. Look for any signs of damage or wear. If the ballast appears faulty, it may need replacement as well. A malfunctioning ballast can lead to flickering lights or reduced efficiency, so addressing this issue during the replacement process is crucial. Additionally, check for any corrosion or loose connections in the wiring, as these can also affect the performance of your lighting system. If you notice any irregularities, it may be wise to consult a professional electrician to ensure that everything is functioning safely and correctly.
Installing the New Fluorescent Tube
With the old tube removed, it’s time to install the new fluorescent tube. Align the pins of the new tube with the sockets in the fixture, and gently twist the tube until it locks into place. Ensure that the tube is securely fitted to avoid any operational issues. After installation, turn the power back on to test the new tube. Observe the light output; it should illuminate steadily without flickering. If you notice any issues, double-check the connections and make sure the ballast is functioning properly. It’s also a good idea to keep a spare tube on hand, as fluorescent bulbs can sometimes fail unexpectedly, and having a replacement readily available can save you time and hassle in the future.
Testing and Finalizing the Installation
After installing the new tube, it’s essential to test the system to ensure everything is functioning correctly. This step is vital for both safety and performance. A thorough testing process can help identify any potential issues before they escalate, ensuring that the installation meets both operational standards and user expectations.
Restoring Power and Testing the Light
Once the new tube is installed, restore power at the circuit breaker. Turn on the light switch and observe the new tube for any flickering or unusual sounds. A properly installed fluorescent tube should illuminate without any issues. If problems persist, further investigation into the ballast or wiring may be necessary. It’s also a good practice to check the light output; the brightness should be consistent across the entire length of the tube. If there are any dark spots or uneven lighting, it may indicate a problem with the tube itself or the fixture, warranting further inspection.
Cleaning Up the Work Area
After confirming that the new light is functioning correctly, clean up the work area. Dispose of the old fluorescent tube responsibly, as they contain small amounts of mercury and should be recycled according to local regulations. Ensuring a tidy workspace not only promotes safety but also leaves a positive impression on clients. Additionally, take a moment to inspect the surrounding fixtures and surfaces for any dust or debris that may have accumulated during the installation process. A clean environment not only enhances the aesthetic appeal but also contributes to the longevity of the lighting fixtures by preventing dust buildup that can affect performance.
Furthermore, consider documenting the installation process and any observations made during testing. This documentation can be invaluable for future reference, especially if similar installations or repairs are needed. Keeping a record of the tube type, installation date, and any issues encountered can help streamline future maintenance and ensure that you have all pertinent information at your fingertips. This proactive approach not only aids in personal organization but also enhances communication with clients, providing them with a clear understanding of the work completed and any necessary follow-ups.
Common Challenges and Solutions
Even experienced contractors may face challenges when replacing fluorescent lights. Understanding common issues and their solutions can help streamline the process.
Flickering Lights
Flickering lights can be a frustrating issue. This problem often arises from a faulty ballast or a loose connection. If flickering occurs after replacing the tube, inspect the ballast and wiring connections to ensure they are secure and functioning properly.
Incompatible Components
Using incompatible tubes or ballasts can lead to performance issues. Always verify that the replacement components match the specifications of the existing system. Checking compatibility before starting the replacement can save time and prevent unnecessary complications.
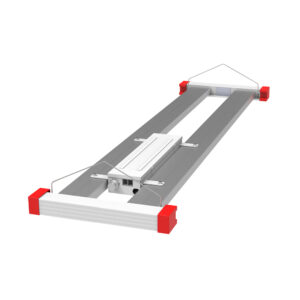
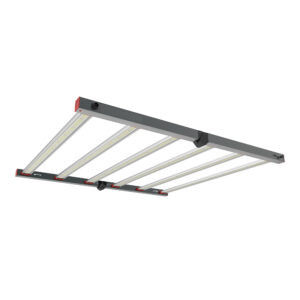
Upgrading to LED Alternatives
With advancements in lighting technology, many contractors are considering upgrading from fluorescent to LED lighting. This transition offers several benefits, including improved energy efficiency and longer lifespans.
Benefits of LED Lighting
LED lights consume significantly less energy than fluorescent lights, leading to lower electricity bills. Additionally, they have a longer lifespan, reducing the frequency of replacements. This not only saves money but also minimizes disruption for clients.
Installation Considerations for LED Lights
When upgrading to LED lights, it’s important to consider the compatibility of the existing fixtures. Some LED tubes can be installed directly into existing fluorescent fixtures, while others may require a complete fixture replacement. Understanding these requirements ensures a seamless transition for clients.
Conclusion
Replacing fluorescent lights is a fundamental skill for lighting contractors that can enhance efficiency and customer satisfaction. By following best practices, including understanding the components, preparing adequately, and adhering to safety protocols, contractors can ensure successful replacements. Additionally, considering upgrades to LED lighting can provide added benefits for both contractors and clients alike.
Ultimately, staying informed about the latest advancements in lighting technology and maintaining a commitment to quality work will set contractors apart in a competitive industry. Emphasizing professionalism and reliability in every replacement project will foster trust and encourage repeat business.
Upgrade Your Lighting Game with LumenWholesale
Ready to take your lighting projects to the next level? At LumenWholesale, we provide lighting contractors like you with the highest quality, spec-grade lighting products at prices that can’t be beaten. Say goodbye to local distributor markups and hello to our extensive selection that meets rigorous industry standards. Whether you’re replacing fluorescent lights or upgrading to LED alternatives, we’ve got you covered. Plus, with free shipping on bulk orders, you can stock up on premium lighting without worrying about hidden fees. Don’t compromise on quality or value. Visit LumenWholesale today for Wholesale Lighting at the Best Value and elevate your lighting solutions with ease and confidence.