Fluorescent tube lighting is a staple in commercial and industrial settings, providing efficient illumination at a lower energy cost compared to traditional incandescent bulbs. For lighting contractors, understanding the wiring of fluorescent tubes is essential for installation, maintenance, and troubleshooting. This article breaks down the necessary components and wiring techniques in a concise manner, ensuring that contractors can quickly grasp the essentials of fluorescent tube wiring.
Understanding Fluorescent Tube Components
Before diving into wiring, it’s crucial to understand the main components of a fluorescent lighting system. This knowledge will help contractors effectively navigate installation and repairs.
Ballasts
The ballast is a vital component in a fluorescent lighting system. It regulates the current to the fluorescent tube and provides the necessary voltage to start the lamp. There are two main types of ballasts: magnetic and electronic. Magnetic ballasts are older technology and tend to be less energy-efficient, while electronic ballasts offer better efficiency and flicker-free operation.
When selecting a ballast, consider the wattage of the fluorescent tube and the specific requirements of the installation. Ensure that the ballast is compatible with the type of tube being used, as this will affect performance and longevity. Additionally, it’s worth noting that electronic ballasts can also offer features such as dimming capabilities, which can be particularly beneficial in settings where lighting needs may vary throughout the day.
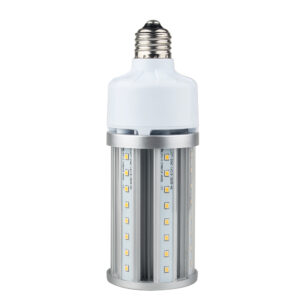
Fluorescent Tubes
Fluorescent tubes come in various lengths and diameters, with the most common being T8 and T12. The “T” stands for tubular, and the number indicates the diameter in eighths of an inch. For example, a T8 tube has a diameter of 1 inch, while a T12 tube has a diameter of 1.5 inches.
Contractors should also be aware of the different color temperatures available, ranging from warm white to cool white. Choosing the right color temperature can significantly impact the ambiance of a space, making it essential for contractors to understand client preferences. Furthermore, the color rendering index (CRI) of fluorescent tubes is another critical factor to consider, as it measures the light’s ability to accurately reveal the colors of objects in comparison to natural light. Higher CRI values indicate better color accuracy, which can be particularly important in retail and art galleries.
End Caps and Starters
Each fluorescent tube has end caps that connect to the fixture and hold the lamp in place. These caps also house the electrical contacts required for the lamp to function. In older fluorescent systems, starters are used to help ignite the tube. However, modern electronic ballasts often eliminate the need for starters, simplifying installation.
When replacing tubes, ensure that the end caps are in good condition and free from corrosion. Damaged end caps can lead to poor connections and reduced lamp performance. Additionally, it’s important to consider the overall design of the fixture when replacing end caps, as some fixtures may require specific types or sizes to maintain proper alignment and functionality. Regular maintenance checks can help identify any wear and tear on these components, ensuring that the lighting system remains efficient and reliable over time.
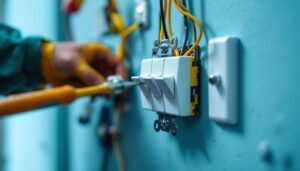
Wiring Fluorescent Tubes: The Basics
Wiring fluorescent tubes is a straightforward process, but it requires attention to detail to ensure safety and functionality. Understanding the wiring configuration will help contractors avoid common pitfalls during installation. Proper installation not only maximizes the lifespan of the fluorescent tubes but also enhances energy efficiency, making it a vital skill for any electrician or DIY enthusiast.
Wiring Configuration
Fluorescent tubes typically have two pins at each end, which connect to the fixture’s wiring. The basic wiring configuration involves connecting the ballast to the lamp holders and the power supply. The ballast will have input and output wires that need to be connected correctly for the system to function. It’s important to note that different types of fluorescent tubes, such as T5 or T12, may have variations in their wiring configurations, so always refer to the specific guidelines for the tube type being used.
For a standard T8 fluorescent tube, the wiring configuration generally includes two wires from the ballast to each of the lamp holders. One wire connects to the end cap, while the other connects to the opposite end cap. Understanding this configuration is crucial for ensuring that the current flows correctly through the tube. Additionally, some modern fixtures may incorporate electronic ballasts, which can provide better energy efficiency and reduce flickering compared to traditional magnetic ballasts. Familiarity with these advancements can significantly improve installation practices.
Safety Precautions
Safety should always be a priority when working with electrical systems. Before beginning any wiring work, ensure that the power supply is turned off. Use a voltage tester to confirm that there is no current flowing through the wires. This step is critical, as accidental contact with live wires can lead to serious injuries or even fatalities. Furthermore, it is wise to keep a fire extinguisher nearby, especially if working in environments where flammable materials are present.
Additionally, contractors should wear appropriate personal protective equipment (PPE) such as gloves and safety glasses. This not only protects against electrical hazards but also from potential glass breakage when handling fluorescent tubes. It’s also advisable to work in a well-ventilated area, as the phosphor coating inside fluorescent tubes can release harmful substances if broken. Taking these precautions helps create a safer working environment and minimizes the risk of accidents.
Common Wiring Errors
Even experienced contractors can make wiring mistakes. Common errors include incorrect wiring connections, which can lead to flickering lights or complete failure of the lighting system. It’s essential to double-check all connections against the wiring diagram provided by the ballast manufacturer. Additionally, ensuring that the correct voltage is being supplied to the ballast is crucial, as supplying too high or too low a voltage can damage the fluorescent tubes and reduce their lifespan.
Another common mistake is failing to secure the wires properly, which can result in loose connections and electrical arcing. Ensuring that all connections are tight and secure will help prevent future issues. Furthermore, neglecting to check for any signs of wear or damage to the wiring can lead to unexpected failures. Regular maintenance and inspections of the wiring and fixtures can help identify potential problems before they escalate, ensuring a reliable lighting system for years to come.
Step-by-Step Wiring Process
Now that the basics are covered, let’s outline a step-by-step process for wiring fluorescent tubes. This guide will help contractors streamline their installation process.
Step 1: Gather Tools and Materials
Before starting, ensure that all necessary tools and materials are on hand. This includes wire strippers, screwdrivers, electrical tape, and the appropriate ballast and fluorescent tubes. Having everything ready will make the process more efficient.
Step 2: Turn Off Power
As mentioned earlier, safety is paramount. Turn off the power supply to the fixture at the circuit breaker. Use a voltage tester to confirm that the power is off before proceeding with any wiring.
Step 3: Connect the Ballast
Begin by connecting the ballast to the power supply. Most ballasts will have a wiring diagram on the casing, which provides guidance on how to connect the input wires. Typically, there will be two wires for the power supply (line and neutral) and a ground wire. Connect these wires securely.
Step 4: Connect the Lamp Holders
Next, connect the output wires from the ballast to the lamp holders. Each lamp holder will have two terminals, and it’s essential to connect the wires correctly. One wire from the ballast should connect to one terminal of the lamp holder, while the other wire connects to the opposite terminal of the other lamp holder.
Ensure that all connections are tight and secure to prevent any electrical issues.
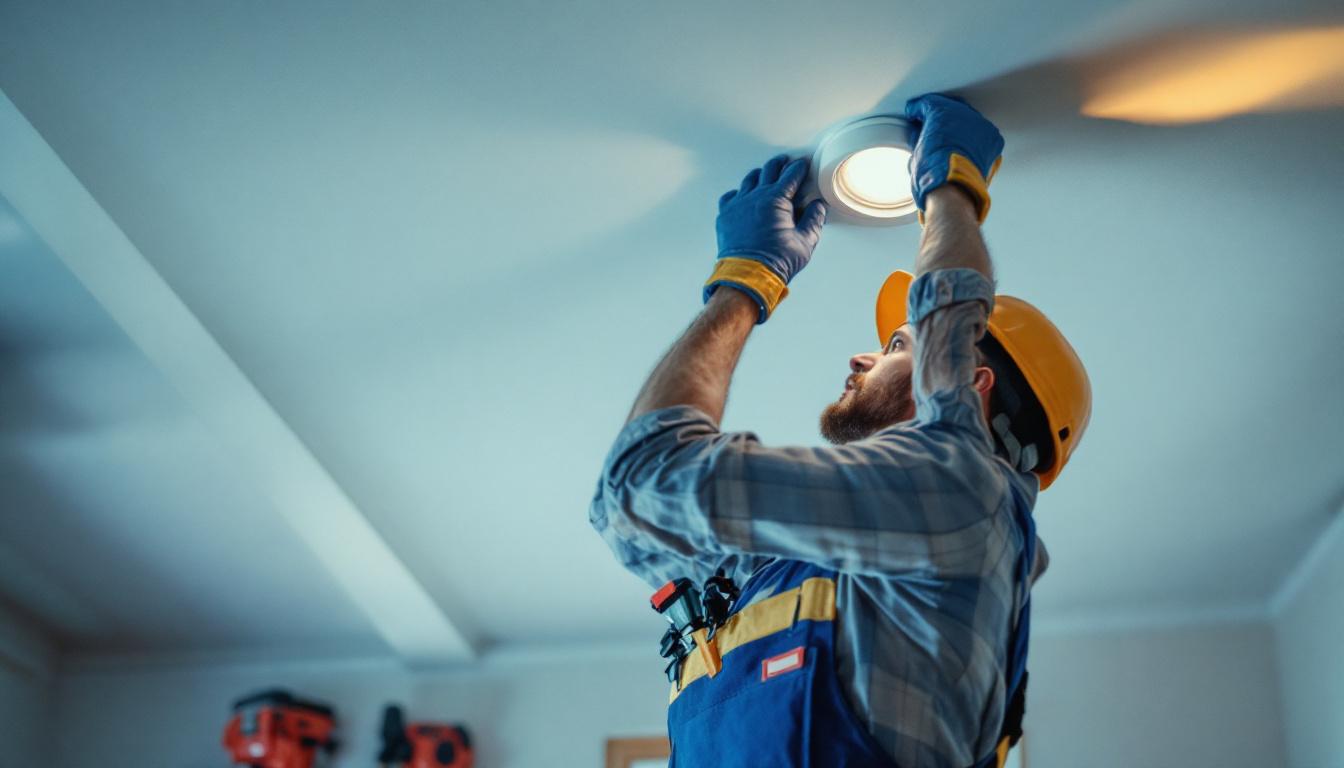
Step 5: Install the Fluorescent Tube
Once the wiring is complete, carefully insert the fluorescent tube into the lamp holders. Ensure that the pins are fully seated in the contacts to establish a proper connection. Rotate the tube gently to lock it in place.
Step 6: Restore Power
After installing the tube, restore power at the circuit breaker. Turn on the fixture to test the installation. If the light does not illuminate, double-check all wiring connections and ensure that the ballast is functioning correctly.
Maintenance and Troubleshooting
Regular maintenance of fluorescent lighting systems is essential for longevity and performance. Understanding common issues and their solutions can help contractors provide better service to their clients.
Identifying Common Issues
Flickering lights, dim illumination, and complete failure to start are common issues faced with fluorescent tubes. Flickering can often be attributed to a failing ballast or poor connections, while dim lights may indicate that the tubes are nearing the end of their lifespan.
In cases where the light does not turn on at all, it is important to check the power supply and ensure that the ballast is functioning properly. If the ballast is faulty, it will need to be replaced.
Replacing Fluorescent Tubes
When replacing fluorescent tubes, always ensure that the power is turned off. Remove the old tube by gently twisting it out of the lamp holders. Check the condition of the end caps and replace them if necessary before installing the new tube.
After installing the new tube, turn the power back on and test the fixture. If the new tube does not illuminate, further investigation into the ballast and wiring may be necessary.
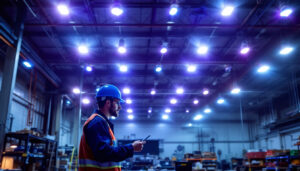
Periodic Inspection
Regular inspections of fluorescent lighting systems can help catch issues before they escalate. Contractors should recommend periodic checks to clients, ensuring that the ballasts and tubes are functioning optimally. This proactive approach can save clients money on energy costs and reduce the frequency of replacements.
Conclusion
Fluorescent tube wiring is a fundamental skill for lighting contractors. By understanding the components, wiring configurations, and maintenance practices, contractors can ensure efficient and effective installations. With the right knowledge and attention to detail, the process can be completed swiftly and safely, providing clients with reliable lighting solutions.
By following the guidelines outlined in this article, contractors can enhance their expertise in fluorescent tube wiring, ultimately leading to better service and satisfied clients. Whether it’s a new installation or a maintenance task, being well-versed in fluorescent lighting systems is invaluable in the lighting industry.
Get Your Fluorescent Lighting Supplies at LumenWholesale
Ready to elevate your lighting installations with the best in the business? Look no further than LumenWholesale for all your fluorescent tube wiring needs. Our commitment to quality and affordability ensures that you have access to the highest standard of lighting products without the premium price tag. With LumenWholesale, you can confidently tackle any project, big or small, with the assurance of spec-grade materials and the convenience of free shipping on bulk orders. Don’t let middleman markups dim your business—shine bright with LumenWholesale, where superior lighting meets unbeatable value.